We’ve all been there: you reach for a gluten-free option and somehow your stomach feels like a hollow drum after an hour. Or you power through a meal and crash hard before dinner. No more wandering between snack pockets and lame salads. You deserve meals that actually satisfy, that stick to your ribs without gluten and without guilt. These 10 gluten-free wonders will calm the snack-attack, fuel long afternoons, and make you the hero of your own kitchen. Read on with curiosity, because yes, a few of these might just change the way you think about gluten-free eating. FYI, some of them might become weekly staples. Seriously.
Each recipe below is designed to deliver heat-from-the-pocket fullness, balanced textures, and flavors that linger on your tongue. I’ve included a flavor profile so you can picture the aroma as soon as you prep, plus practical tweaks for meal-prep, budget-friendly shopping, and kid-friendly adaptability. If you’ve ever felt stuck with bland gluten-free options, you’re in for a treat. Trust me: these come with crisp edges, creamy centers, and that satisfying chew that makes you forget there’s no gluten in the dish.
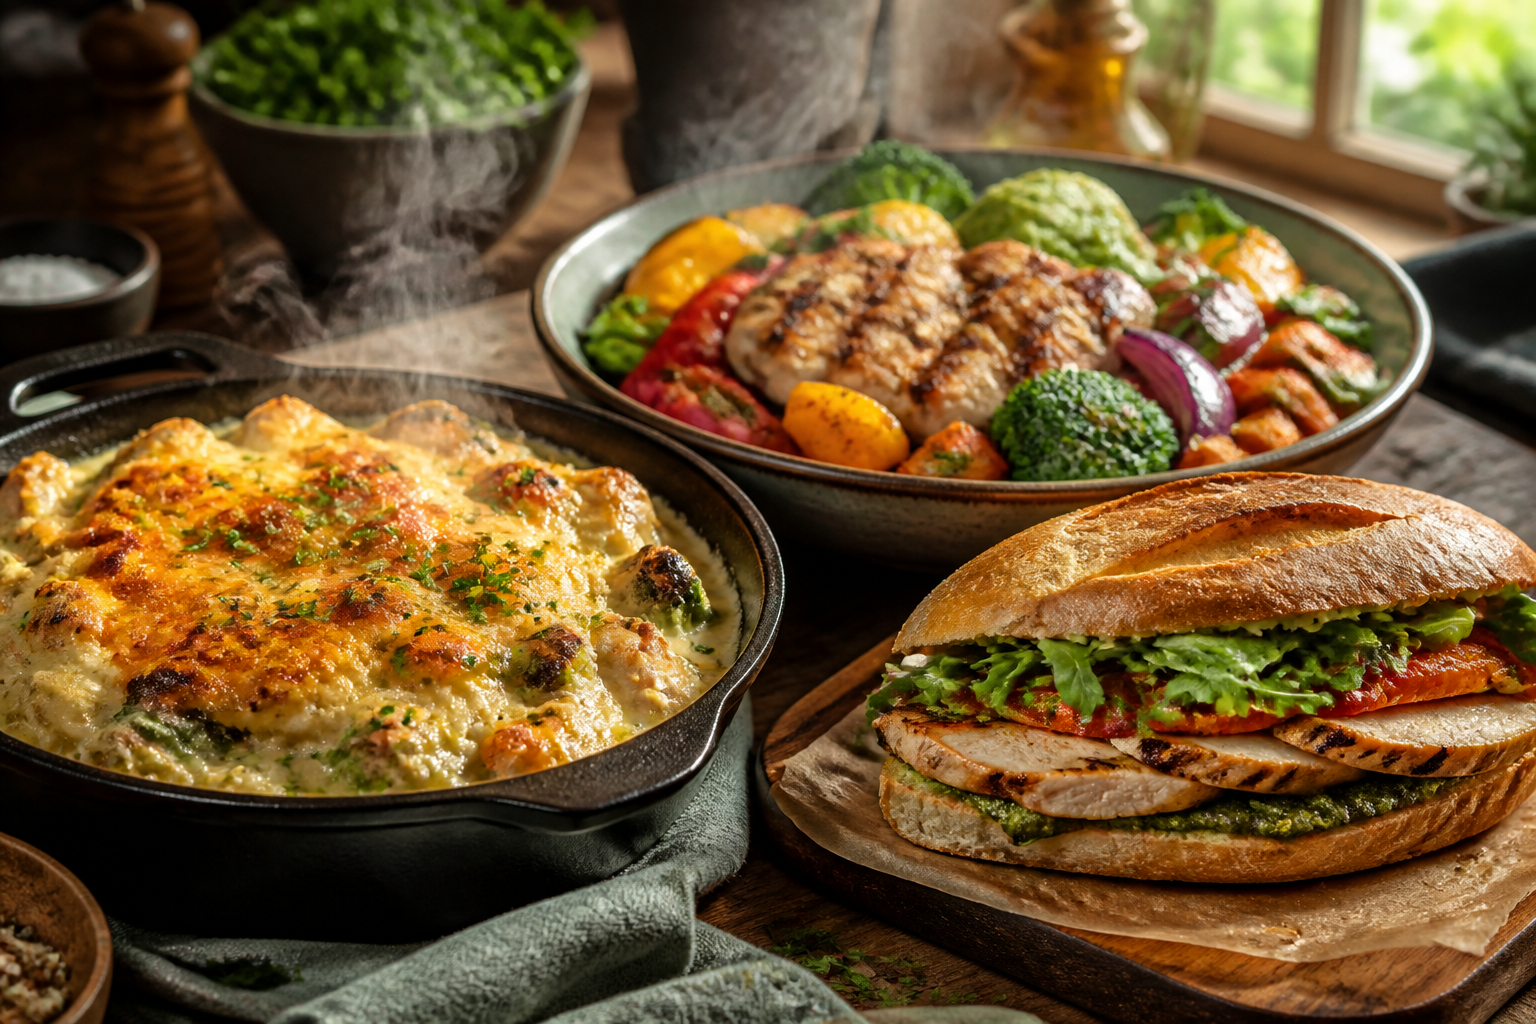
Let’s start with a little tease: a hearty bowl that looks like a weekend feast, a comforting casserole that tastes like a hug in a mug, and a handheld that belts mouth-wopping savory notes with every bite. Are you ready to raid your pantry and turn a few staples into gluten-free magic? Keep scrolling—the next recipe is just a scroll away and will tug at your cravings in the best possible way.
1. Tuscan Panzanella That’ll Ruin Store-Bought Salads Forever
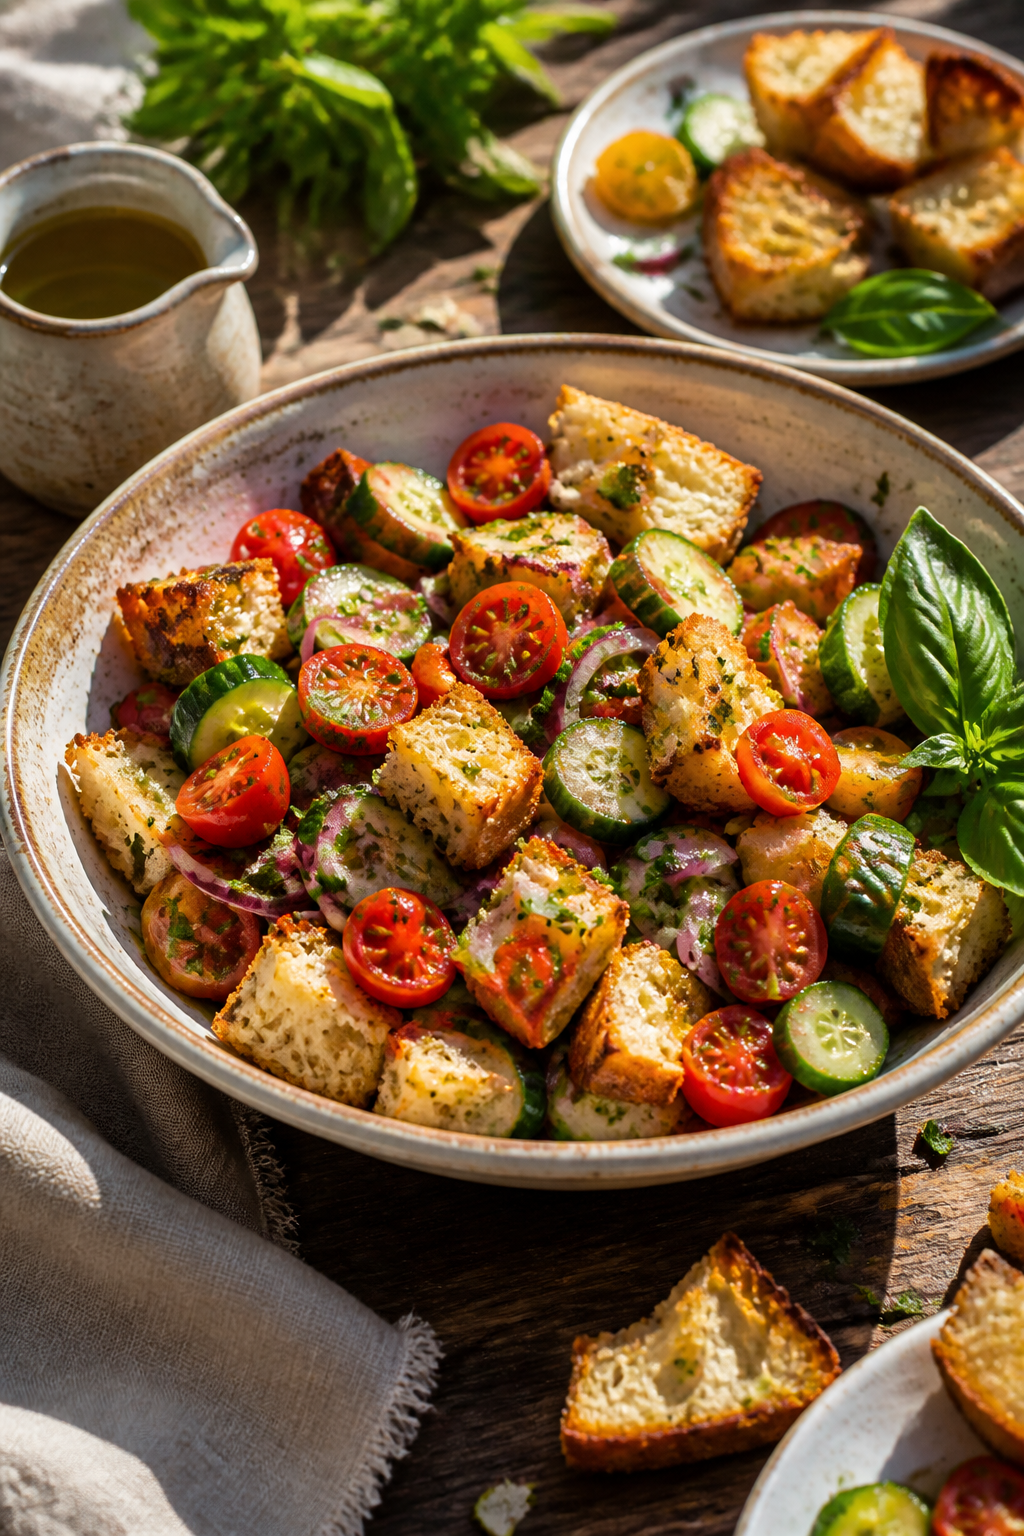
The first bite here feels like sunshine on a chopping board. A rustic mix of tomatoes, cucumber, and day-old gluten-free bread becomes a jubilant, chewy crouton festival when given a little sun and a splash of olive oil. The bread soaks up vinegar and herbs in a way that makes you question why you ever settled for bland salad bowls. This one is a crowd-pleaser at picnics, a quick lunch, or a dinner-side that somehow steals center stage. It’s bright, it’s hearty, and those toasted bread bits give you that “I’m eating real food” feeling without the gluten.
Why You’ll Love It
- Gluten-free and incredibly satisfying with every bite
- Textural contrast between crisp veggies and soft bread
- Bright, herbaceous flavor that lasts in the memory
- Great make-ahead option for meal prep
- Perfect as a side or a quick standalone meal
Ingredients
- 6 cups gluten-free cubed bread, day-old is ideal
- 3 cups ripe cherry tomatoes, halved
- 1 cucumber, diced
- 1 small red onion, thinly sliced
- 1/2 cup pitted kalamata olives, halved
- 1/2 cup fresh basil leaves, torn
- 1/3 cup extra virgin olive oil
- 1/4 cup red wine vinegar
- 2 cloves garlic, minced
- 1 tsp Italian seasoning
- Salt and pepper to taste
- Optional: shaved parmesan for serving
Instructions
- Toast gluten-free bread cubes until golden and crisp; set aside to cool.
- In a large bowl, combine tomatoes, cucumber, red onion, olives, and basil.
- Whisk olive oil, red wine vinegar, garlic, Italian seasoning, salt, and pepper in a small bowl.
- Toss vegetables with dressing until everything is well coated.
- Add the toasted bread cubes and gently fold to combine, letting the bread absorb some dressing.
- Let sit 15-20 minutes to allow flavors to meld; taste and adjust seasoning.
- Serve with a shower of parmesan if you like a little salty kick.
Pro Tips
- Use day-old bread to avoid soggy salad; you want crisp edges, not mush.
- For extra tang, add a teaspoon of lemon juice to the dressing.
- Make ahead: assemble dressing and vegetables in advance, add bread just before serving.
- Swap olives for roasted peppers for a milder bite.
- Freeze-saver: the leftovers freeze well for quick lunches.
Easy Variations
- Protein boost: add grilled chicken or chickpeas for staying power.
- Herb swap: coriander or mint for a fresh twist.
- Cheese option: crumble feta for a saltier finish.
Mistakes To Avoid
- Overdressing: too much oil makes it greasy and lose bread texture.
- Too soon adding bread: bread can turn soggy if dressed too early.
- Overloading with onions—raw onion can overpower the flavor if not balanced.
Serving Ideas
Pair with grilled proteins, or serve as a vegetarian main with a side of marinated beans. It shines at room temp, so you can pack it for lunches or serve it at casual dinners. A wedge of lemon on the side brightens everything up.
What Surprised Me Most About This Recipe
The bread becomes a textural stage partner—the crunch from toasting plus the absorption from the dressing makes it feel like a proper, restaurant-style salad and not a soggy affair.
The Secret Ingredient Nobody Expects
A touch of lemon zest in the dressing lifts the whole bowl with brightness you didn’t know it needed.
Why This Recipe Works Better Than Most Versions
It uses a light, well-balanced dressing that respects gluten-free bread and avoids heavy mayo-based sauces that weigh you down.
Related Posts:

Reader Favorite Tip
Let the warm bread sit for a few minutes after toasting, then toss with dressing before adding vegetables for a better texture.
The Biggest Mistake People Make
Overloading with raw onions and under-seasoning the bread, which leaves the salad flat. Balance is key.
Serving Ideas
Serve alongside a grilled veggie platter or with a protein bowl for a complete, satisfying meal.
2. Creamy Chickpea-Cava Rosti Bake That Feels Like a Hug
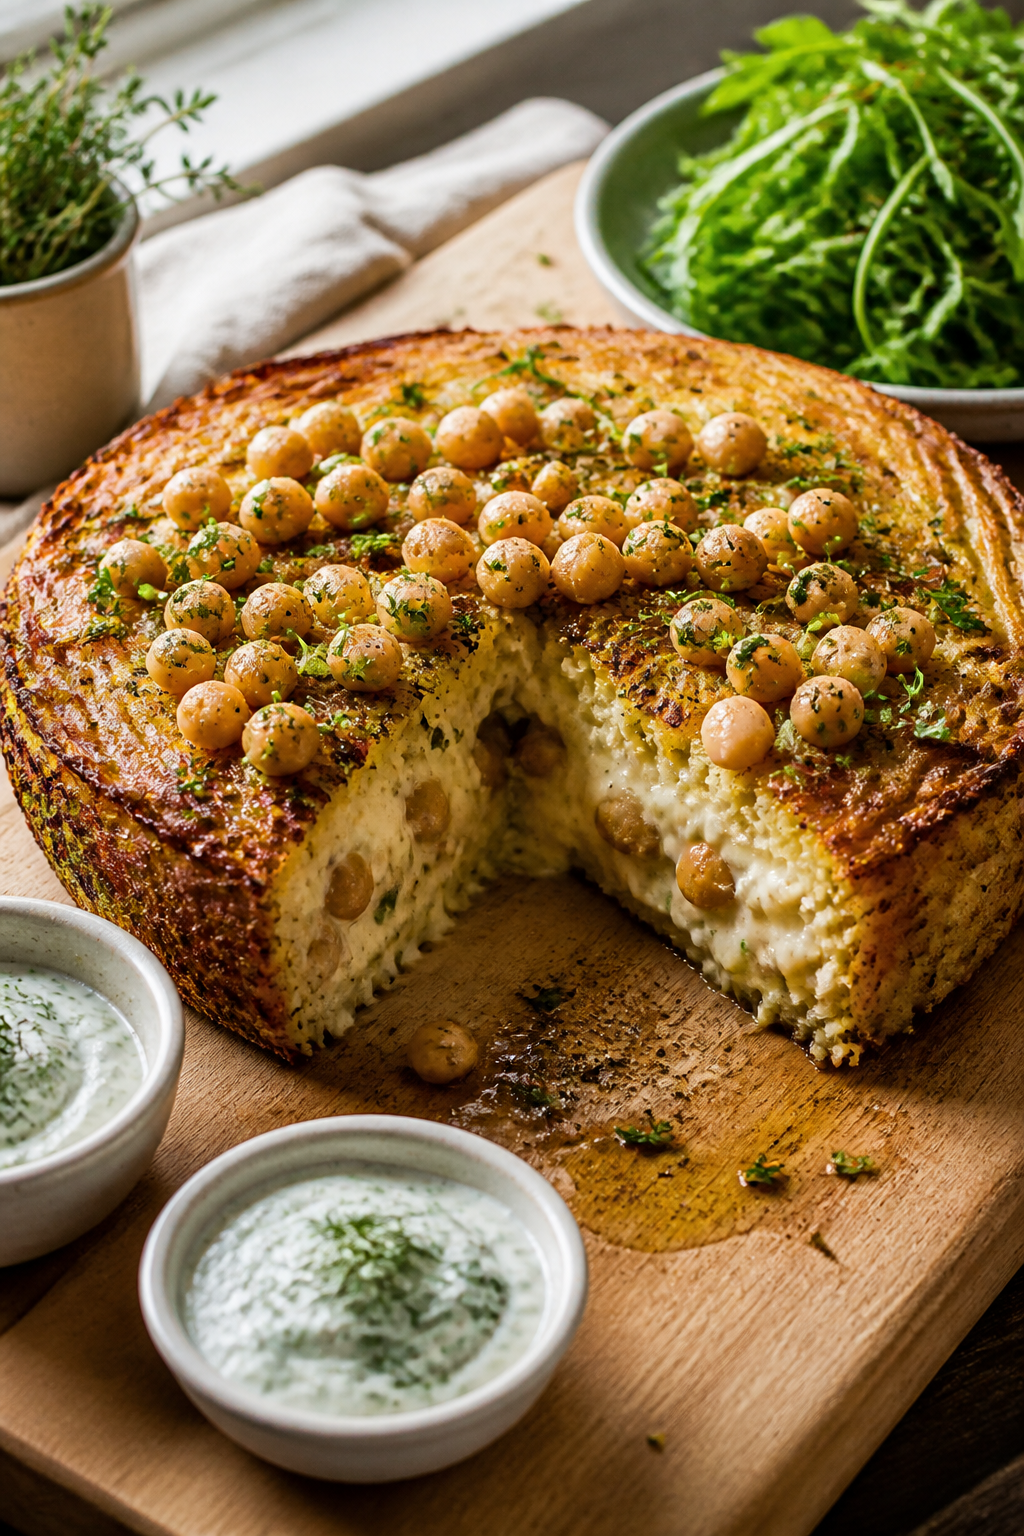
Imagine a warm, cheesy, crisp-edged rosti loaded with garlicky chickpeas and a savory, herby crust. This one feels like comfort food that somehow stayed gluten-free and easy to bake after a long day. The chickpeas add heft, protein, and a creamy interior that begs for a spoon. It’s perfect for a cozy weeknight and translates well into a meal-prep-friendly container that still tastes like a special dinner.
Why You’ll Love It
- Protein-packed and filling
- Excellent make-ahead option
- Creamy interior with a crisp edge
- One-pan and relatively hands-off
- Great for leftovers that taste just as good
Ingredients
- 2 cans chickpeas, drained and mashed
- 1/2 cup grated parmesan (or vegan cheese)
- 2 large eggs or flax eggs for vegan option
- 1/3 cup gluten-free all-purpose flour
- 1 small onion, grated
- 2 cloves garlic, minced
- 2 tbsp olive oil
- 1 tsp smoked paprika
- Salt and pepper to taste
- Fresh parsley for garnish
Instructions
- Preheat oven to 425°F (220°C) and grease a baking sheet or skillet.
- In a bowl, mix mashed chickpeas, eggs, and flour until a chunky batter forms.
- Stir in onion, garlic, parmesan, paprika, salt, and pepper.
- Form small rosti patties and lay them apart on the baking sheet.
- Drizzle with olive oil and bake 15 minutes, then flip and bake another 10-12 minutes until golden.
- Garnish with parsley and serve warm with a dollop of yogurt or dairy-free alternative.
Pro Tips
- Dry mash the chickpeas a bit to keep the batter firm.
- Use fresh garlic for a sharper flavor; pre-minced can dull with time.
- For extra crispiness, finish under the broiler for 1-2 minutes.
- Balance salt with a squeeze of lemon just before serving.
- Double the batch for easy freezer lunches.
Easy Variations
- Add chopped spinach for greens and color
- Swap parmesan with nutritional yeast for a cheesy vibe without dairy
- Include sun-dried tomatoes for a sweet-savory kick
Mistakes To Avoid
- patties too thick, causing center rawness
- Overworking the mixture, which makes the rosti dense
- Neglecting to pat out moisture from chickpeas
Serving Ideas
Pair with garlicky yogurt sauce and a green salad for a complete meal, or stack two rosti as a sandwich with avocado.
What Surprised Me Most About This Recipe
The chickpea texture transforms into something almost crumbly and creamy at once—it’s surprising how well it holds up to high heat without gluten.
The Secret Ingredient Nobody Expects
A tiny pinch of nutmeg in the batter brightens the chickpeas without overpowering the whole dish.
Why This Recipe Works Better Than Most Versions
The batter is stabilized with eggs (or flax eggs) and a light flour, which prevents dryness while keeping it gluten-free.
Reader Favorite Tip
Serve with a zingy yogurt-caper sauce to cut through the richness.
The Biggest Mistake People Make
Over-flipping and mashing during cooking; you want a crispy exterior with a tender center.
Serving Ideas
Top with a spoon of herb yogurt, squeeze of lemon, and a green salad on the side for a balanced plate.
3. Black Bean Quinoa Stuffed Peppers That Boast Bold Flavor
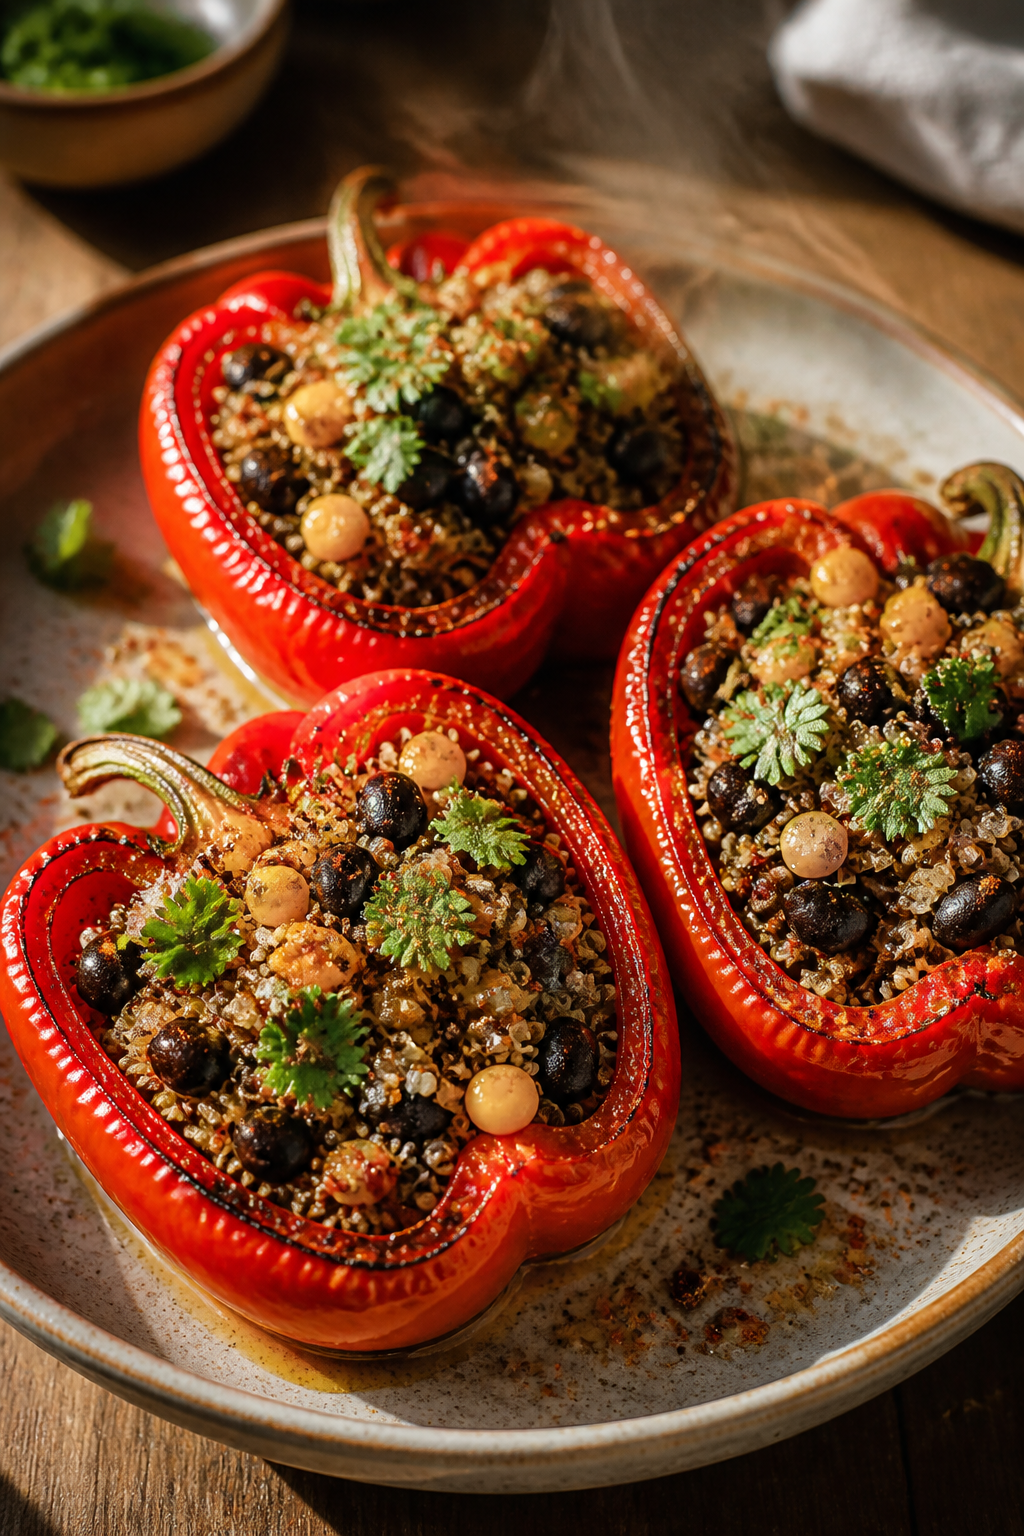
These peppers are the kind of dish that tastes like you spent hours over a stove when you actually whipped them up in a single sheet pan. The quinoa adds a fluffy bite, the black beans give heft, and a secret spice blend ties it all together. The peppers themselves become a sweet, roasted bowl that holds everything in a warm, comforting hug. It’s veggie-forward without feeling like a diet plan—just vibes, ok?
Why You’ll Love It
- Protein-rich and filling
- Colorful presentation that begs to be photographed
- Excellent for batch cooking
- Balanced, comforting flavors with a lively kick
- Kid-friendly with room to customize spices
Ingredients
- 4 large bell peppers, tops cut and seeded
- 1 cup cooked quinoa
- 1 can black beans, drained
- 1 cup corn kernels
- 1 small onion, diced
- 2 cloves garlic, minced
- 1 tsp cumin
- 1/2 tsp chili powder
- 1 cup salsa
- 1/2 cup shredded cheese (cheddar or monterey jack)
- Salt and pepper to taste
Instructions
- Preheat oven to 375°F (190°C). Lightly grease a baking dish.
- In a skillet, sauté onion and garlic until translucent, then add spices for a quick bloom.
- Stir in quinoa, black beans, corn, and salsa; season with salt and pepper.
- Stuff peppers with the filling and place in the dish.
- Top with cheese, cover with foil, and bake 25 minutes. Remove foil and bake another 10 minutes.
- Broil for 1-2 minutes if you want extra char and bubbling cheese.
Pro Tips
- Rice work too if you skip quinoa; just adjust moisture.
- Make it spicier with jalapeños or chipotle powder.
- Prep ahead by stuffing and refrigerating; bake when ready.
- Freeze baked peppers solo for quick dinners.
Easy Variations
- Use lentils instead of beans for a different texture
- Load with spinach or kale for greens
- Top with avocado crema for a creamy finish
Mistakes To Avoid
- Overloading with salsa; peppers may release too much moisture
- Under-seasoning the filling; it needs a punch to stand up to the cheese
- Not pre-cooking the filling; underdone texture ruins the dish
Serving Ideas
Pair with a bright lime sour cream or a simple green salad. Leftovers taste fantastic heated with a squeeze of lime.
What Surprised Me Most About This Recipe
How the quinoa takes on the salsa’s brightness; it’s surprising how well the bite stays firm after baking.
The Secret Ingredient Nobody Expects
A splash of apple cider vinegar awakens the filling’s flavors and keeps it lively.
Why This Recipe Works Better Than Most Versions
It’s a one-dish powerhouse with a balance of protein, fiber, and vegetables that keeps you full for hours.
Reader Favorite Tip
Finish with a dollop of yogurt or cashew cream to add creaminess without extra calories.
The Biggest Mistake People Make
Skipping the pre-cook step for the filling; peppers won’t cook evenly if the filling stays cold.
Serving Ideas
Serve with a simple avocado-cucumber salsa for a refreshing contrast.
4. Garlicky Herb Salmon with Quinoa Risotto That Feels Indulgent
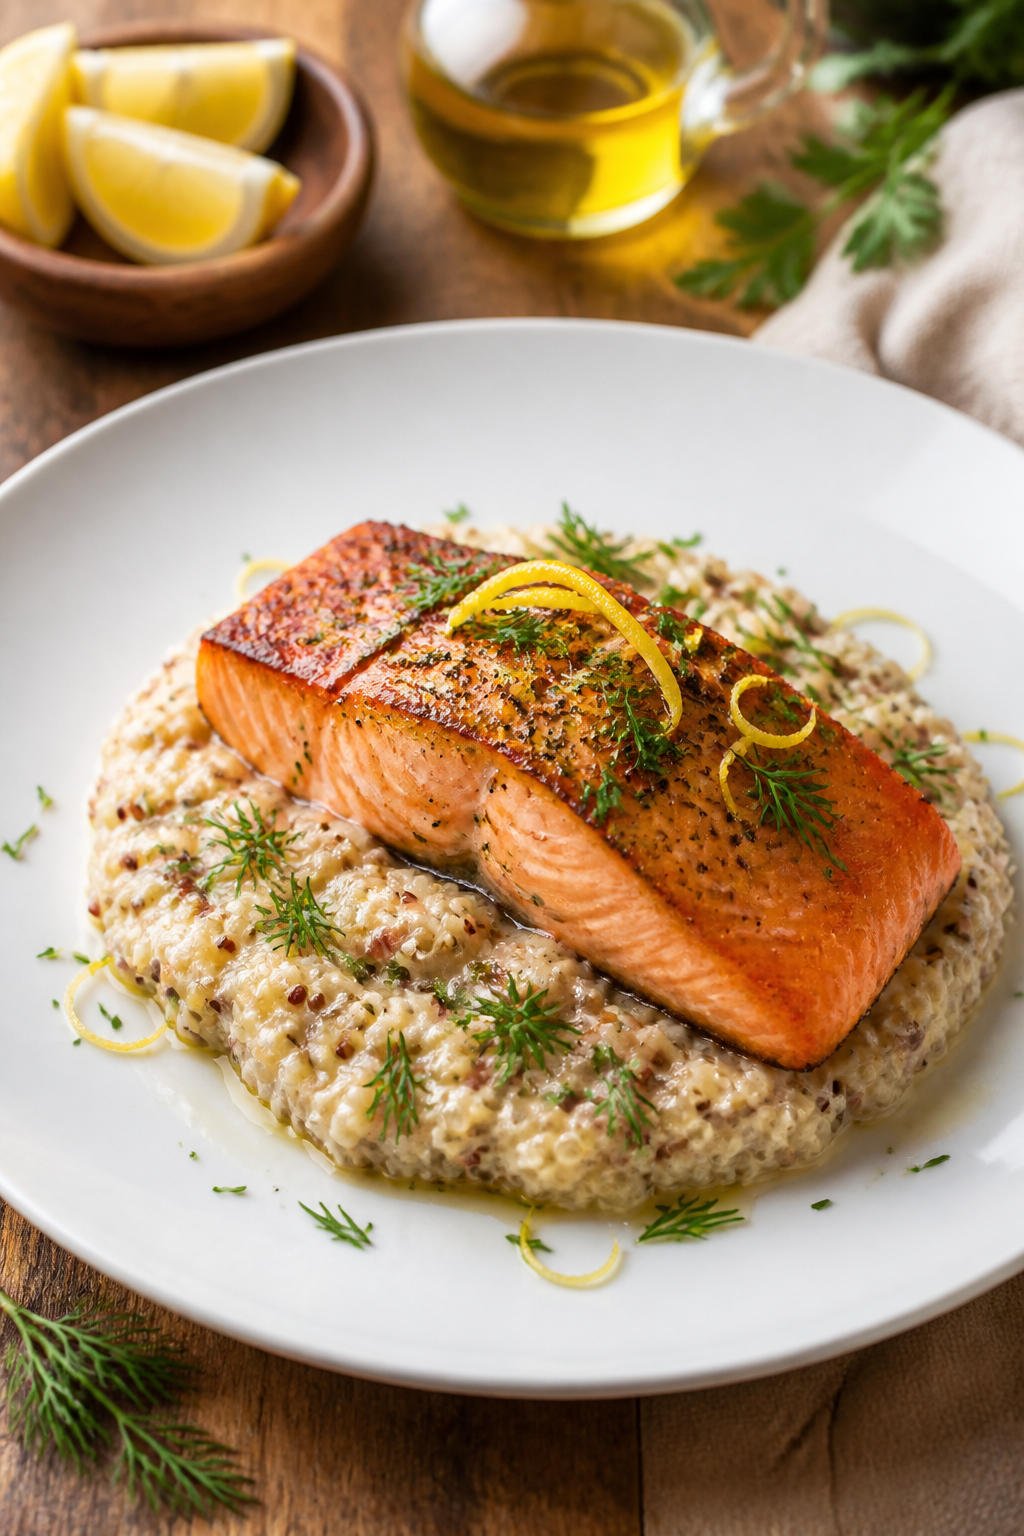
Salmon is sensational here: crisped edges, a lemon-herb perfume, and creamy quinoa that melts into a risotto-like texture. It’s the kind of dish you cook for guests but secretly crave on a Tuesday after a long day. The dairy-free option still stays lush and comforting because the quinoa stands in for risotto’s starch without dragging you down. This one reads like a luxury dinner but cooks in under 30 minutes.
Why You’ll Love It
- High-protein, gluten-free feast
- Ultra-flavorful yet simple to throw together
- Leaves a lingering, comforting taste
- Great for date night or solo treats
- Full of healthy fats and minerals
Ingredients
- 2 salmon fillets
- 1/2 cup quinoa, rinsed
- 1 cup vegetable or chicken stock
- 1 small onion, finely chopped
- 2 cloves garlic, minced
- 1/2 cup white wine (optional)
- 1 tbsp lemon juice
- 1 tbsp butter or olive oil
- Fresh dill or parsley, chopped
- Salt and pepper to taste
Instructions
- Season salmon with salt, pepper, and a drizzle of lemon juice; set aside.
- In a skillet, sauté onion and garlic in butter or oil until translucent.
- Add quinoa and toast for 2 minutes, then pour in stock and wine if using.
- Simmer gently, stirring occasionally, until quinoa is creamy and tender, about 15 minutes.
- Meanwhile, pan-sear salmon skin-side down until crisp, then finish cooking through.
- Stir lemon juice and herbs into the quinoa; plate with the salmon on top.
Pro Tips
- Keep stock warm to maintain a gentle simmer for the risotto.
- Use a nonstick skillet to prevent sticking when making quinoa risotto.
- If you’re dairy-free, skip butter and use olive oil with extra herbs.
- Finish with a wipe of lemon zest for brightness.
Easy Variations
- Swap salmon for cod or shrimp for a different seafood flavor
- Switch quinoa to Arborio rice if you’re not gluten-free purist (still GF)
- Add mushrooms for an earthy note
Mistakes To Avoid
- Overcooking salmon, which makes it dry
- Letting quinoa get mushy by over-stirring
- Salt balancing: taste early and adjust at the end
Serving Ideas
Top with extra herbs and a dollop of yogurt for a creamy contrast, or a squeeze more lemon for zing.
What Surprised Me Most About This Recipe
Quinoa creates a creamy, risotto-like mouthfeel that fools even skeptics into believing there’s dairy involved, all while staying gluten-free and light on the stomach.
The Secret Ingredient Nobody Expects
A small splash of white wine adds a surprising depth to the quinoa that you only notice after the first bite.
Why This Recipe Works Better Than Most Versions
Balancing the creaminess of the quinoa with crisp salmon skin gives a dynamic contrast you rarely see in gluten-free meals.
Reader Favorite Tip
Finish with extra lemon zest and a pinch of flaky salt to heighten the flavors.
The Biggest Mistake People Make
Cooking the salmon too long, which kills moisture and flavor. Keep it moist and succulent.
Serving Ideas
Pair with a bright cucumber-tenné salad or roasted asparagus for a complete plate.
5. Spiced Lentil and Sweet Potato Power Bowls That Don’t Quit
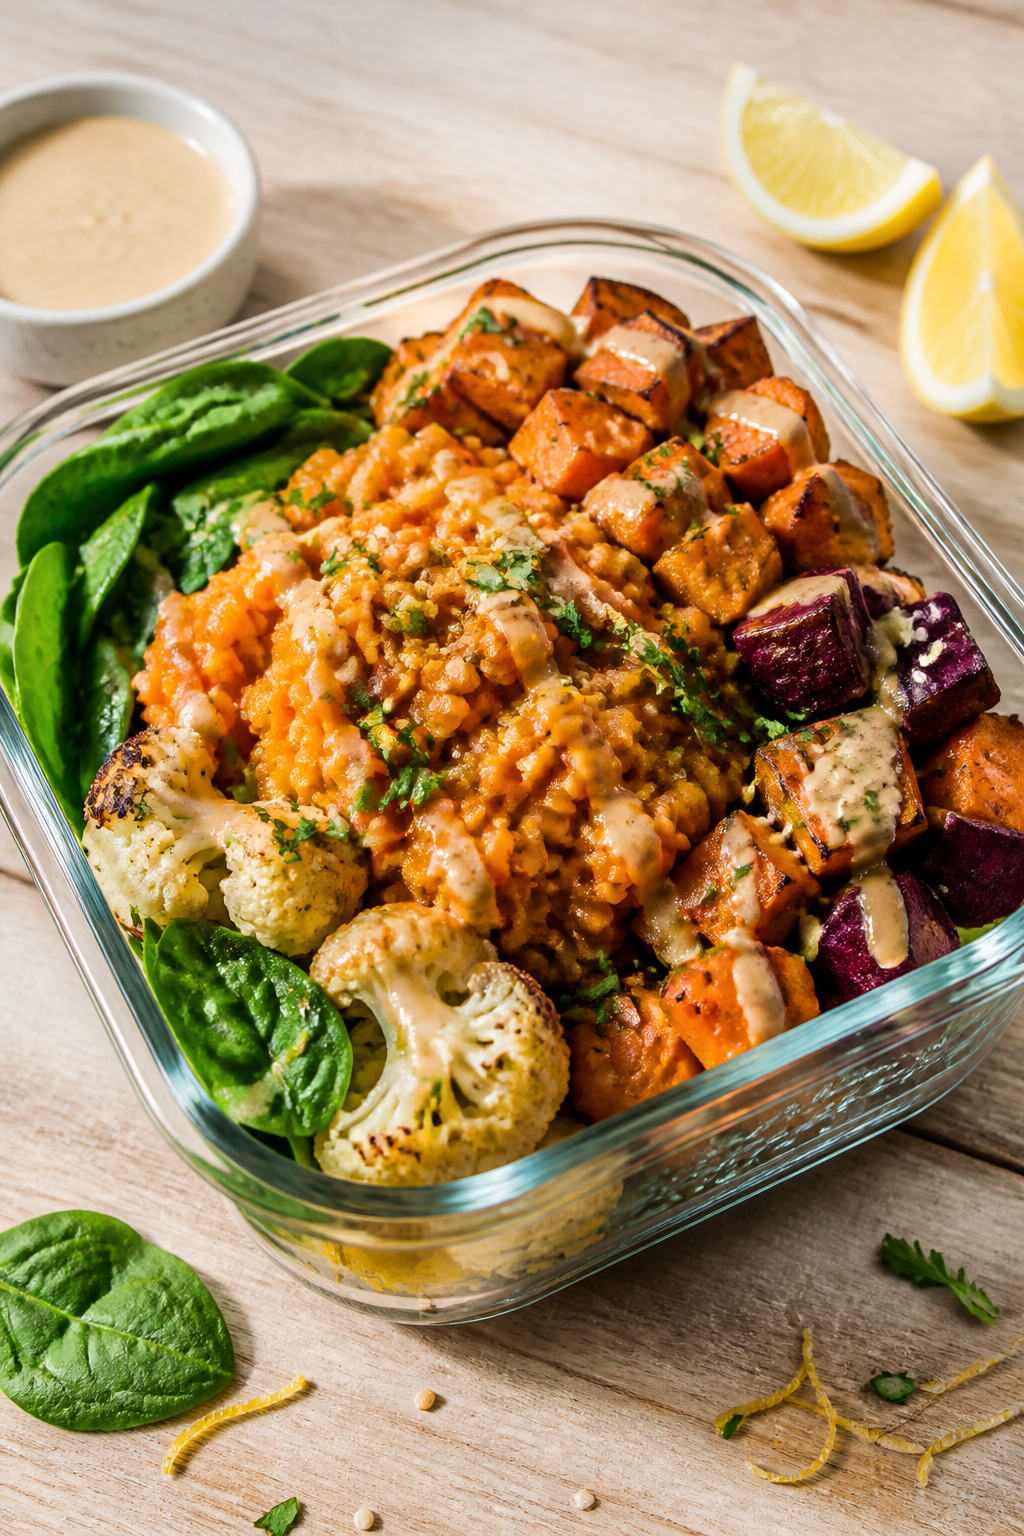
If you crave a bowl that fills you up and fuels you straight through the afternoon slump, this is it. Lentils provide starch and protein while sweet potatoes offer comforting sweetness and fiber. A tangy tahini-lemon sauce ties it all together with a glossy gloss, and roasted veggies add texture and color. You’ll keep coming back to this bowl because it’s not just dinner; it’s a hug in a glass lunch-box.
Why You’ll Love It
- Powerful plant-based protein that sustains
- One-bowl wonder with vibrant flavors
- Roasted veggies add caramelized sweetness
- Easy to customize with pantry staples
- Great for meal prepping and portion control
Ingredients
- 1 cup dried red or green lentils, rinsed
- 2 medium sweet potatoes, cubed
- 1 red bell pepper, sliced
- 1 small red onion, wedges
- 2 tbsp olive oil
- 1 tsp cumin
- 1/2 tsp smoked paprika
- 1/4 tsp chili flakes
- 1/4 cup tahini
- 2 tbsp lemon juice
- Water to thin sauce
- Fresh parsley for garnish
- Salt and pepper to taste
Instructions
- Roast sweet potatoes and peppers with olive oil, cumin, paprika, salt, and pepper at 425°F (220°C) for 25-30 minutes.
- Meanwhile, simmer lentils in water with a pinch of salt until tender, about 15-20 minutes.
- Whisk tahini, lemon juice, water, and a pinch of salt to make a creamy sauce.
- Assemble bowls: lentils, roasted veggies, and any greens you like.
- Drizzle with tahini sauce and garnish with parsley.
- Season to taste and serve warm or room temperature.
Pro Tips
- Cook lentils in vegetable stock for extra depth.
- Roast veggies longer if you want more caramelization.
- Make tahini sauce thicker for drizzle drips or thinner for a pourable dressing.
- Store leftovers in separate containers to keep textures crisp.
Easy Variations
- Add kale or spinach to the bowls for greens
- Swap sweet potatoes with roasted carrots
- Garnish with toasted almonds for crunch
Mistakes To Avoid
- Overcooking lentils into mush
- Not thinning the tahini sauce enough; it becomes gluey
- Skimping on salt—lentils soak up flavor quickly
Serving Ideas
Dress with extra lemon and a drizzle of olive oil; serve with a side of pickled veggies for brightness.
What Surprised Me Most About This Recipe
The hummus-like tahini sauce becomes the glue that ties the entire bowl together, adding richness without dairy.
The Secret Ingredient Nobody Expects
A pinch of sumac sprinkled on top for a tangy aroma that lifts the dish instantly.
Why This Recipe Works Better Than Most Versions
The balance of hearty lentils and sweet potatoes creates a nourishing texture that doesn’t rely on gluten for satisfaction.
Reader Favorite Tip
Toast the lentils briefly before cooking to deepen their flavor and create a nutty note.
The Biggest Mistake People Make
Adding too much tahini sauce; it can overpower the bowl’s natural flavors.
Serving Ideas
Top with a dollop of yogurt or vegan yogurt if you want extra creaminess and tang.
6. Crunchy Coconut-Curry Chicken with Rice That Sticks to Your Ribs
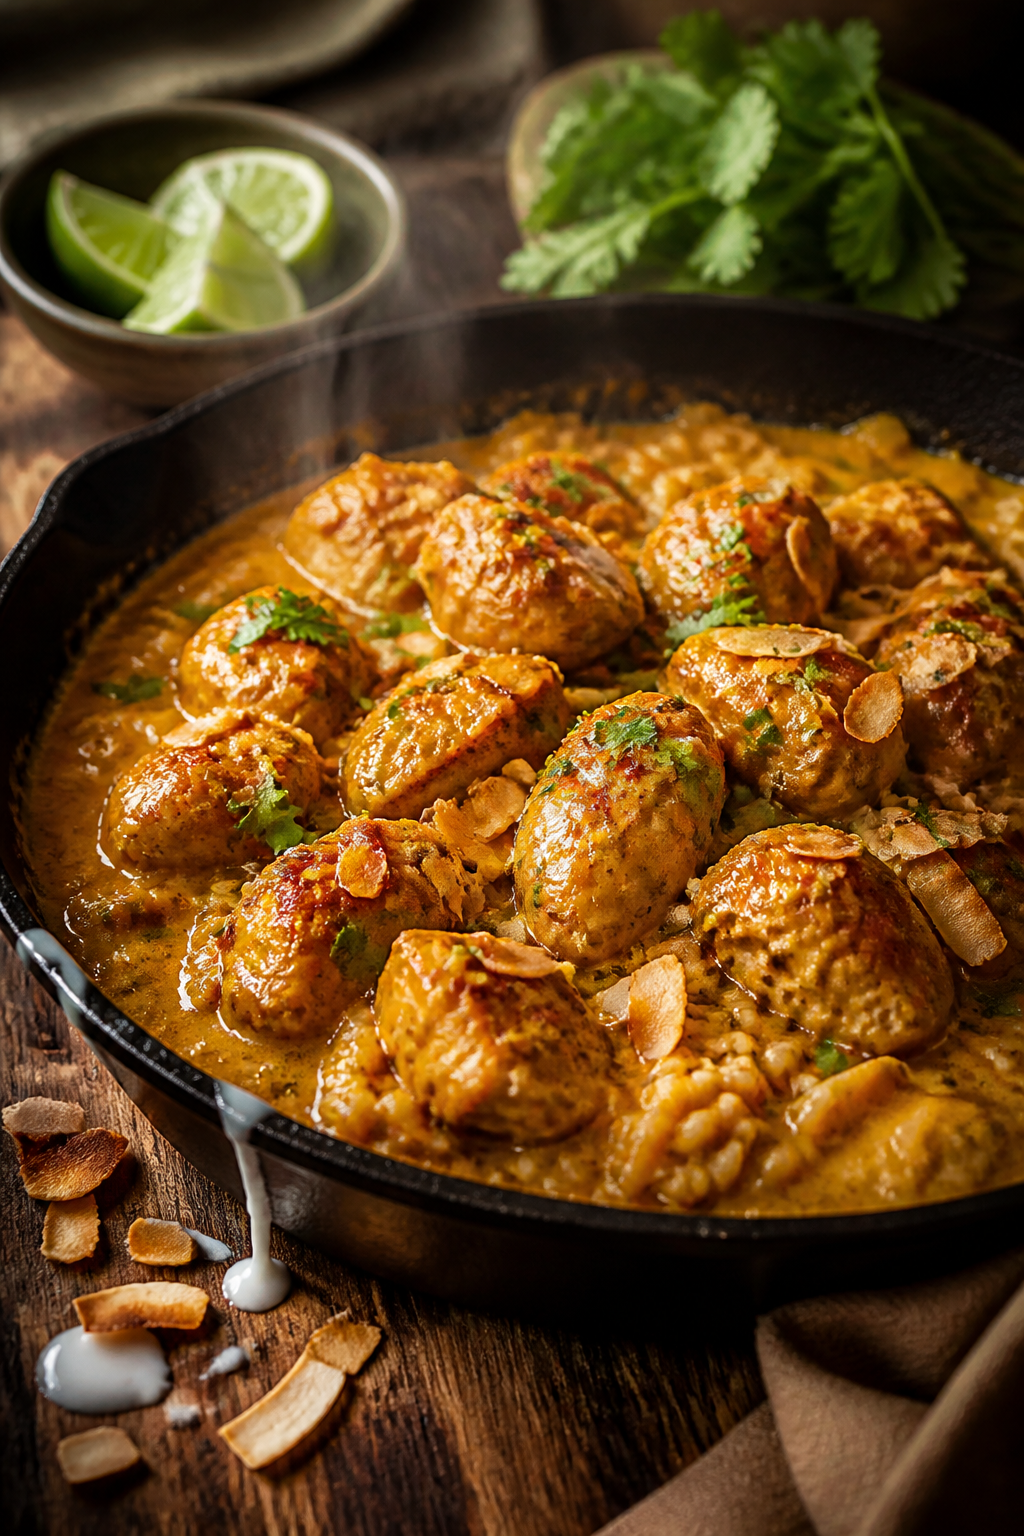
One bite and you’ll be thinking about lazy Sundays and long conversations with friends. This dish balances the tropical sweetness of coconut with a warm curry zing, and the chicken stays tender thanks to a gentle simmer. The rice soaks up the sauce, creating a cozy, satiating bite every time. It’s not just dinner—it’s a little vacation in a skillet, and yes, it’s gluten-free.
Why You’ll Love It
- Protein-forward main that stays filling
- Rich, coconut-kissed sauce with a curry kick
- Weeknight-friendly and adaptable
- Leftovers thrive in lunch boxes
- Kid-friendly with a mild heat option
Ingredients
- 2 chicken breasts, cubed
- 1 can full-fat coconut milk
- 1 cup basmati or jasmine rice
- 1 onion, sliced
- 2 cloves garlic, minced
- 1 tbsp curry paste or powder
- 1 cup chicken stock
- 1 cup shredded coconut (optional)
- Fresh cilantro for garnish
- Salt to taste
Instructions
- Cook rice according to package directions; set aside.
- Sauté onion and garlic in a little oil until fragrant.
- Add chicken and sear until lightly browned.
- Stir in curry paste, then pour in stock and coconut milk.
- Simmer 10-12 minutes until chicken is cooked through and sauce thickens.
- Stir in shredded coconut if using and adjust salt; serve over rice.
Pro Tips
- Use light coconut milk for a lighter sauce that still feels rich.
- ’Lady finger’ curry paste can be substituted with green curry paste for a different flavor
- Extra veggies like bell peppers or peas work beautifully here
- Garnish with cilantro for a fresh finish
Easy Variations
- Make it with tofu for a vegetarian version
- Use shrimp instead of chicken for a seafood twist
- Add a handful of spinach toward the end for color and nutrients
Mistakes To Avoid
- Overcooking the chicken, which dries it out
- Not balancing curry heat with coconut sweetness
- Not letting the sauce simmer long enough for flavors to meld
Serving Ideas
Serve with a cucumber-mint slaw or pickled cucumbers for a refreshing contrast to the creamy curry.
What Surprised Me Most About This Recipe
The coconut milk thickens beautifully with a touch of starch from the rice, making every mouthful feel luxurious without heaviness.
The Secret Ingredient Nobody Expects
A touch of lime zest brightens the sauce and makes the curry pop.
Why This Recipe Works Better Than Most Versions
It’s a gentle simmer that preserves moisture and develops deep flavor without complicating steps or introducing gluten.
Reader Favorite Tip
Finish with a squeeze of lime and a sprinkle of toasted coconut for aroma and texture.
The Biggest Mistake People Make
Skipping the final simmer; you miss the sauce’s depth and the chicken remains bland.
Serving Ideas
Pair with quick pickled veggies or a simple cucumber salad to cut richness.
7. Hearty Turkey and Lentil Meatballs in Tomato Sauce That Silently Impress
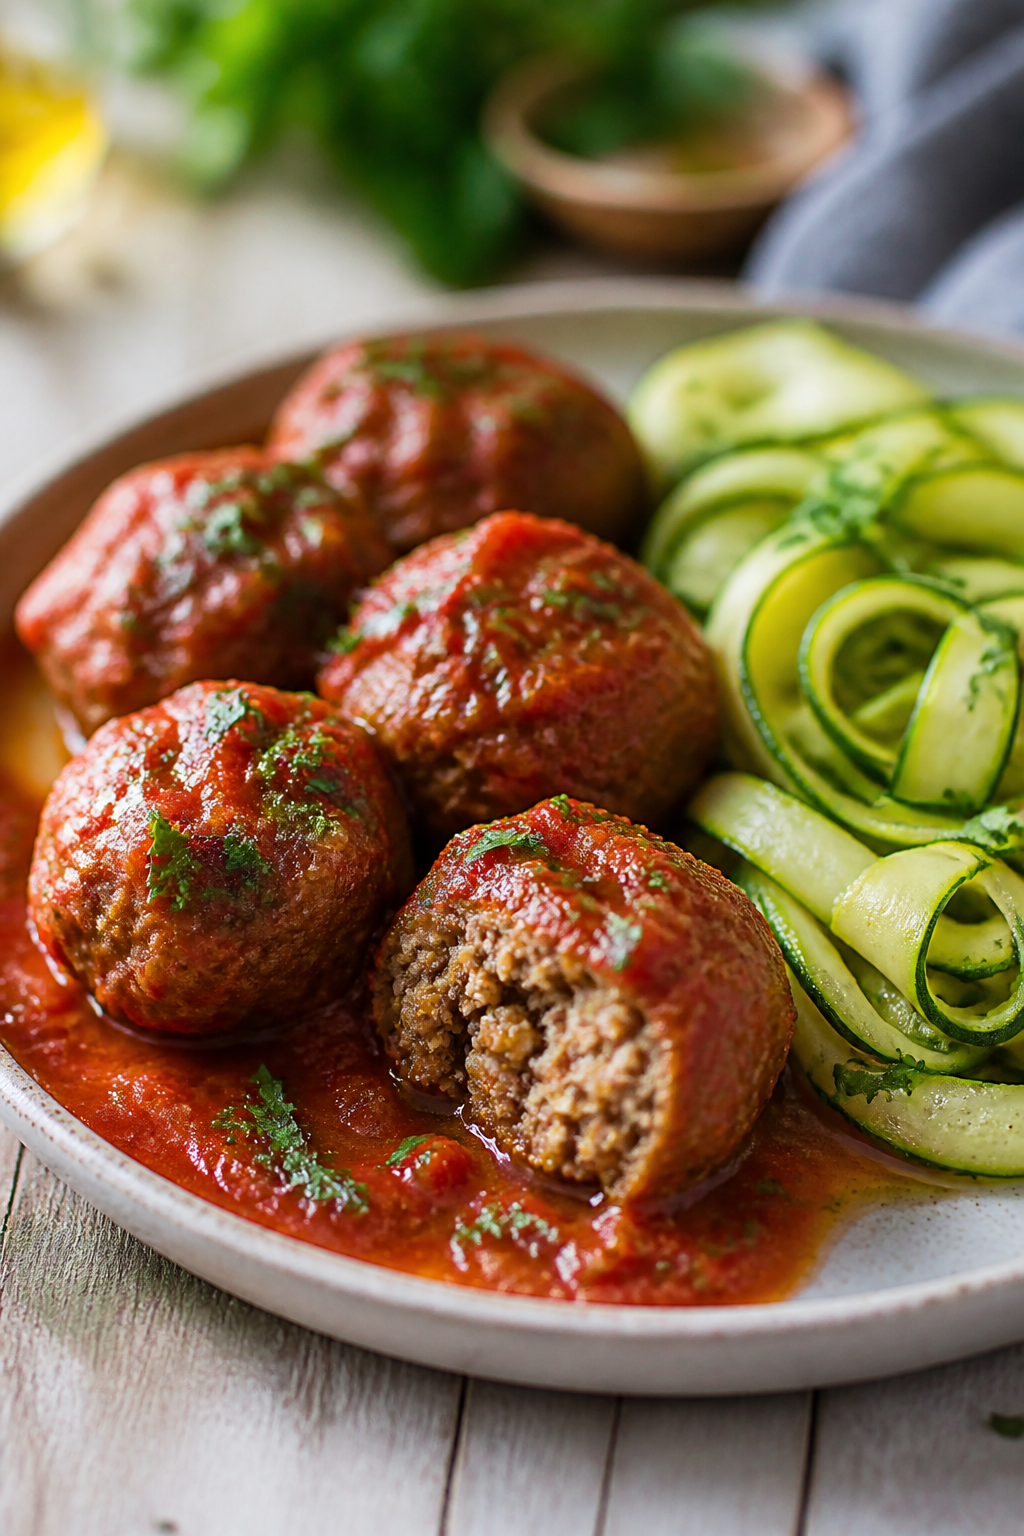
Meatballs are back, but these are gluten-free, protein-packed, and surprisingly light on the sauce. The lentils fill with a soft, earthy savor while turkey keeps things lean. The tomato sauce clings to every meatball like a cozy blanket, and zucchini ribbons on the side add a playful texture. This is a dish you’ll want to cook on Sundays and enjoy all week—comfort food that travels well and tastes better the next day.
Why You’ll Love It
- Gluten-free meatballs with a tender bite
- Protein-forward and freezer-friendly
- Balanced tomato sauce with a touch of sweetness
- Great for kids and adults alike
- Low in carbs but rich in flavor
Ingredients
- 1 lb ground turkey
- 1/2 cup cooked lentils, mashed
- 1 egg
- 1/3 cup gluten-free breadcrumbs
- 2 cloves garlic, minced
- 1 tsp dried oregano
- 1/2 tsp paprika
- 2 cups tomato sauce
- 1 zucchini, sliced into ribbons
- Olive oil for cooking
Instructions
- Preheat oven to 375°F (190°C). Line a baking sheet with parchment.
- Mix turkey, lentils, egg, breadcrumbs, garlic, oregano, paprika, salt, and pepper until just combined.
- Shape into 1-inch meatballs and place on the sheet; drizzle with a little oil.
- Bake 15-20 minutes until golden and cooked through.
- Warm tomato sauce in a pan; add meatballs and simmer 5-7 minutes to coat.
- Serve over zucchini ribbons or gluten-free pasta, if desired.
Pro Tips
- Don’t overmix; it makes meatballs dense.
- Mashed lentils help bind and add moisture without gluten.
- For extra moisture, add a splash of beef or vegetable stock to the sauce.
- Let meatballs rest a minute before serving to keep juices in.
Easy Variations
- Try ground chicken or beef for different flavor profiles
- Make mini-meatloaves instead of balls
- Stir in spinach for a green boost
Mistakes To Avoid
- Overbaking, which dries the meat
- Leaving sauce under-seasoned; it should taste alive
- Using too much breadcrumb, which can dry out the center
Serving Ideas
Serve with a side of garlicky greens or a warm quinoa salad for a complete, nourishing plate.
What Surprised Me Most About This Recipe
Lentils in the meatball filler create a surprising depth and moisture that you’d expect from a more indulgent dish.
The Secret Ingredient Nobody Expects
A tiny splash of balsamic vinegar in the sauce brightens all the tomato flavors without making the dish sweet.
Why This Recipe Works Better Than Most Versions
The lentil binding and turkey combination deliver juicy meatballs with a gluten-free crumb that tastes like comfort.
Reader Favorite Tip
Grate a bit of parmesan over the top for a salty finish if you’re not dairy-free.
The Biggest Mistake People Make
Overstuffing meatballs with breadcrumbs—keep it lean for the best texture.
Serving Ideas
Pair with a crisp side salad and a tangy tomato-basil sauce for a bright finish.
8. Savory Mushroom and Barley Risotto-Style Bake (Gluten-Free) That Feels Fancy
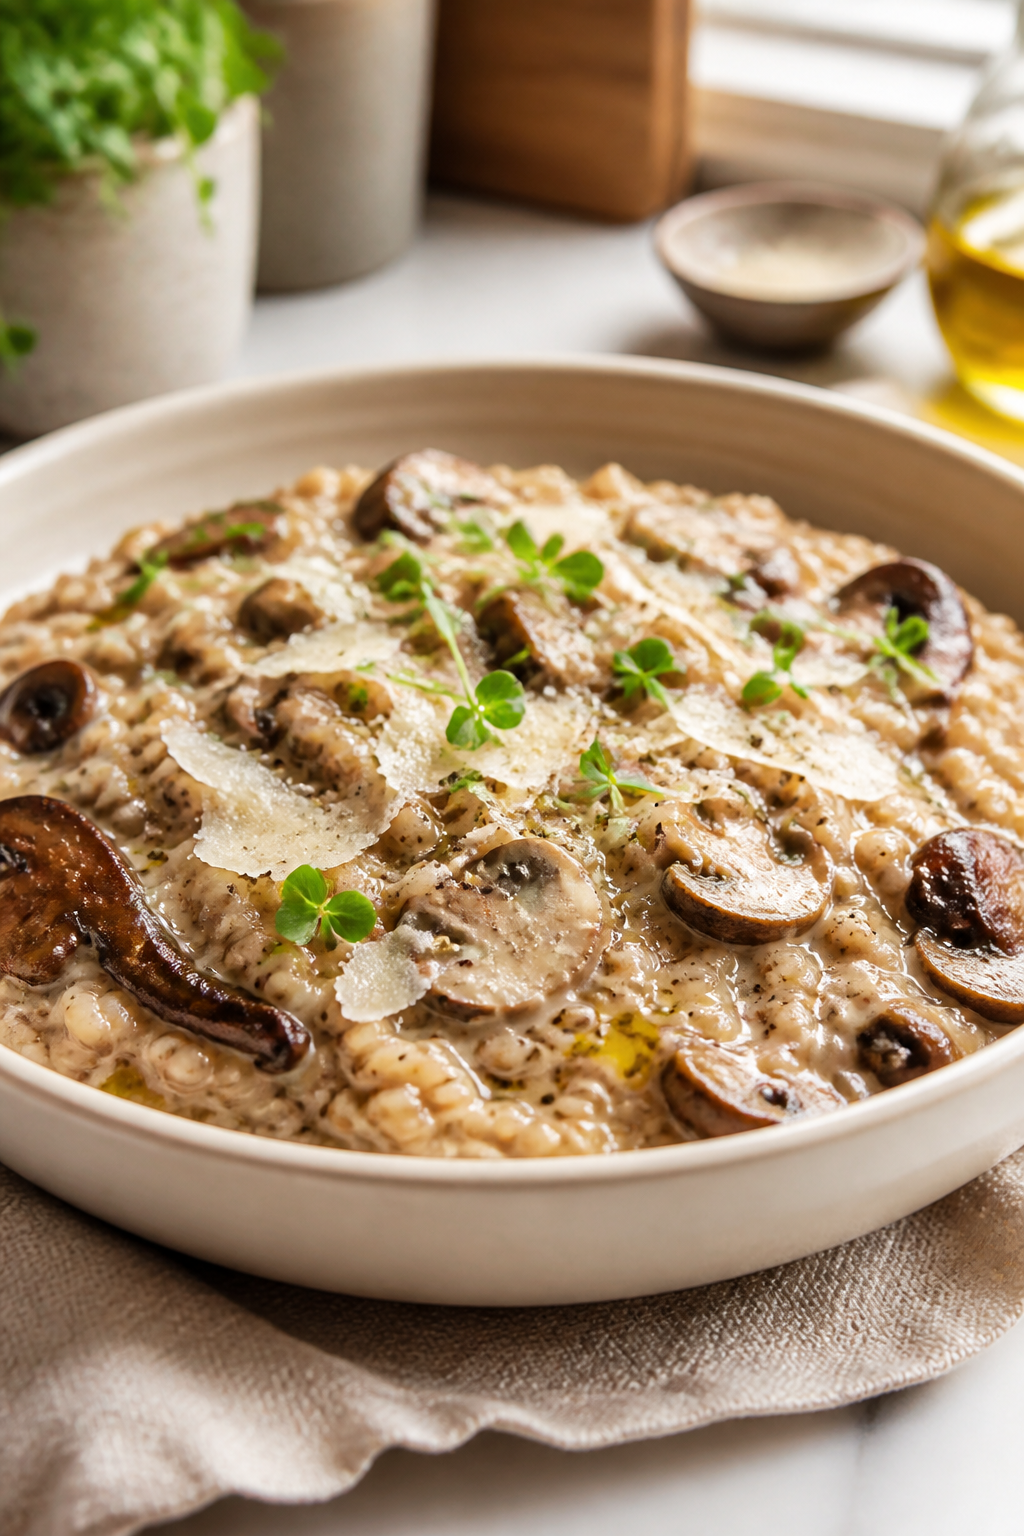
Yes, you heard me right: gluten-free barley in a risotto-style bake. It’s a testament to how a clever swap can deliver that luxurious, creamy mouthfeel without sacrificing texture. Earthy mushrooms weave umami into every bite, and a kiss of parmesan or vegan cheese makes the whole thing feel indulgent. It’s a dish you crave after a long day, and it’s surprisingly quick for a “fancy” dinner.
Why You’ll Love It
- Luxurious texture without gluten
- Umami-forward with mushroom depth
- One-pan comfort with robust flavors
- Great for date night or cozy weekends
- Leftovers toast beautifully
Ingredients
- 1 cup gluten-free barley (pearled), rinsed
- 2 cups mushroom stock or vegetable stock
- 2 cups mixed mushrooms, sliced
- 1 small onion, finely chopped
- 2 cloves garlic, minced
- 1/2 cup grated parmesan (or dairy-free alternative)
- 1/4 cup white wine (optional)
- 2 tbsp olive oil
- Fresh thyme for garnish
- Salt and pepper to taste
Instructions
- Heat olive oil in a skillet; sauté onions and garlic until translucent.
- Add mushrooms; cook until they release and reabsorb their moisture, about 5-7 minutes.
- Stir in barley; toast lightly for 2 minutes, then deglaze with wine if using.
- Gradually add stock, stirring often, until barley is tender and creamy, about 25-30 minutes.
- Stir in parmesan and adjust seasoning; finish with thyme.
- Serve warm, with extra herbs if desired.
Pro Tips
- Keep the stock hot; this helps barley cook evenly and stay creamy.
- Shallots can be swapped for onions for a subtler sweetness.
- Wine is optional but adds depth—don’t skip if you want that risotto vibe.
- Finish with a touch of butter or olive oil for glossiness.
Easy Variations
- Add a handful of spinach toward the end for color and nutrients
- Use different mushrooms for varied aroma
- Swap barley for gluten-free rice or farro substitute if available
Mistakes To Avoid
- Letting the grains soak up too much liquid; it goes past creamy to dry
- Not seasoning during cooking; mushroom flavors can retreat without salt
- Using cold stock; it slows down the cooking process
Serving Ideas
Pair with a green salad and a lemon wedge to brighten the dish; a dollop of herbed yogurt works wonders too.
What Surprised Me Most About This Recipe
Gluten-free barley can deliver a remarkably similar creaminess to traditional risotto when treated with patience and steady heat.
The Secret Ingredient Nobody Expects
A pinch of white pepper heightens mushroom earthiness without overpowering the dish.
Why This Recipe Works Better Than Most Versions
The barley carries a nutty flavor and a soft bite that makes the dish feel substantial without gluten.
Reader Favorite Tip
Finish with a squeeze of lemon and a sprinkle of parsley for a bright finish.
The Biggest Mistake People Make
Over-stirring; you want the dish to bubble gently so the barley can release starch without turning gluey.
Serving Ideas
Offer with roasted garlic broccoli or a simple arugula salad for a complete dinner spread.
9. Spiced Rice Cakes with Avocado and Black Bean Salsa — A Cozy Truck-Stop Vibe
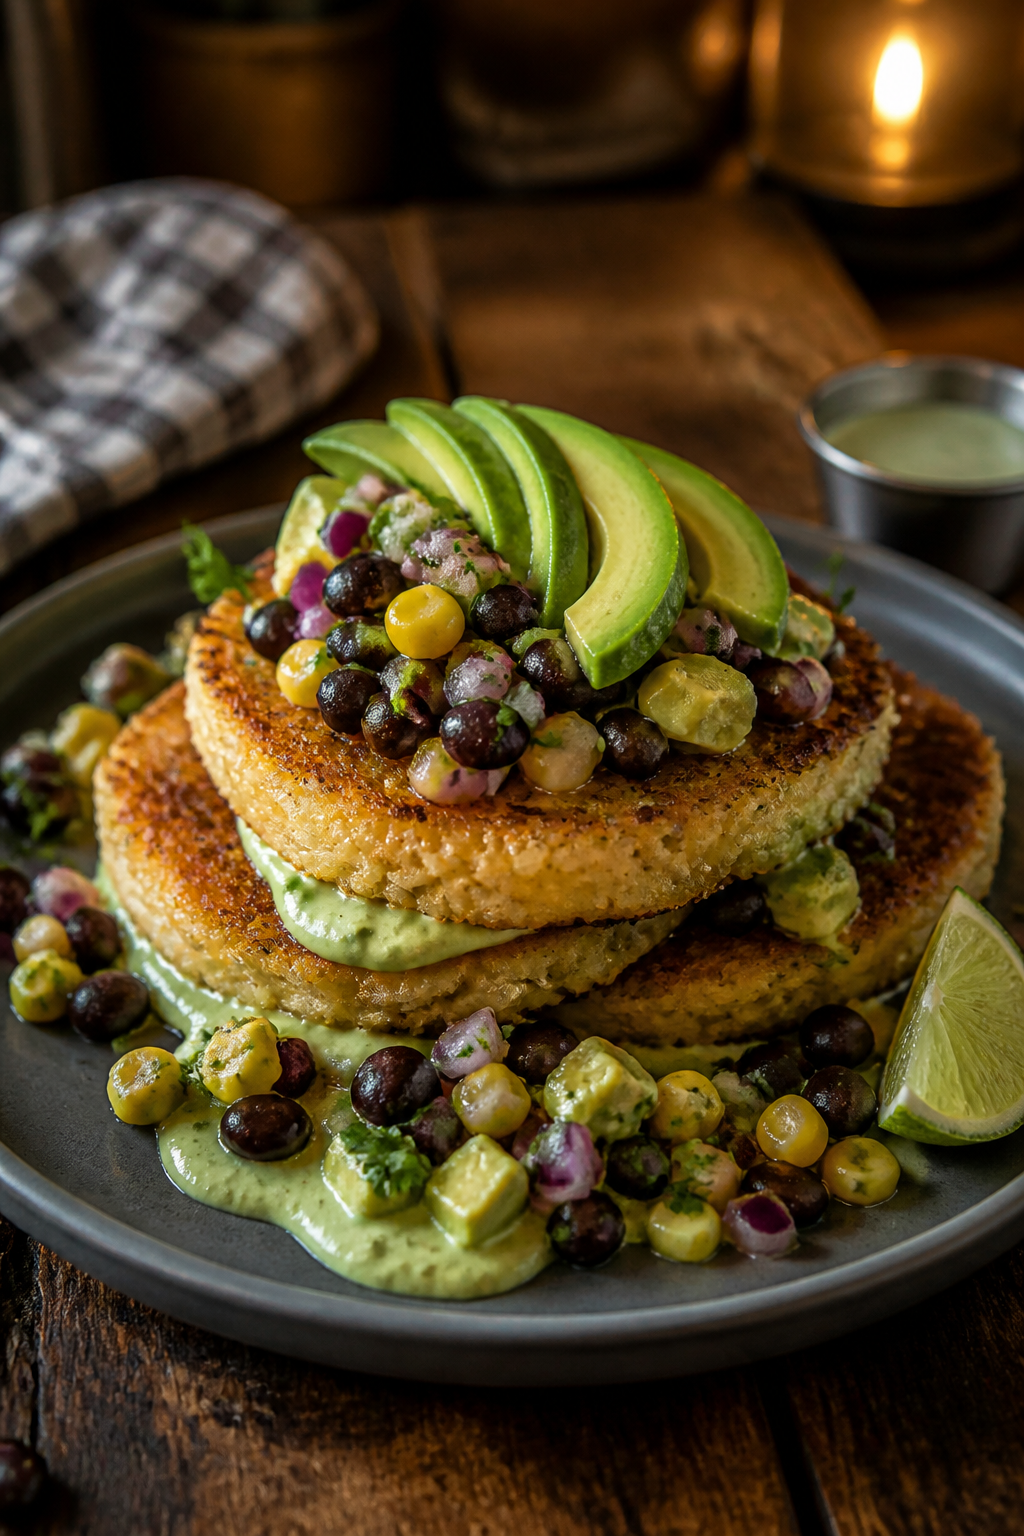
These rice cakes are thick, hearty, and crunchy in all the right places. The beans add a comforting protein punch, while avocado brings creaminess that feels indulgent but remains gluten-free magic. Picture a street-food vibe in your own kitchen: crunchy-on-the-outside, soft-on-the-inside bites, topped with a zingy salsa that wakes up every palate nerve. It’s a bit playful, a lot delicious, and somehow totally feasible on a weeknight.
Why You’ll Love It
- Crispy textures with a creamy center
- High in fiber and plant-based protein
- Ultra-versatile: toppings are endless
- Excellent for batch cooking and meal prep
- Comes together quickly with pantry staples
Ingredients
- 1 cup cooked rice (short-grain or leftover)
- 1/2 cup black beans, mashed
- 1 egg or flax egg
- 1/4 cup gluten-free flour
- 1/2 tsp cumin
- 1/2 tsp chili powder
- Salt to taste
- Oil for frying
- 1 avocado, sliced
- 1 cup salsa or pico de gallo
Instructions
- Mix rice, mashed beans, egg, flour, and spices until a sticky mass forms.
- Form into patties about 1/2 inch thick.
- Fry in a nonstick skillet with a thin film of oil until both sides are golden and crisp.
- Top with avocado slices and a dollop of salsa.
- Serve immediately to enjoy maximum crunch.
- Optional: serve atop a greens salad for a complete bowl.
Pro Tips
- Chill patties 15 minutes before frying to help them hold shape.
- Use leftover rice for faster prep and better texture.
- Make a larger batch and freeze patties for quick meals.
- Try different bean varieties for color and taste.
Easy Variations
- Swap avocado for a spicy lime crema
- Add corn kernels for extra sweetness and texture
- Top with cotija cheese if dairy is allowed
Mistakes To Avoid
- Overworking the mixture; it becomes dense and tough
- Too thin patties that fall apart during frying
- Under-seasoning; the salsa should carry most of the flavor
Serving Ideas
Pair with a simple cucumber-tenné slaw or a lime-yogurt sauce to brighten every bite.
What Surprised Me Most About This Recipe
When the rice and beans crisp up, you get a satisfying bite with surprisingly little effort—gluten-free magic in a skillet.
The Secret Ingredient Nobody Expects
A touch of hot sauce in the salsa adds depth without turning the dish spicy for everyone.
Why This Recipe Works Better Than Most Versions
Its combination of texture and a salsa topper creates a complete, fast meal that feels substantial without heaviness.
Reader Favorite Tip
Make a double batch of salsa; the fresh topping keeps well and lifts leftovers beautifully.
The Biggest Mistake People Make
Neglecting to press the patties before cooking; you won’t get that golden crust without it.
Serving Ideas
Serve with a crisp side salad or a fried egg on top for extra protein.
10. Chewy Almond-Crusted Chicken with Garlic-Ginger Greens and Rice
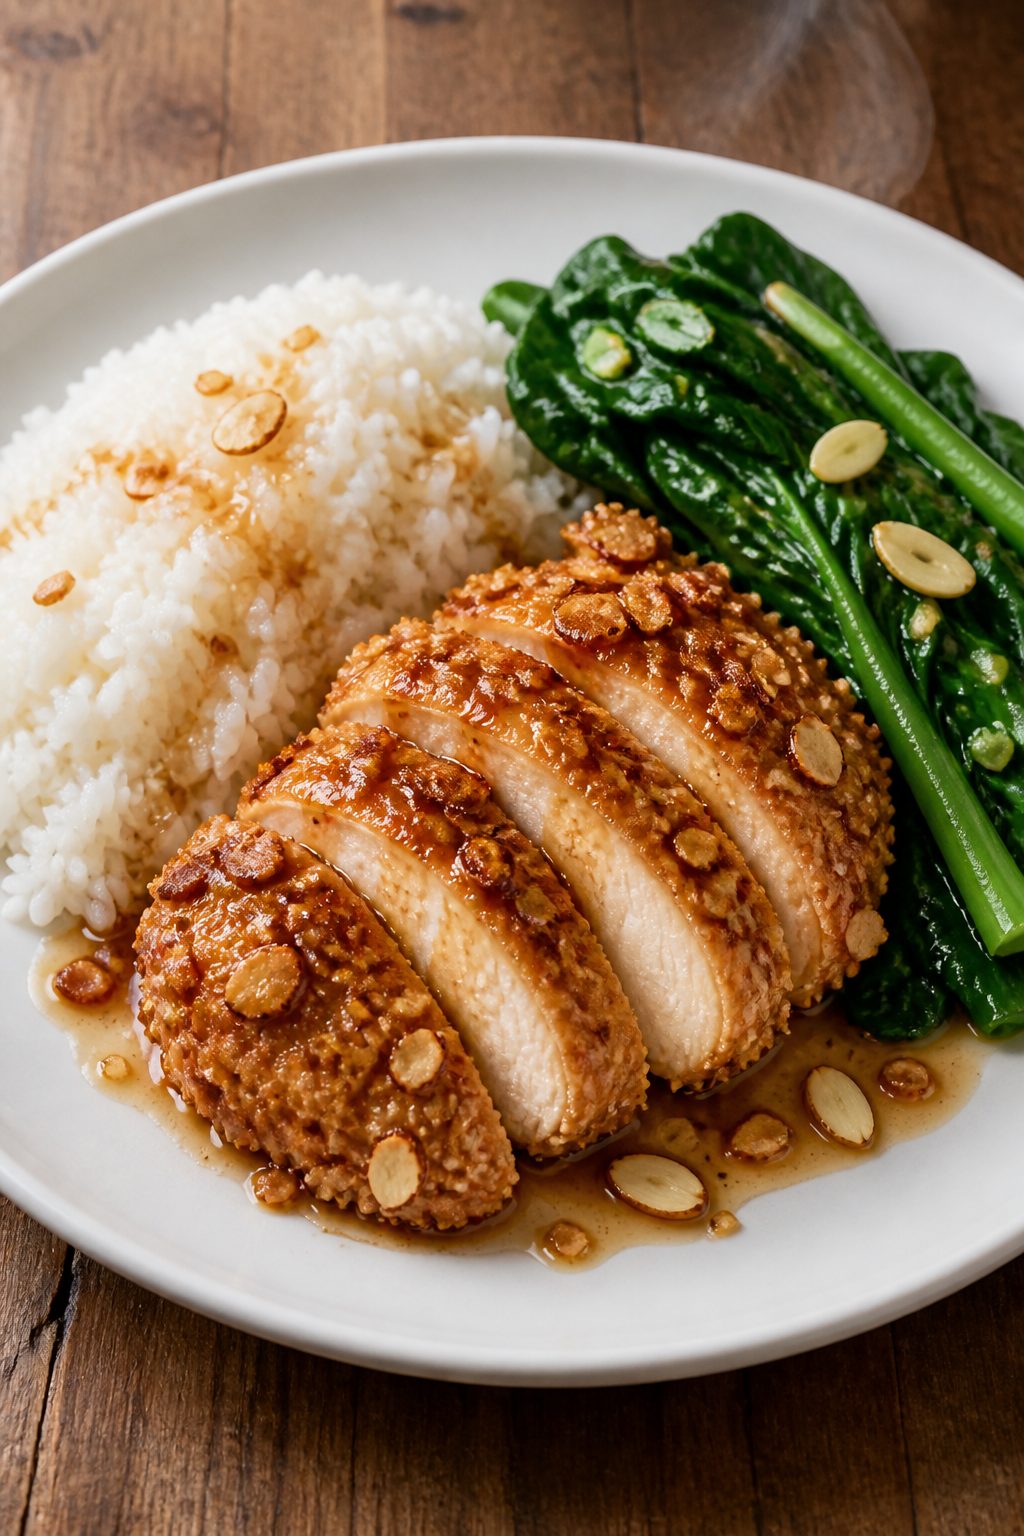
Last but not least, a dish that feels fancy but stays wonderfully approachable. Almond crust gives chicken a satisfying crunch and nutty aroma, while the garlic-ginger greens bring a zingy, vibrant contrast. The rice absorbs every bit of sauce, tying everything into a cohesive, full-night dinner that sticks with you long after you’ve finished the plate. It’s comfort food with a modern, gluten-free twist that makes you feel pampered without the fuss.
Why You’ll Love It
- Crunchy, flavorful chicken without gluten
- Bright greens balance the richness
- One-pan-friendly with a simple rice side
- Fragrant, memorable aroma
- Ideal for entertaining or weeknights
Ingredients
- 4 chicken cutlets or breasts
- 1/2 cup almond flour
- 1 egg or flax egg
- 2 cups garlic-ginger greens (garlic, ginger, kale or bok choy, sautéed)
- 1 cup cooked brown rice
- 2 tbsp olive oil
- Salt and pepper to taste
- Fresh lemon wedges for serving
Instructions
- Preheat oven to 400°F (200°C) if finishing in the oven; otherwise, pan-sear the crust.
- Dip chicken in beaten egg, then coat with almond flour seasoned with salt and pepper
- Pan-sear in olive oil until golden on both sides; finish in the oven for 6-8 minutes if needed
- Sauté greens quickly with a touch of garlic and ginger to keep them bright
- Serve over warm rice with lemon on the side
- Enjoy the aroma as the crisp crust crackles with every bite
Pro Tips
- Toast almond flour lightly to deepen flavor
- Keep greens slightly al dente to retain color and crunch
- Use a meat thermometer to ensure chicken hits 165°F (74°C)
- Add a splash of soy-free sauce for extra savoriness
Easy Variations
- Use panko mixed with almond flour for extra crunch
- Swap greens for spinach or kale depending on what you have
- Try a citrus glaze for a bright finish
Mistakes To Avoid
- Overcrowding the pan leading to steaming instead of crisping
- Not patting chicken dry; moisture prevents crust from adhering
- Under-seasoning the crust, which hides the meat’s flavor
Serving Ideas
Serve with a light cucumber salad and a wedge of lemon to brighten each bite.
What Surprised Me Most About This Recipe
The almond crust not only adds texture but a subtle nutty sweetness that elevates the entire dish without overpowering the chicken.
The Secret Ingredient Nobody Expects
A tiny splash of apple cider vinegar in the greens briefly elevates their brightness and depth.
Why This Recipe Works Better Than Most Versions
The combination of a crunchy crust and fast, crisp greens creates a refined, restaurant-like dish that’s totally gluten-free.
Reader Favorite Tip
Add a pinch of chili flakes to the greens for a mild kick that pairs beautifully with almond crust.
The Biggest Mistake People Make
Cooking the almonds too long; you’ll end up with a bitter crust instead of a warm, toasty crust.
Serving Ideas
Pair with a garlic rice or a simple fennel slaw for crunch and brightness.
Frequently Asked Questions
Q: Are these meals strictly gluten-free, or can they be easily adapted for other dietary needs?
A: They’re all gluten-free as written, with easy substitutions (dairy-free, vegetarian, or vegan options) woven into the variations. Most dishes can swap meat for plant-based proteins or goat cheese for dairy-free creamer alternatives without losing the fullness factor.
Q: Do I need to meal prep to enjoy these all week?
A: Not at all. But these recipes shine as meal-prep heroes. Double batches store well in the fridge or freezer, and reheat beautifully with minimal sogginess or dryness.
Q: Which recipe is the best for batch cooking?
A: The Spiced Lentil and Sweet Potato Power Bowls or the Garlic-Ginger Greens with Rice are especially forgiving for batch prep and reheating.
Q: How do I know if a gluten-free dish is truly satisfying long-term?
A: Look for meals with a good protein-to-carb balance, fiber, and healthy fats. These anchors help keep you full and prevent quick sugar crashes.
Q: Any tips for crisping gluten-free components?
A: Use a hot pan and a light coating of oil. Don’t overcrowd the pan, and let ingredients form a crust before turning.
Q: Are there vegan-friendly options among these?
A: Yes — many can be easily adapted with flax eggs, dairy-free cheeses, and plant-based milks or yogurts. Check the notes within each recipe for specifics.
Q: How do I prevent leftovers from drying out?
A: Store sauces separately, reheat gently, and add a splash of stock or water to loosen sauces when reheating.
Q: Can I freeze these meals?
A: Most can be frozen, especially the lentil-based dishes and meatballs. Thaw slowly in the fridge and reheat, adding a splash of liquid if needed.
Q: What are the best staples to stock for gluten-free meals that keep you full?
A: Think: legumes, gluten-free grains like quinoa and barley substitutes, leafy greens, nuts and seeds, eggs, dairy or dairy-free substitutes, and robust spices to make quick meals taste big.
Final Thoughts
If your week feels like a tug-of-war between hunger and gluten restrictions, you’re not alone. These 10 gluten-free meals are designed to fill you up, fuel your day, and spark joy at the table. They’re not just about avoiding gluten; they’re about embracing flavor, texture, and comfort without unnecessary complexity. Try one tonight and another tomorrow—you’ll notice the difference in energy, digestion, and the simple delight of a truly satisfying bite. Welcome to the club of meals that stay with you, not just meals that taste good in the moment.
Now that you’ve got these in your arsenal, which one will you tackle first? Seriously, pick a vibe: comforting bowls, crispy proteins, or a one-pan dream. I’m rooting for you to mix, match, and create your week of fullness with zero gluten-based compromises. You’ve got this, and your appetite will thank you.
Printable Recipe Card
Want just the essential recipe details without scrolling through the article? Get our printable recipe card with just the ingredients and instructions.