From that first bite, you’ll know what all the fuss is about. Japanese honey toast is basically a cloud of bread, a drizzle of sweet glory, and enough texture to make your teeth work for joy. If you haven’t tried it yet, you’re missing out on a dessert that feels like a warm hug from the kitchen fairy.
What is Japanese honey toast, anyway?
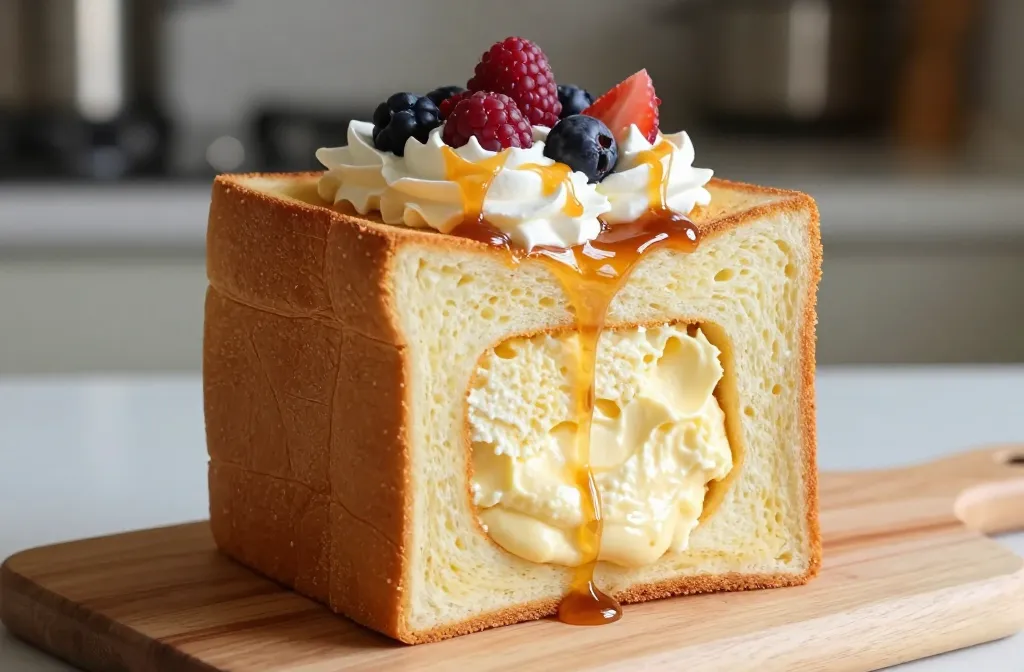
If you’ve never heard of it, imagine a thick block of bread squared into warm cubes, hollowed out, and stuffed with creamy fillings, then crowned with fresh fruit, whipped cream, and a glossy honey glaze. It’s part toast, part pudding, part dessert theater. The result is impossibly soft on the inside, slightly crisp on the outside, and endlessly customizable. IMO, it’s what happens when bakers marry brunch energy with dessert swagger.
How to make it at home: the basics
Getting this right isn’t about fancy equipment; it’s about technique and patience. You’ll probably need a bread loaf, a few bowls of filling, and a little time to let everything set.
Crack the bread code
– Choose a soft, fluffy loaf with good structure. Japanese milk bread (shokupan) is ideal, but brioche or Japanese-an Pan can work in a pinch. – Slice a thick opening: cut out the inner portion, leaving a sturdy shell. Don’t go too deep, or you’ll end up with a hollow tub instead of a toast block. – Tear the inner bits into chunks and toast them lightly in a pan to dry them out a touch and build flavor.
Fill that cavity with personality
– Classic cream: thick whipped cream or custard. If you’re feeling fancy, mix in a little vanilla bean paste. – Fruit: strawberries, kiwi, mango, berries—whatever’s in season and Instagram-worthy. – Extras: chocolate shards, matcha drizzle, caramel threads, or a dusting of powdered sugar.
The drizzle and the final flair
– Honey is the star, but you can mix in a touch of maple or condensed milk for depth. – A glossy glaze on top not only looks amazing, it keeps things moist. A light brush of honey butter can also work wonders.
Tips for best results
– Use room-temperature ingredients. Cold cream tends to separate and ruin the dream consistency. – Don’t overfill the toast blocks. You want a nice balance of structure and ooze. – Let the assembled toast rest for a few minutes. It helps the flavors meld and the bread firm back up a bit after you poke at it.
Ingredient swaps you’ll thank me for
– Dairy-free: coconut cream whipped with a splash of vanilla works surprisingly well. – Sugar-free-ish: use a natural sweetener with a similar sweetness profile, but beware of moisture changes in the bread. – Gluten-free: there are solid gluten-free breads that hold up when you hollow them out, but the texture shifts—manage expectations and lean into the creaminess.
Pro tips
– Timing is everything. Bake or toast the bread just enough to get a light crust. You want that bite, not a brick. – Layer flavors. Try a subtle matcha cream or a lemon curd to cut the sweetness. – presentation matters. A drizzle of honey or syrup in a zigzag pattern makes the dish look professional without any fuss.
Common mistakes
– Over-saturating the bread with liquid. It turns soggy and sad. – Skimping on the cream. A hollow shell feels less luxurious. – Neglecting texture variety. If every bite is sweet, it gets old fast.
– Soft center: achieved by a gentle fill and minimal toasting after assembly. – Crisp exterior: achieved by lightly toasting the bread before hollowing and filling.
FAQ
Q: Can I make Japanese honey toast ahead of time?
Best enjoyed fresh, but you can prep the components ahead. Assemble just before serving to keep the texture right. If you must prep, store fillings separately and reassemble right before eating.
Q: Is honey necessary?
Not strictly, but it’s the signature touch. If you skip it, add a syrup you love and a pinch of salt to mimic that glossy finish and depth.
Q: Can I cook the toast a bit longer for extra crunch?
Yes, but watch closely. A touch more toasting adds crunch, but you’ll lose some tenderness in the middle.
Q: What’s the best fruit pairing?
Seasonal, juicy fruit wins every time. Strawberries and mango are a crowd-pleaser, while kiwi adds a zippy tang for balance.
Serving ideas and presentation
– Plate with a splash of fruit coulis or a berry sauce to add color and acidity. – Dust powdered sugar just before serving for a pretty finish. – Serve with a side of vanilla yogurt or a light custard for dipping.
Food safety and storage
– Keep dairy fillings chilled until serving, especially in warm weather. – Consume within a day for best texture; bread can dry out if left too long. – If you’re making multiple servings, assemble and chill portions separately, then toast briefly before serving.
Conclusion
If you haven’t treated yourself to honey toast yet, you’re missing a little edible theater. It’s cozy, playful, and endlessly adaptable. IMO, the joy is in the tiny decisions—the toast’s tenderness, the cream’s thickness, the fruit’s brightness. So go on, pick your fillings, drizzle your honey, and savor that moment when everything comes together in one glorious bite. FYI, you’ll want seconds.
Disclosure: This post may contain affiliate links.
If you make a purchase through these links, I may earn
a small commission at no extra cost to you.
prab chahal
Hi, I’m Prabjot Chahal – the heart (and taste buds) behind this blog!
Food has always been my love language – from experimenting with family recipes to discovering unique flavors from around the world. I believe that cooking isn’t just about following a recipe, it’s about creating moments, sharing stories, and connecting with others over something delicious. Through this blog, I want to build a vibrant food community where we share more than just recipes – we share inspiration, tips, and the joy of making and enjoying good food together. Whether you’re here for quick weekday dinners, festive treats, or creative seasonal ideas, you’re part of this table. So grab a fork (or a whisk!) and let’s cook, bake, and share our love for food – one recipe at a time.


")
")


")