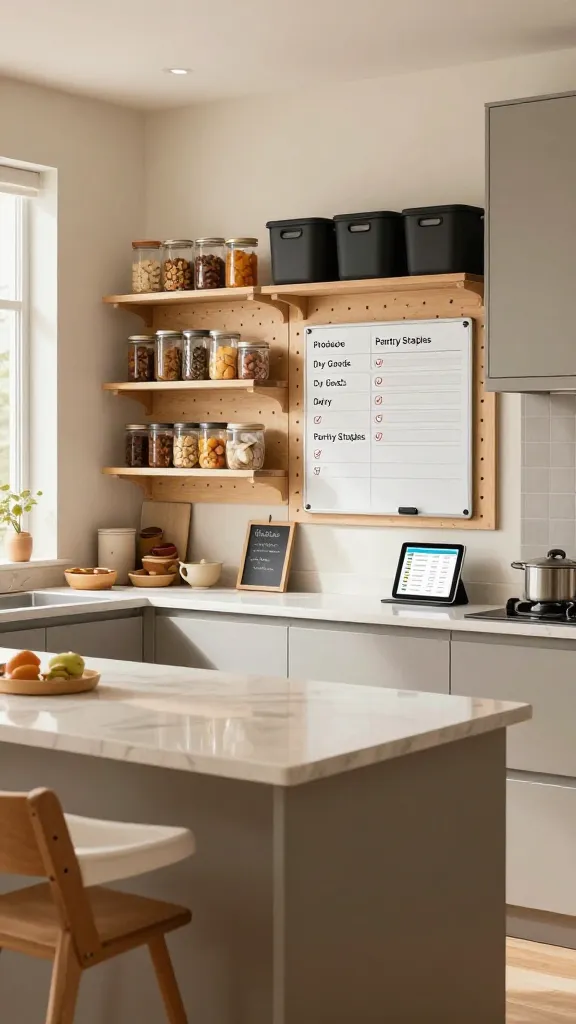
Picture this: you’re standing at the kitchen counter the week before Thanksgiving, trying to prep a massive menu while a stray garlic press hides behind a stack of recipe magazines and your cutting board has a coffee mug ring that’s never gone away. The problem isn’t your cooking skills; it’s your space trying to accommodate more than it can handle. Every shelf you pull out to make room reveals another item you forgot you owned, another container that’s decades old, and another imperfection in the layout that makes every task take longer than it should. A Fall Kitchen Reset isn’t about adding more stuff or buying fancy organizers. It’s about removing the clutter that gets in your way, reclaiming real estate you didn’t know you had, and setting up a system that actually works when the oven is on and the timer is ticking. If you want a practical, budget-conscious plan that fits small apartments, rental kitchens, and busy households, you’ll find it here—step by deliberate step, problem by problem.
1) Create a “Use First” Zone for Frequently Forgotten Ingredients
A. The Problem
Every holiday season, you find yourself chasing after the same forgotten ingredients—spices you never use daily, open bags of flour that went stale, or that one can of pumpkin puree you swear you’ll bake with “someday.” These items clutter higher shelves, get pushed to the back of the cabinet, or get hidden by larger containers. The result: extra steps, wasted time, and twice-baked stress during a time-crunched cooking window.
B. Why It Happens
We often store frequently used items in the most inconvenient places (back corner of a deep cabinet, or on a shelf that’s hard to reach). Seasonal ingredients also drift into odd spots because they’re pulled out only during holiday baking, then forgotten for months.
C. The Fix
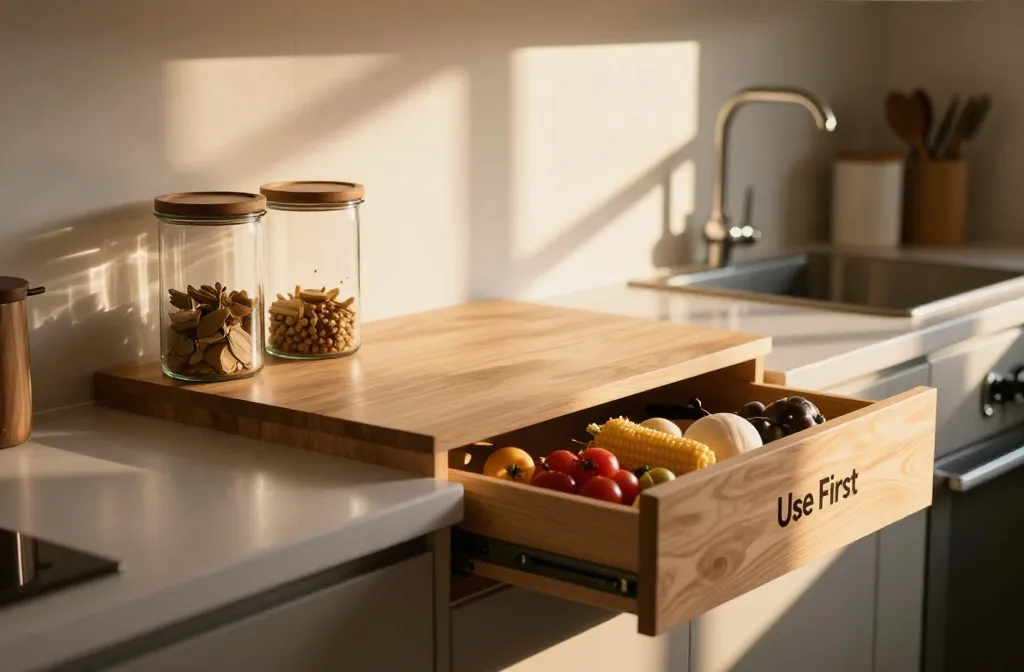
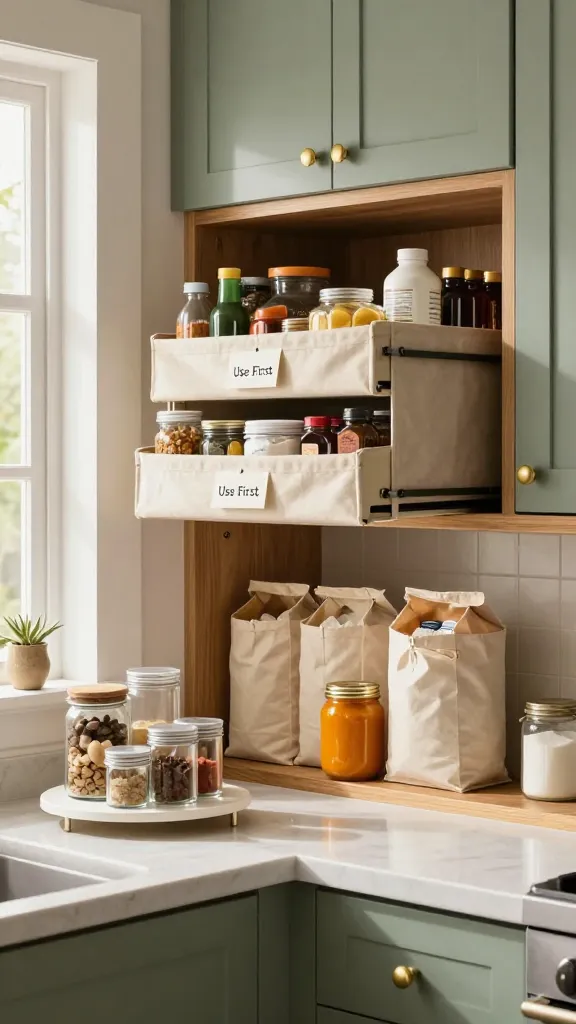
Allocate a dedicated, clearly labeled “Use First” zone—ideally within easy reach and near the prep zone. This is not the pantry’s glamorous showcase; it’s the workhorse area that holds items you’ll grab in the heat of cooking.
Clear a 6–12 inch-wide strip on a pullout shelf, a lazy Susan, or the front of a cabinet. This becomes your Use First zone.
Place 6–12 items there that you reach for weekly or during holiday prep (salt, pepper, garlic powder, onion powder, cinnamon, nutmeg, pumpkin pie spice, oil, a small jar of flour, sugar, and vanilla extract).
Keep a small card or a label that lists “Use First” items so everyone in the house uses the same zone.
Rotate monthly: glance at items that haven’t moved in 6 weeks and consider relocating them to standard storage.
E. Real-Life Consideration
Small spaces: use a slim pullout or a shallow bin so you don’t block cabinet doors. Renters: avoid drilling; use a magnetic strip or adhesive hooks to keep the Zone visible. Budget: a simple wire rack or a small plastic turntable often costs less than $15 and makes items visible at a glance.
F. Common Mistake
Keeping the Use First zone too small or too cluttered—leading to the exact problem you’re trying to fix: items forgotten or buried.
G. Better Alternative
Make Use First a two-minute daily check: when you unload groceries, verify this zone is stocked, and remove anything that’s past its prime or rarely used. A quick rotation every month keeps it efficient without extra effort.
2) Fix Deep Pantry Shelves So Food Doesn’t Disappear in the Back
A. The Problem
Deep shelves are great for maximizing space but terrible for visibility. You can bury essential staples behind cereal boxes and tall jars, forcing you to pull out half the shelf every time you need something.
B. Why It Happens
Depth invites “out of sight, out of mind” behavior. People prioritize neatness over accessibility, assuming that uniform stacking looks tidy, even if it’s not functional.
C. The Fix
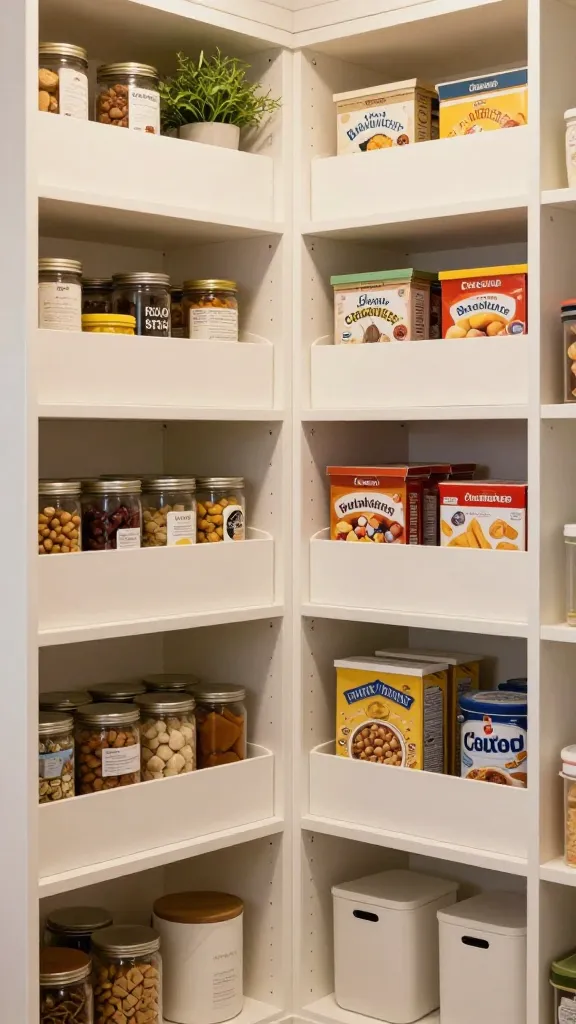
Create several shallow sub-zones within deep shelves. Reorganize so that the most-used items sit at the front 6–8 inches of the shelf; rarely used items live in the back.
D. How to Do It
Remove everything from a shelf and sort into: daily-use, occasional-use, and rotate-for-season items.
Install adjustable shelf risers or use commercially available shelf organizers to create 2–3 shorter layers per shelf.
Place the most-used items (pasta, rice, canned tomatoes, broths) within the front third, at eye level if possible.
Use clear labeling on the front of each sub-zone so you don’t have to move items to find them again.
E. Real-Life Consideration
Small spaces: maximize vertical stacking using risers; don’t block the cabinet swing with bulky items. Apartments: choose adjustable organizers that don’t require permanent installation. Renters: if you can’t install shelves, use a set of bin dividers on a single shelf to break space into visible zones.
F. Common Mistake
Overcrowding the front layer with too many items, which defeats the purpose and makes it harder to see what’s back there.
G. Better Alternative
Label and rotate with a quarterly schedule: every three months, review the back items; if you haven’t touched them, consider relocating or donating. A simple chute or tiered insert can do wonders without expensive changes.
3) Make Room for Holiday Baking Without Buying More Storage
A. The Problem
Your bakeware and specialty ingredients multiply during the fall, and you’re left with no room for mixing bowls, sheet pans, candy molds, or holiday cookie sheets. Storage that was designed for everyday use suddenly feels like a siege when you add pile-ons for the holidays.
B. Why It Happens
Baking is a seasonal activity that creates a temporary spike in items you only use a few times a year. Many kitchens don’t have a built-in system to handle seasonal equipment without a full-time commitment.
C. The Fix
Create a dedicated, semi-permanent seasonal zone that’s rotated in and out. The goal is to keep your daily bakeware accessible but still free up the space you need for holiday prep.
D. How to Do It
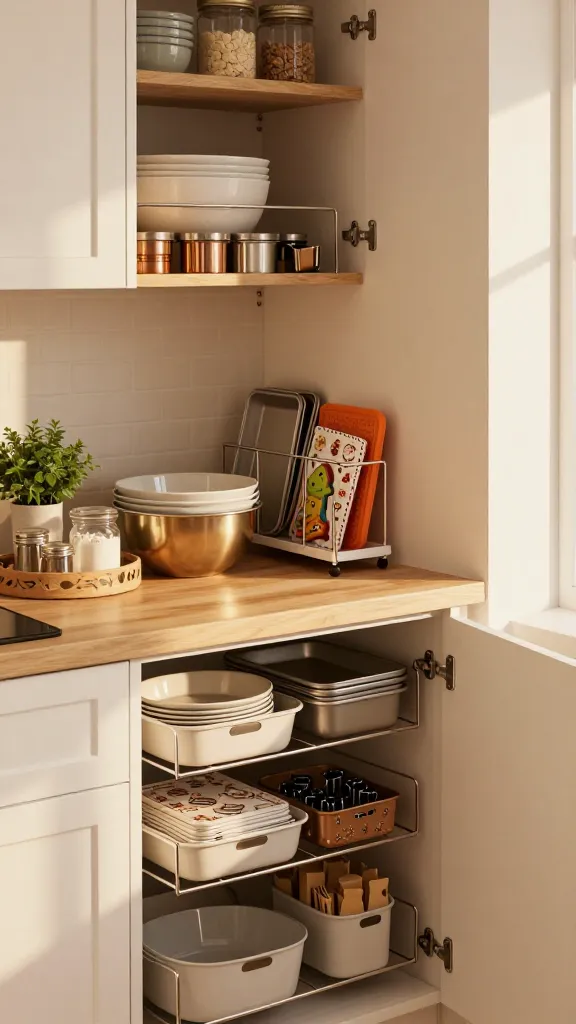
Identify your true daily-use bakeware (two mixing bowls, a whisk, a muffin tin, a small sheet pan) and relocate them to the most accessible area.
Choose a two-bin seasonal system: a “Fall/Winter” bin for holiday-specific bakeware and ingredients, and a “Parked Seasonal” shelf near the stove so you can grab what you need without digging.
Label the Seasonal bin with a simple schedule: mid-October to early January, then rotate out.
If you’re short on countertop space, store heavier pans vertically in a shallow bin or a slim magazine rack for easy pull-out access.
E. Real-Life Consideration
Small-space kitchens: use wall-mounted racks or magnetic strips for frequently used pans; avoid deep drawers that require emptying to reach items.
F. Common Mistake
Trying to store everything in a single cabinet; seasonal items then become impossible to track and leads to duplicate purchases.
G. Better Alternative
Adopt a rotating seasonal plan: when a season ends, move items to a labeled back shelf or a tote that slides under a bed or in a closet. This keeps the kitchen uncluttered without sacrificing readiness.
4) Stop Duplicate Grocery Purchases With a Simple Inventory Zone
A. The Problem
You buy the same items twice because you can’t remember what’s in stock, especially when you’re juggling a long shopping list and a hungry family at the checkout line.
B. Why It Happens
Multiple trips, noisy aisles, and kid distractions create mental clutter. The result is “I forgot I bought this already” every week.
C. The Fix
Establish a minimal, durable inventory system visible to everyone who uses the kitchen. This helps you see what you already have before you shop.
D. How to Do It
Set up a simple inventory board on the inside of a cabinet or a whiteboard on the fridge side that lists core items: flour, sugar, oil, canned tomatoes, stock, spices, and baking extracts.
Each item gets a quick count—empty, low, plenty. Use magnets or a dry-erase marker for easy updating.
Do a quick weekly check (10 minutes) before grocery trips to adjust counts and note items you used up.
Keep a one-shelf “shopping list” on the board that you update as you run low, so you don’t forget items mid-week.
E. Real-Life Consideration
Small spaces: a single magnetic notepad on the fridge saves wall space. Renters: a lightweight whiteboard can be moved with you if you change kitchens. Budget: dry-erase markers are cheap and reusable, so you don’t need fancy software to stay organized.
F. Common Mistake
Gazette-like lists that aren’t updated; they become decorative and useless after a week.
G. Better Alternative
Make it a habit: every grocery trip includes a 2-minute inventory scan that updates counts and flags items to add to the shopping list. That cadence makes a real difference during busy weeks.
5) Create a Clear, Accessible “Use-Now” Zone for Seasonal Needs
A. The Problem
Seasonal items like pumpkin puree, cinnamon sticks, or nutmeg are essential during fall holidays but often live in hard-to-reach spots, leading to oversights or last-minute runs to the store.
B. Why It Happens
Seasonal items are often stored with other non-seasonal items to save space, but that creates a friction point when you need them immediately.
C. The Fix
Designate a compact, clearly labeled zone for seasonal items at eye level near your primary prep area.
D. How to Do It
Choose a shallow bin or a small shelf that’s easily visible from your prep space.
Put 6–8 seasonal items there; rotate them as you rotate your menu (e.g., pumpkin puree, canned pumpkin, cinnamon sticks, cloves, allspice, vanilla, brown sugar, and an extra bag of flour).
Put a simple note on the refrigerator door listing current seasonal items and a quick “use by” check for freshness (common items spoil faster than you think).
E. Real-Life Consideration
Small spaces: a single pull-out basket near the stove can hold all seasonal items without blocking cabinet doors. Renters: reuse existing storage furniture with a small bin labeled “Seasonal” to avoid duplicating storage. Budget: a single-tier acrylic organizer keeps items visible and affordable.
F. Common Mistake
Overstuffing the seasonal zone with rarely used items or duplicating multiple seasonal items that get overlooked.
G. Better Alternative
Rotate seasonally in this zone only; store backup items elsewhere. This keeps the zone lean and highly usable when you need it most.
6) Declutter Your Counter-Top Decision Tree
A. The Problem
Counter space is the kitchen’s most valuable real estate. When it’s crowded with gadgets, small appliances, and weekly grocery deliveries, you lose a critical work surface exactly when you need it most.
B. Why It Happens
Counter clutter grows gradually as you add “useful” items for quick tasks, then forget they exist when you don’t use them daily.
C. The Fix
Decision-tree decluttering for counters: keep only items that are used 4–5 times per week or help with current seasonal cooking. Everything else goes into a labeled cabinet or storage bin.
D. How to Do It
List items currently on the counter: toaster, coffee maker, blender, fruit bowl, utensil caddy, knife block, decorative items.
Rank them by weekly use. Remove anything you don’t use at least 4 days a week for the last month.
Relocate the rest to a cabinet, drawer, or a nearby shelf. If you truly use one item occasionally, store it in a labeled bin so it’s not hidden but not in the way.
E. Real-Life Consideration
Small spaces: a single under-sink or top-door storage bin can hold most counter-essentials you’re not using daily. Renters: avoid heavy equipment; keep the essentials plugged and ready in a small, organized space. Budget: a slim, dedicated tray and two accessory jars cost less than $20 and dramatically reduce clutter.
F. Common Mistake
Moving essential items into drawers and cabinets without considering accessibility; you end up crawling under the sink at 5 a.m. to grab a whisk.
G. Better Alternative
Adopt a cycling approach: rotate counter items based on your current menu, rather than a fixed “always-on” setup. This ensures you keep the counter clear during peak cooking weeks.
7) Tidy the Fridge and Freezer Without Turning Your Kitchen Into a Lab
A. The Problem
A disorganized fridge leads to wasted food, confused expiration dates, and a scramble when you’re half-way through a recipe and can’t find what you need.
B. Why It Happens
Things are placed where they fit rather than in logical zones (dairy, produce, proteins). There’s no easy way to see what’s stored in the back, especially in smaller fridges with awkward layouts.
C. The Fix
Introduce a simple fridge zoning plan and a rotate system so items are moved to the front as you use them.
D. How to Do It
Define zones: upper fridge for ready-to-eat items, lower shelves for meats and dairy, door for condiments, crisper for produce.
Use clear, shallow containers for leftovers with date labels, and store perishables in front of longer-lasting items so you see them first.
Create a quick front-facing inventory: a small whiteboard magnet on the fridge that lists what’s in each zone and what’s low or close to expiry.
E. Real-Life Consideration
Small spaces: use adjustable shelves in the fridge to create more front-facing visibility. Renters: check your fridge’s interior for tall items that must be stored in the door; avoid blocking vents. Budget: inexpensive clear bins and magnets can transform visibility quickly.
F. Common Mistake
Ignoring expiration dates and relying on “looks fine” as a test; this leads to food waste and a rushed, last-minute menu change.
G. Better Alternative
Schedule a 5-minute weekly fridge check: rotate items to front, discard expired products, and note items that need restocking. A small habit, big impact.
8) Reimagine the Cooktop and Workspace for Easy Cleaning
A. The Problem
During holiday cooking, splatters and spills create a daily fight between cleaning and cooking. A cluttered cooktop area slows you down and creates a messy workflow that’s hard to fix mid-recipe.
B. Why It Happens
Lack of designated landing space for hot pots, or a non-functional layout that forces you to move pans around the stove to reach ingredients.
C. The Fix
Define a clean, uncluttered cooktop zone with a small, dedicated landing pad and a simple cleanup routine that fits within your kitchen’s real-world usage.
D. How to Do It
Keep only essential items within arm’s reach of the stove (oil, salt, pepper, spatula, tongs). Move the rest to a nearby cart or cabinet.
Use a small, heat-resistant mat or trivet near the stove as a designated landing pad for hot pots, preventing surface mess.
Create a 2-minute wipe routine after each cooking session—wipe the surface, replace items, and wipe any splatters from the back of the stove.
E. Real-Life Consideration
Small spaces: install a slim fold-down shelf to keep frequently used items within reach without encroaching on counter space. Renters: avoid permanent counter changes; use a rolling cart as a mobile workspace. Budget: a damp cloth, a spray bottle, and a simple tray are enough to start.
F. Common Mistake
Overloading the stove with extra gadgets because you think you’ll use them; the result is a messy, hard-to-clean surface.
G. Better Alternative
Limit hardware around the cooktop to items you actually reach for weekly; store everything else in a nearby cabinet or cart, so the cooking zone stays clean and efficient.
9) Consolidate Spices and Flavors for Easy Access
A. The Problem
Spices become a black hole: jars topple, labels fade, and you can’t quickly answer whether you have ground cinnamon or whole cloves without a scavenger hunt.
B. Why It Happens
We accumulate jars over time, store them in different places (pantry, spice drawer, lazy Susan), and forget to re-check expiration dates or to consolidate duplicates.
C. The Fix
Consolidate spices into a single, clearly labeled, easy-to-navigate zone and create a rotation plan that matches your fall cooking.
D. How to Do It
Gather all jars and labels; discard duplicates or stale spices (if in doubt, sniff and check the date).
Choose a shallow, wide container that holds 1–2 layers of jars for quick visibility. Clear jars help you see quantities.
Group by use: sweet spices (cinnamon, nutmeg, allspice), savory (garlic powder, onion powder, paprika), and baking essentials (vanilla, cocoa).
Label with a simple calendar-based rotation: “Use by” date on outside and a small color dot by category for quick scanning.
E. Real-Life Consideration
Small spaces: a compact magnetic spice tins rack on the cabinet door saves space and keeps items visible. Renters: use a shake-proof spice container system that you can move as needed. Budget: repurposing small jars with uniform labels is cheaper and still efficient.
F. Common Mistake
Overbuying spices you never use because you didn’t track what’s already in the cabinet; you end up with a dozen jars that sit idle.
G. Better Alternative
Keep a short spice list that aligns with your fall and holiday menu. When you see a gap, update a single shopping trip rather than stocking up all at once.
10) Streamline Canned Goods Without Losing Flexibility
A. The Problem
Pantry cans accumulate behind others, and you can’t see what’s there until you pull dozens of items out. The result is spoiled items and excess purchases that go unseen until it’s too late.
B. Why It Happens
Vertical stacking makes it hard to notice specific items, and the use-by dates blend into the label design on many cans.
C. The Fix
Create a live, front-facing system for canned goods; every time you shop, ensure the front row shows what you’ll actually use in the next 2–3 weeks.
D. How to Do It
Sort cans by category (soup, tomatoes, beans, veggies) and then by date with the soonest-to-expire in front.
Install a shallow can rack or use a pull-out organizer in a lower cabinet so you can see the front-row items without moving others.
Keep a one-line “front list” on a whiteboard or fridge that notes two weeks of planned meals with corresponding canned items.
E. Real-Life Consideration
Small spaces: use a slim can dispenser on a cabinet shelf to maximize visibility without consuming extra width. Renters: a freestanding shelf with a front-facing bin is portable and cheap. Budget: simple wire racks are highly effective and inexpensive.
F. Common Mistake
Trying to reuse a deep drawer for cans; it’s hard to see what you have and leads to duplicates and waste.
G. Better Alternative
Pick a dedicated low, front-facing shelf for canned goods and keep only what you’ll actually use in the next three weeks in that spot.
11) Reframe the Cleaning Supplies Area for Holiday-Ready Ready
A. The Problem
Cleaning supplies creep into kitchen spaces, taking away space you need for food prep and making the kitchen look chaotic—even when you’re close to hosting.
B. Why It Happens
We hoard cleaning supplies under the sink or in a utility closet, and when holiday cooking ramps up, you need access to a handful of items in the kitchen itself without sacrificing food safety.
C. The Fix
Create a compact, clearly organized maintenance station that lives near the kitchen but not in the main prep zone—so cleaning is quick and non-disruptive.
D. How to Do It
Use a small caddy or bin for dish soap, sponge, degreaser, and a microfiber cloth. Place it near the sink or a side cabinet.
Keep a separate list on the inside of the cabinet door noting where extra paper towels, trash bags, and oven cleaning supplies live.
During holiday cooking, do a 2-minute wipe-down after every major task so the mess doesn’t compound.
E. Real-Life Consideration
Small spaces: a wall-mounted caddy frees up counter space. Renters: a suction cup or over-the-door organizer can hold sprayers and brushes without drilling. Budget: a small bin and a reusable microfiber cloth go a long way.
F. Common Mistake
Stashing cleaning supplies in the hottest prep zone; you’ll end up crossing the kitchen during cooking and risking spills on your ingredients.
G. Better Alternative
Separate cleaning tools from food prep by a small barrier—either a dedicated cabinet or a pull-out organizer—so you can work smoothly without a constant sweep of clutter.
12) Create a Sustainable No-Frustration Recycling and Compost Clip
A. The Problem
Recycling and composting bins often get in the way or aren’t used consistently, which creates mess and increases daily friction during holiday prep.
B. Why It Happens
These bins end up in inconvenient corners or are too small to handle a high-volume season. People forget to empty and sort, causing cross-contamination and clutter.
C. The Fix
Put a compact, clearly labeled system in a predictable corner so it’s easy to use and maintain during busy weeks.
D. How to Do It
Use a small dual-bin system (recyclables and compost) under a sink or on the back of a cabinet door.
Label each bin and place a tight lid on both to minimize odor and spills.
Develop a weekly drop-off routine—e.g., after Sunday prep, you empty the bins into the exterior recycling and compost containers.
E. Real-Life Consideration
Small spaces: a compact, dual-bin unit mounted under the sink works well. Renters: choose a bin that can be tucked away when guests visit. Budget: a simple plastic bin with a lid does the job without a premium price.
F. Common Mistake
Not emptying the bins regularly; you end up with overflow and spills in a hurry when the oven timer is buzzing.
G. Better Alternative
Make it a routine: incorporate a weekly 5-minute bin check into your cooking day plan so you always stay tidy without extra effort.
13) Implement a Practical Inventory-Based Shopping Rule
A. The Problem
Shopping purely on impulse often leads to overbuying or missing essential items mid-cook, especially during the busy holiday season.
B. Why It Happens
Impulse shopping is fueled by an unstructured approach to supply; if you don’t know what you need, you’ll buy what’s in front of you.
C. The Fix
Use a concrete, minimal shopping rule: only buy what you’ve planned when the plan correlates with your inventory and the week’s meals.
D. How to Do It
Write a weekly meal plan that uses the items you already have as a baseline.
Create a 1-page shopping list that only includes items you are out of or about to run out of, confirmed by your inventory board.
Stick to the list and avoid adding “nice to have” items unless they’re on sale or very useful for a particular recipe.
E. Real-Life Consideration
Small spaces: rely on a small, whiteboard list so you don’t need to pull a wall of papers. Renters: keep the sheet in a cabinet that travels with you. Budget: a single-page week-long plan keeps costs predictable and limits waste.
F. Common Mistake
Letting the “maybe I’ll use it someday” items sneak back in; you’ll end up with a maze of extraneous products and less usable storage.
G. Better Alternative
Practice a monthly “season reset” where you review your inventory and prune items that haven’t been used in two seasonal rotations.
14) Establish a Simple Maintenance Rhythm That Sticks
A. The Problem
Even the best reset fails if you don’t keep it up. A messy kitchen during Thanksgiving week is not the time to implement a new system; you’ll revert to old habits out of sheer necessity.
B. Why It Happens
You think a one-and-done decluttering will last forever, but real life has constant changes—menus, guests, and meals shift weekly.
C. The Fix
Define a practical maintenance rhythm that you can actually sustain through the fall season and beyond. A few minutes a day can keep things stable.
D. How to Do It
Set a 10-minute daily reset: return items to their designated spots, wipe surfaces, and do a quick inventory check.
Weekly 15-minute refresh: review the Use First zone, rotate seasonal items, and adjust for any upcoming cooking needs.
Monthly 30-minute deep dive: reassess zones, measure space usage, and simplify any stubborn areas that still feel crowded.
E. Real-Life Consideration
Small spaces: split maintenance into micro tasks you can do in under a minute. Renters: tie maintenance to a routine you already perform (e.g., after dinner). Budget: schedule a 15-minute monthly “decision” session to prevent buildup.
F. Common Mistake
Over-scheduling maintenance and then skipping it, which creates a backlog and backsliding into old habits.
G. Better Alternative
Make maintenance a built-in part of your cooking workflow: a quick 3-step routine every day (clear, wipe, and return) to cement the habit.
15) Decide What Stays Accessible During Holiday Cooking
A. The Problem
When holiday cooking hits peak intensity, you want certain tools within arm’s reach. Too many items left out leads to overcrowded counters and slower cooking.
B. Why It Happens
We often try to keep too many “important” tools out instead of designating a few critical ones for hands-on use during the busiest days.
C. The Fix
Identify a core set of 6–8 tools you must have out during holiday cooking and store the rest compactly elsewhere. The goal is clarity and speed, not a showroom of gadgets.
D. How to Do It
List your primary tools by task: prepping (knife, cutting board, peeler), cooking (spatula, tongs, spoon rest), baking (rolling pin, mixer, silicone mats, measuring cups).
Place these tools in a dedicated, shallow tray or caddy on the counter or an easily accessible drawer near the prep area.
Store the rest in a well-litted cabinet or cart that can be rolled to the room you’re working in on busy days.
E. Real-Life Consideration
Small spaces: a compact rotating caddy keeps the essential tools organized and within reach. Renters: use a freestanding organizer with a handle you can move around the kitchen. Budget: a sturdy plastic or metal caddy is cheaper and more durable than fancy organizers.
F. Common Mistake
Trying to keep too many specialized tools accessible; you end up juggling items while cooking, increasing the chance of mistakes.
G. Better Alternative
Adopt a lean, task-based toolkit: only the tools you actually use during the holidays stay out; everything else goes away until the next season.
Conclusion
A Fall Kitchen Reset isn’t a one-time purge; it’s a practical, repeatable system that respects real homes—small kitchens, rental spaces, busy households, and modest budgets. By removing what creates friction, reorganizing for actual use, and establishing simple maintenance habits, you gain a kitchen that works with you during the most demanding season. Start with one zone today—perhaps the Use First shelf or the front-facing fridge inventory—and build from there. The goal isn’t perfection; it’s making your kitchen reliably easier to cook in when the calendar fills up. Take the first 20 minutes this week to start the reset, and let the rest follow naturally as you prepare for holiday cooking with confidence.
Frequently Asked Questions
Frequently Asked Questions
How do I know what to remove first? Start with items that block the most-used prep areas or hide in back corners. If you can’t access something without moving three other items, remove or relocate it to a less disruptive spot.
What if I don’t have a deep pantry or a lot of storage? Focus on making the front-most zones incredibly efficient. Use shallow bins and risers to maximize visibility and accessibility, and keep a small seasonal bin near your primary prep area so you’re never reaching for the wrong thing.
When should I implement a maintenance routine? Begin now with a 10-minute daily reset and a 15-minute weekly refresh. Build up to a monthly deep-dive; this cadence makes the system sustainable for holidays and beyond.
Internal Linking Opportunities (suggested) – how to organize a small kitchen – fall cleaning checklist – small pantry storage ideas – pantry inventory system for families – removing clutter in a rental kitchen Final Note This article presents practical, real-world solutions tailored for U.S. homes with limited space and varied layouts. Each section addresses a distinct problem with a concrete fix, step-by-step implementation, and real-life considerations to ensure usability in apartments, small homes, or rental spaces. The focus remains on actionable, budget-conscious strategies that improve daily cooking flow during the Fall and holiday season without turning your kitchen into a showroom.
Disclosure: This post may contain affiliate links.
If you make a purchase through these links, I may earn
a small commission at no extra cost to you.
prab chahal
Hi, I’m Prabjot Chahal – the heart (and taste buds) behind this blog!
Food has always been my love language – from experimenting with family recipes to discovering unique flavors from around the world. I believe that cooking isn’t just about following a recipe, it’s about creating moments, sharing stories, and connecting with others over something delicious. Through this blog, I want to build a vibrant food community where we share more than just recipes – we share inspiration, tips, and the joy of making and enjoying good food together. Whether you’re here for quick weekday dinners, festive treats, or creative seasonal ideas, you’re part of this table. So grab a fork (or a whisk!) and let’s cook, bake, and share our love for food – one recipe at a time.