If your joints creak after a long day, you’ve got a gluten-free life that doesn’t have to feel like a compromise. You deserve meals that soothe, satisfy, and spark joy—without all the guesswork or boring textures. These 10 anti-inflammatory gluten-free recipes are your new favorite rotation: bright, cozy, and proudly practical. FYI, you’ll likely notice your cravings shift from “whatever’s easy” to “whatever sounds amazing.” Trust me, your body will thank you, and your taste buds will high-five you behind your backline of spices. Ready to upgrade weeknights and weekend brunches without sacrificing flavor? Let’s dive in and let the pantry-friendly magic begin.
Note: Each recipe below is crafted to keep inflammation in check with nutrient-dense ingredients like turmeric, ginger, leafy greens, berries, healthy fats, and protein-rich legumes or seafood. We’m keeping gluten out but flavor in, big time. We’ll start with a comforting plate you can crave and end with something so vibrant you’ll forget you were ever worried about gluten-free meals. Are you excited yet? Good—that’s the vibe we’re going for.
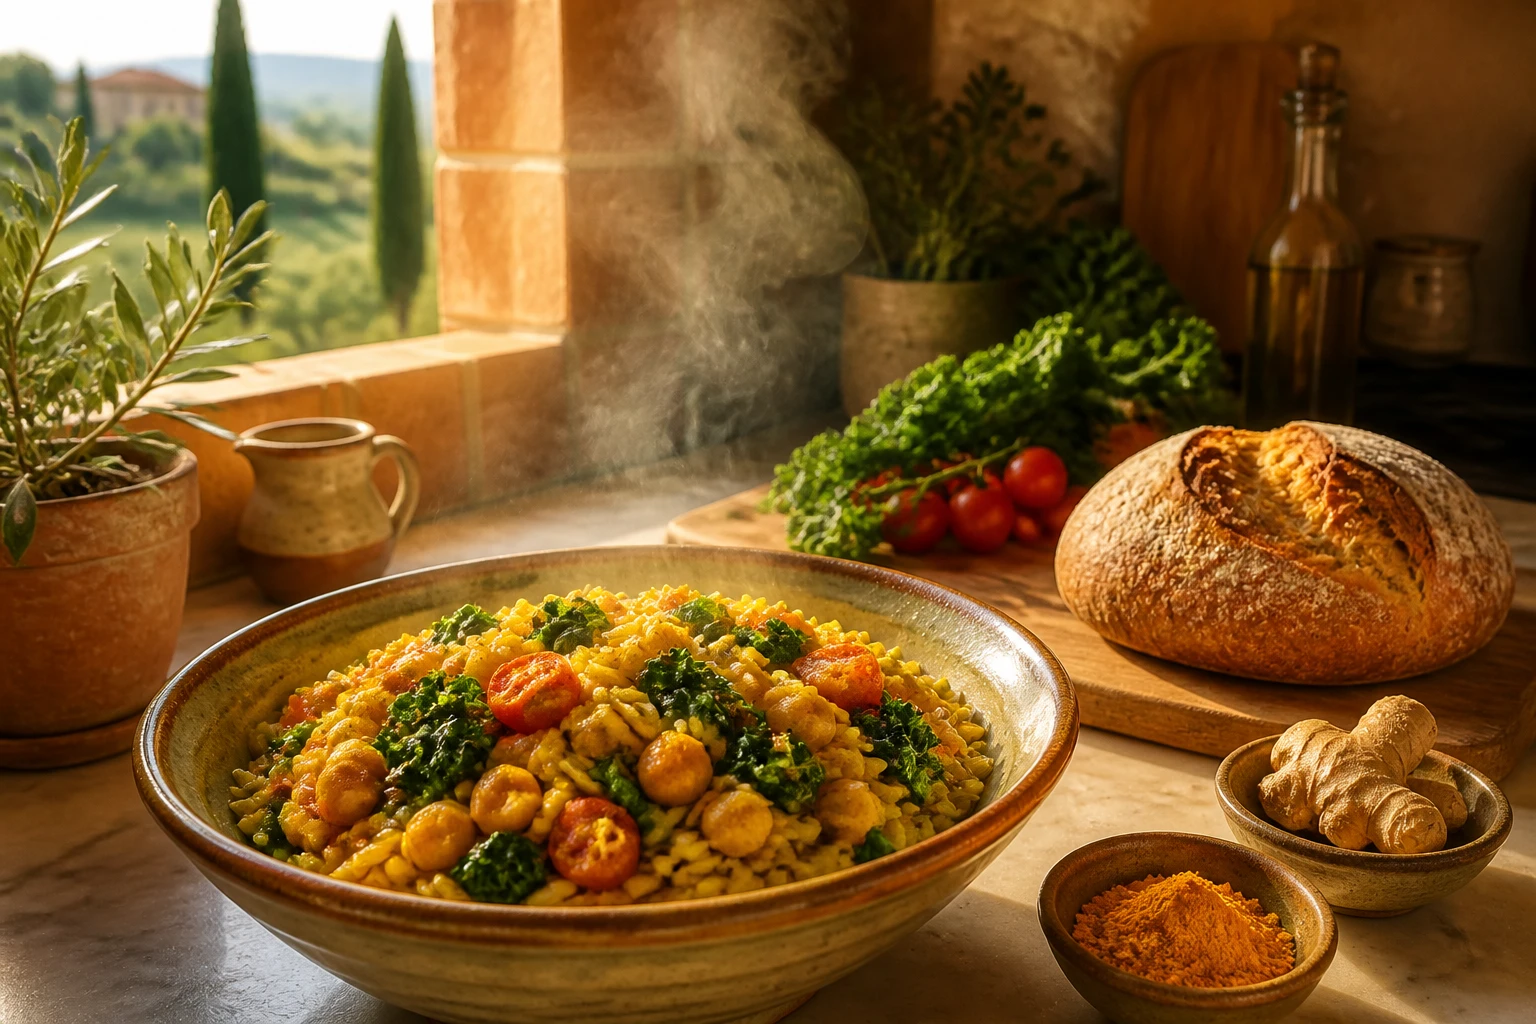
1. Tuscan Sun-Zested Chickpea Orzo With A Turmeric Twist
Picture a sunlit kitchen in a small Tuscan town, the kind of place where a simple pasta dish becomes a memory. This version swaps traditional gluten-containing orzo for chickpea orzo, so you get that bite and chew you crave without the gluten fog. The turmeric brings a warm glow to every forkful, while olive oil, lemon zest, and salty capers dance in harmony. It’s comfort with a brightness that makes it feel like a vacation you can take every weeknight.
You’ll love how the chickpea orzo stands up to toss-ins and the way the lemony brightness cuts through the earthiness of turmeric. It’s the kind of dish that makes you say, “I could eat this all week.” The textures—al dente pasta, creamy beans, and crisp kale—play really nicely together. And yes, it’s surprisingly filling without weighing you down.
Why You’ll Love It
High-protein chickpea base keeps you full longer
Bright lemon and turmeric flavors feel uplifting, not heavy
Vibrant color makes weeknight dining feel special
Gluten-free friendly with accessible ingredients
Great as a main or a hearty side
Make-ahead friendly for meal prep
Ingredients
8 oz chickpea orzo
1 cup canned chickpeas, rinsed
2 cups baby kale, chopped
1/2 cup cherry tomatoes, halved
2 tbsp extra-virgin olive oil
1 garlic clove, minced
1/2 tsp ground turmeric
1/4 tsp red pepper flakes (optional)
1 lemon, zested and juiced
1/4 cup grated Parmesan (optional for non-vegan)
Salt & pepper to taste
Instructions
Bring a pot of salted water to a boil and cook chickpea orzo according to package instructions until al dente. Reserve 1/2 cup of pasta water.
Meanwhile, in a large skillet, warm olive oil over medium heat. Add minced garlic and turmeric; sauté 30 seconds until fragrant.
Add cherry tomatoes and cook for 2–3 minutes until they just start to blister.
Toss in kale and chickpeas; cook until kale wilts and greens look glossy, about 3–4 minutes.
Drain orzo and add to the skillet. Pour in reserved pasta water to loosen and help emulsify the sauce.
Stir in lemon zest and juice, red pepper flakes (if using), and Parmesan. Season with salt and pepper to taste.
Cook for another minute, allowing flavors to meld and the mixture to come together into a glossy finish.
Remove from heat and taste for brightness; adjust salt or lemon as needed.
Pro Tips
Use warm pasta water to help the sauce emulsify instead of adding extra oil.
Can swap kale for spinach or arugula for a peppery bite.
Toast the turmeric in oil for 20 seconds before adding aromatics to boost flavor.
Store leftovers in a sealed container for up to 3 days; reheat gently.
Easy Variations
Add smoked paprika for a smoky depth.
Stir in crumbled feta for a tangy finish.
Top with toasted pine nuts for extra crunch.
Mistakes To Avoid
Overcooking the orzo; it should stay pleasantly firm.
Letting the garlic burn; it becomes bitter quickly.
Pouring in too much lemon at once; taste gradually.
Serving Ideas
Pair with a crisp green salad and a glass of Chardonnay or a chilled sparkling water with cucumber. This makes a light, satisfying dinner that still feels special.
The What Surprised Me Most About This Recipe
That turmeric can be the star without tasting medicinal. The lemon zest lifts everything in a way you don’t expect from a gluten-free pasta dish.
The Secret Ingredient Nobody Expects
Parmesan, when used sparingly, binds the flavors and adds a gentle savoriness that makes the dish feel richer than it is.
Why This Recipe Works Better Than Most Versions
It balances protein, greens, and citrus in every bite, while the gluten-free pasta holds its shape beautifully with the chickpeas and vegetables.
Let the kale wilt a touch longer so it develops a silky texture that contrasts nicely with al dente pasta.
The Biggest Mistake People Make
Thinking a gluten-free pasta cooks exactly like regular pasta; it doesn’t. Expect a firmer bite and adjust cooking time accordingly.
Serving Ideas
Top with extra lemon zest and a drizzle of olive oil right before serving for an extra zing. This shines as a lunch leftovers remix too.
2. Ginger-Scented Salmon Over Quinoa Crunch
Imagine a weekend-by-the-sea vibe, where salmon flakes kiss bright quinoa and a ginger-lime glaze keeps things zippy. This dish is all about balance: omega-3 richness from salmon, the nutty chew of quinoa, and a glaze that tastes like sunshine. It’s easy to scale up for guests, and the flavors stay punchy even after a quick reheating.
It’s also a life-saver when your joints want to remind you who’s boss but your stomach still wants a party. The ginger helps with digestion, while the glaze gives you a glossy, glossy finish. Seriously, it’s a crowd-pleaser that’s also smart eating.
Why You’ll Love It
High-quality protein that’s quick to cook
Gluten-free and naturally dairy-free in this version
Quinoa provides a satisfying texture and extra protein
Ginger-lime glaze gives a bright, clean finish
Leftovers taste even better the next day
Ideal for a weeknight dinner or a quick lunch
Ingredients
4 salmon fillets (6 oz each)
1 cup quinoa, rinsed
2 cups water or low-sodium broth
1 tbsp olive oil
1 inch fresh ginger, grated
2 garlic cloves, minced
1/4 cup low-sodium soy sauce or tamari
2 tbsp honey or maple syrup
Juice of 1 lime
1 lime, sliced for garnish
1/4 cup chopped fresh cilantro
Salt and pepper to taste
Instructions
Rinse quinoa and simmer in water or broth until fluffy and the surface shows little germ rings, about 15 minutes. Fluff with a fork.
While quinoa cooks, heat olive oil in a skillet over medium heat. Add ginger and garlic; sauté 1–2 minutes until fragrant.
Add soy sauce and honey; simmer to create a glossy glaze. Remove from heat and stir in lime juice.
Pat salmon dry, season with salt and pepper, and sear skin-side down in a hot skillet until skin is crisp, about 4–5 minutes. Flip and cook 2–3 minutes more until just cooked through.
Divide quinoa among plates, top with salmon, and spoon glaze over the fish. Garnish with cilantro and lime slices.
Serve immediately for best texture, or pack for a crunchy lunch the next day.
Pro Tips
For a thicker glaze, reduce a bit longer on low heat.
Quinoa can be swapped for brown rice if you prefer a heavier bite.
Keep salmon moist by not overcooking; it should flake with a gentle press.
Easy Variations
Honey-mueño glaze with a touch of sesame oil for an Asian twist.
Top with toasted sesame seeds for extra crunch.
Use cod or halibut if salmon isn’t your jam.
Mistakes To Avoid
Over-reducing the glaze, which makes it too sweet or sticky.
Searing salmon on too low heat; you’ll miss the crisp skin.
Not rinsing quinoa; it can taste bitter if left dirty.
Serving Ideas
Pair with a cucumber-dill salad for a refreshing counterpoint. A light white wine like Sauvignon Blanc or a sparkling water with lime keeps the flavors clean and bright.
The What Surprised Me Most About This Recipe
That a simple glaze can transform everyday salmon into something that feels restaurant-worthy without effort.
The Secret Ingredient Nobody Expects
A splash of fish sauce in the glaze heightens umami without making it fishy.
Why This Recipe Works Better Than Most Versions
The quinoa base adds texture and protein, making the dish feel substantial without heaviness.
Reader Favorite Tip
Let the salmon rest for a minute after cooking; it reabsorbs juices for a moister bite.
The Biggest Mistake People Make
Over-salting the glaze; balance is key since soy sauce is salty on its own.
Serving Ideas
Drop a few microgreens on top for color and a peppery finish.
3. Turmeric-Golden Lentil Soup That Warms You From The Inside Out
Where I live, soup is a language. This lentil soup speaks fluently in turmeric, cumin, and smoky paprika. It’s thick enough to feel comforting, yet bright enough to wake you up on a chilly afternoon. Lentils hand you a protein hug while the coconut milk smooths the edges, so it’s friendly to gluten-free souls and dairy-sensitive palates alike.
Serving it with a squeeze of lemon and a handful of cilantro brings a little summer into a winter bowl. The aroma alone can lure you from the couch—seriously, you’ll want to pour a bowl before you even turn the burner off. If you’re batching for the week, this soup freezes beautifully, which is a major win for busy folks who still want flavor.
Why You’ll Love It
One-pot wonder with minimal cleanup
Protein-packed lentils make it hearty
Turmeric is anti-inflammatory and mood-lifting
Coconut milk adds creaminess without dairy
Good for make-ahead lunches
Discounts on leftovers—flavors deepen overnight
Ingredients
1 cup red lentils, rinsed
1 medium onion, diced
2 carrots, diced
2 garlic cloves, minced
1 tsp ground turmeric
1/2 tsp cumin
1/2 tsp smoked paprika
1 can (14 oz) coconut milk
4 cups vegetable broth
1 tbsp olive oil
Salt and pepper to taste
Fresh cilantro and lemon wedges for serving
Instructions
Heat olive oil in a pot over medium heat. Add onion and carrots; sauté until softened, about 5 minutes.
Stir in garlic, turmeric, cumin, and paprika; cook 1 minute until fragrant.
Add lentils, coconut milk, and vegetable broth. Bring to a boil, then reduce to a simmer.
Simmer 25–30 minutes until lentils are creamy and the soup thickens slightly.
Season with salt and pepper to taste. If you like a thinner soup, add a splash more broth.
Blend lightly with an immersion blender if you want extra creaminess, or leave as-is for texture.
Serve with cilantro and a squeeze of lemon for brightness.
Pro Tips
Red lentils break down nicely; don’t worry about mushy texture—this is intentional.
A touch of lemon zest at the end brightens the earthy lentils.
Store in the fridge up to 4 days or freeze in portions.
Easy Variations
Stir in spinach at the end for a leafy green boost.
Use curry powder instead of paprika for a mellower warmth.
Top with roasted chickpeas for extra crunch.
Mistakes To Avoid
Over-thickening; lentils absorb liquid as they sit, so don’t overcook initially.
Undercooking the onions; you’ll miss the base flavor.
Using bland broth; invest in a flavorful stock.
Serving Ideas
Pair with a simple arugula salad dressed in lemon and olive oil. A warm naan or gluten-free flatbread on the side gives you dipping joy without guilt.
The What Surprised Me Most About This Recipe
How the coconut milk makes the soup feel velvety and restaurant-worthy without any dairy cream.
The Secret Ingredient Nobody Expects
A pinch of cinnamon in the spices brings a surprising depth to the overall profile.
Why This Recipe Works Better Than Most Versions
The balance of spice and creaminess makes it comforting yet vibrant, perfect for a gloomy day.
Reader Favorite Tip
Finish with a drizzle of high-quality olive oil for a gloss and extra flavor.
The Biggest Mistake People Make
Skipping the lemon; brightness prevents the soup from tasting flat.
Serving Ideas
Pair with a crispy gluten-free pita to soak up every last drop.
4. Cardamom-Blueberry Bliss Overnight Oats For Calm Mornings
Morning meals that don’t bounce you into a sugar crash exist, and this is one of them. Creamy oats meet antioxidant-rich blueberries with a hint of cardamom to perk up the senses. It’s the kind of breakfast you want to hug before the coffee hits. And it’s gluten-free, of course, so your gut stays peaceful as you tackle the day ahead.
Texture lovers, rejoice: the contrast between creamy oats and juicy berries is a sensation, and the fridge-cold bite adds a refreshing twist. This recipe is easily portioned for the week, which means less morning chaos and more confident sips of your coffee as you plan your day. Who doesn’t want that?
Why You’ll Love It
No-cook prep that saves mornings
Antioxidant-packed blueberries for inflammation control
Cardamom adds a surprising, comforting aroma
Gluten-free and dairy-friendly
Perfect make-ahead breakfast or snack
Customizable toppings keep things interesting
Ingredients
1 cup gluten-free rolled oats
1 cup almond milk (or any milk of choice)
1/2 cup blueberries (fresh or frozen)
1 tbsp chia seeds
1/2 tsp ground cardamom
1 tbsp maple syrup (optional)
1/2 tsp vanilla extract
1/4 cup chopped walnuts or almonds (optional)
Instructions
In a mason jar or bowl, combine oats, almond milk, chia seeds, cardamom, vanilla, and maple syrup. Stir well.
Fold in blueberries and nuts if using. Seal with a lid or cover.
Chill in the fridge overnight or at least 6 hours.
In the morning, give it a good stir and add a splash more milk if needed.
Top with extra blueberries or a drizzle of honey for a morning pep, and enjoy.
Grab-and-go breakfast that tastes indulgent but is actually good for you.
Pro Tips
Use frozen blueberries to ensure color and flavor pop in the morning.
Adjust sweetness with maple syrup after tasting; not everyone wants dessert-level sweetness at sunrise.
Toast nuts for extra crunch right before serving if you have time.
Easy Variations
Swap blueberries for sliced strawberries and a pinch of lemon zest.
Add a spoonful of almond butter for extra richness.
Use Greek yogurt mixed in for a creamy texture (omit if dairy-free).
Mistakes To Avoid
Overloading with fruit; it can water down the oats.
Not stirring enough in the first mix; you’ll get clumps of dry oats.
Using hot liquid in step one—let it sit to prevent curdling the oats.
Serving Ideas
Top with a sprinkle of cinnamon and a few extra chopped nuts for a crunchy finish. This is a stand-in dessert energy boost when you need it.
The What Surprised Me Most About This Recipe
How a no-cook breakfast can feel like a dessert with the right fruit and spices.
The Secret Ingredient Nobody Expects
A tiny pinch of salt enhances sweetness and rounds out spices.
Why This Recipe Works Better Than Most Versions
It’s balanced in texture and flavor, with the chia adding a silky mouthfeel that makes the oats feel luxurious rather than stodgy.
Reader Favorite Tip
Make a big batch and portion into jars for a quick grab-and-go week.
The Biggest Mistake People Make
Stirring in fruit in the morning can lighten the oats too quickly; mix and chill overnight, then top at serving time.
Serving Ideas
Pair with a side of Greek yogurt or a warm chai for a cozy morning routine.
5. Coconut-Curry Shrimp Stir-Fry With Basil & Bell Pepper Crave
You know that first bite that makes you pause mid-scoop and say, “Oh yes, we’re doing this again soon”? That’s this dish. Succulent shrimp, creamy coconut, and a kiss of curry mingle with bright basil and crunchy peppers. It’s fast, it’s vibrant, and it hits the anti-inflammatory notes with ginger, garlic, and healthy fats. This is your express lane to dinner champions status.
Fresh herbs lift the dish, while a hint of lime drives the brightness home. The gluten-free crowd will rejoice because this tastes like comfort food that doesn’t taste like you compromised. Bonus: it’s easy to scale up for guests or repurpose into a lunchable bowl the next day.
Why You’ll Love It
Speedy weeknight supper under 30 minutes
Rich coconut curry without dairy overload
Bright basil adds garden-fresh aroma
Shellfish protein with anti-inflammatory spices
Stacks well with quinoa or cauliflower rice
Allergen-conscious and gluten-free
Ingredients
1 lb shrimp, peeled and deveined
1 tbsp olive oil
1 red bell pepper, sliced
1 small onion, sliced
2 garlic cloves, minced
1 tbsp fresh ginger, grated
1 can (14 oz) coconut milk
1 tbsp curry powder
1 tsp turmeric
1/2 cup fresh basil, torn
Juice of 1 lime
Salt to taste
Instructions
Pat shrimp dry and season lightly with salt. Sauté in a hot wok or skillet with olive oil until pink, about 2 minutes per side. Remove and set aside.
In the same pan, toss in onion and pepper; sauté until crisp-t tender, 3–4 minutes.
Add garlic and ginger; cook 30 seconds until aromatic.
Stir in curry powder and turmeric; toast 1 minute to bloom the spices.
Add coconut milk; simmer 4–5 minutes to thicken slightly.
Return shrimp to the pan, toss with the sauce, and heat through. Stir in basil and lime juice.
Season with salt to taste and serve over rice, quinoa, or cauliflower rice.
Pro Tips
Don’t overcook shrimp; it turns rubbery quickly.
Use full-fat coconut milk for creaminess; light will thin the sauce.
Finish with a fresh squeeze of lime right before serving for extra zing.
Easy Variations
Swap shrimp for firm tofu to keep it vegetarian.
Try a spoon of peanut butter for a richer Thai-style gloss.
Add mushrooms for extra earthiness.
Mistakes To Avoid
Over-braising the peppers; you want a crisp-tender bite.
Skimping on basil; it’s the aroma fingerprint of this dish.
Letting the sauce split; maintain gentle simmer and stir often.
Serving Ideas
Serve with jasmine rice or cauliflower rice for a gluten-free base. A cold glass of sparkling sake would be life-changing here, IMO.
The What Surprised Me Most About This Recipe
How the coconut milk becomes a velvety canvas that makes the curry feel lush without heaviness.
The Secret Ingredient Nobody Expects
A pinch of white pepper to lift the flavors subtly without heat.
Why This Recipe Works Better Than Most Versions
The balance between bright lime, fragrant basil, and creamy coconut creates a comforting dish that still feels light on inflammation- speaking grounds.
Reader Favorite Tip
Prep all veggies beforehand; this meal comes together in a flash when you’re ready to cook.
The Biggest Mistake People Make
Adding sauce to the pan after shrimp cook; do it in the same pan to keep those gorgeous browned bits for depth.
Serving Ideas
Top with extra basil and a few sesame seeds for texture. A side of quick-pickled cucumber would be a refreshing contrast.
6. Roasted Garlic-Parmesan Cauliflower Steaks With Herb Chimichurri
Cauliflower steaks are a thing, and when you elevate them with garlic, parmesan (optional), and a zippy herb chimichurri, they become an event. This is the face of “gluten-free can be glamorous” in your kitchen. The aroma from roasting garlic turns the whole house into a cozy bistro, and the herb chimichurri pops like confetti on every bite. It’s a crowd-pleaser that still respects your inflammation-friendly goals.
Texture is the name here: crisp edges, tender centers, and that peppery, bright chimichurri doing a victory lap across the plate. It’s vegetarian-friendly and can be easily turned vegan by omitting parmesan or swapping in nutritional yeast. Seriously, this dish looks like a triumph and tastes like a celebration.
Why You’ll Love It
Impressive “steak” presentation from a humble veggie
Roasted garlic brings deep, nutty sweetness
Herb chimichurri adds brightness and herbaceous lift
Gluten-free and low in carbs
versatile for main or side dish
Make-ahead roasting for meal planning
Ingredients
1 large head cauliflower, sliced into 1/2-inch steaks
2 tbsp olive oil
2 garlic cloves, minced
1/4 cup grated Parmesan (optional)
Salt and pepper to taste
2 cups fresh parsley, chopped
1/2 cup olive oil (for chimichurri)
1/4 cup red wine vinegar
1/2 tsp red pepper flakes (optional)
1 small shallot, finely chopped
Juice of 1/2 lemon
Instructions
Preheat oven to 425°F (220°C). Line a baking sheet with parchment.
Brush cauliflower steaks with olive oil, sprinkle with garlic, salt, pepper, and Parmesan if using.
Roast 20–25 minutes, flipping halfway, until edges are golden and centers are tender.
Meanwhile, combine chimichurri ingredients in a small bowl. Whisk until emulsified and bright.
Remove cauliflower from oven and plate. Spoon chimichurri generously over the steaks.
Finish with a final drizzle of olive oil and a squeeze of lemon juice.
Pro Tips
Let steaks rest 5 minutes before serving to reabsorb juices.
Parmesan adds depth, but it’s optional for dairy-free versions.
Feel free to add finely chopped capers for a briny kick.
Easy Variations
Top with chili flakes and lemon zest for extra zing.
Swap chimichurri with a bright cilantro-lime drizzle.
Serve with a garlicky yogurt sauce for creaminess (dairy option).
Mistakes To Avoid
Squeezing too much moisture from cauliflower; avoid soggy edges.
Overcooking the steaks; you want a crisp exterior and tender interior.
Not balancing garlic and pepper; too little can feel flat.
Serving Ideas
Pair with a simple cucumber salad and a glass of dry white wine to elevate the meal.
The What Surprised Me Most About This Recipe
How just a few aromatics completely transform a humble crucifer into a star of the show.
The Secret Ingredient Nobody Expects
A splash of lemon juice in the chimichurri right before serving brightens the entire platter.
Why This Recipe Works Better Than Most Versions
The presentational value and the punchy chimichurri make it feel gourmet without extra effort.
Reader Favorite Tip
Roast extra cauliflower florets for snacking while the main steaks bake; they’re irresistible.
The Biggest Mistake People Make
Trying to crowd the pan; give each steak space to crisp rather than steam.
Serving Ideas
Drizzle with an extra spoonful of chimichurri on the side for dipping, and enjoy!
7. Beet-Root Power Bowls With Tahini-Orange Drizzle
Beets bring that earthiness that somehow tastes uplifting when paired with citrus and sesame. This bowl is as much about texture as it is about color: ruby-red beets, black quinoa for a nutty bite, crisp arugula, and a creamy tahini-orange drizzle that brings everything together in a glossy finish. It’s a plant-forward powerhouse that doesn’t skimp on satisfaction.
The aroma here is a little peppery, a little citrusy, and a lot tempting. It’s perfect for meal-prep Sundays or a vibrant lunch at your desk where you still want to feel taken care of. It’s also a win for anti-inflammatory goals, thanks to beets, leafy greens, and sesame seeds’ healthy fats.
Why You’ll Love It
Colorful and nutrient-dense
Perfectly gluten-free and plant-forward
Tahini-orange drizzle is luxurious but light
Quinoa adds protein and texture
Works well for meal prep
Delicious enough to impress guests
Ingredients
2 medium beets, roasted and sliced
1 cup black quinoa, rinsed
2 cups water
4 cups arugula or mixed greens
1/4 cup roasted pistachios, chopped
1/4 cup feta crumbles (optional)
1 tbsp sesame seeds
Olive oil, salt, and pepper to taste
For Tahini-Orange Drizzle:
2 tbsp tahini
1 tbsp orange juice
1 tsp maple syrup
Water to thin to drizzling consistency
Instructions
Cook quinoa in water until fluffy, about 15 minutes; fluff and set aside.
Roast beets until tender; slice into rounds.
In a bowl, combine greens, quinoa, beets, and pistachios. Sprinkle feta if using.
Whisk tahini, orange juice, maple syrup, and enough water to reach a drizzleable consistency.
Drizzle tahini-orange over bowls and finish with sesame seeds and a splash of olive oil.
Season with salt and pepper to taste; serve immediately or chill for later.
Pro Tips
Roast beets ahead of time for quick assembly later in the week.
To soften the tahini drizzle, whisk with hot water gradually.
Use lemon instead of orange for a tangier variation.
Easy Variations
Swap quinoa with farro or brown rice for a different texture.
Replace feta with goat cheese for a tangy kick.
Add roasted chickpeas for extra protein and crunch.
Mistakes To Avoid
Over-dressing the greens; they’ll wilt and lose bite.
Too-thick tahini sauce; adjust with water gradually.
Over-salting from feta; check salt levels early.
Serving Ideas
Pair with a citrusy sparkling water or a light white wine like Pinot Grigio. A quick side of gluten-free pita triangles can turn this into a full-blown bowl party.
The What Surprised Me Most About This Recipe
How the tahini-orange drizzle tastes almost like a creamy sauce without any dairy chemistry going on.
The Secret Ingredient Nobody Expects
A tiny pinch of smoked paprika in the drizzle for a cozy, roasted-nutty finish.
Why This Recipe Works Better Than Most Versions
Because it’s a bowl that truly balances earthiness with bright citrus and a touch of crunch, so every bite feels intentional.
Reader Favorite Tip
Chill the assembled bowls overnight; the flavors mingle in a way you’ll notice immediately when you dig in.
The Biggest Mistake People Make
Adding too many toppings at once; pick 2–3 elements to keep the ensemble cohesive.
Serving Ideas
Top with microgreens and a squeeze of lemon for extra zing.
8. Soba-Free Zoodle Pad Thai With Crunchy Peanuts
You don’t need actual noodles to get that classic Thai crave. This gluten-free twist uses zucchini noodles (zoodles) to capture the satisfaction of pad Thai with all the anti-inflammatory benefits of peanuts, tamari, lime, and a hint of chili. It’s fast, fresh, and makes you feel like you just opened a tiny street-food stall in your own kitchen. The aroma alone will make you reach for chopsticks even if you were planning to eat with a fork.
Texture is the real star here: the crisp-tender snap of zucchini, the chewy rice noodles substitute, and the crunchy peanuts on top. The bright lime and tamari glaze wake up the taste buds, and the sesame oil keeps the whole dish glossy and enticing. It’s a bright reminder that gluten-free can still be a flavor fireworks show.
Why You’ll Love It
Low-carb, gluten-free noodle alternative
Peanut-lime-tamari umami glaze is addictive
Crunchy peanuts provide nice texture contrast
Very quick to put together
Kid-friendly and adult-approved
Great for meal prep with zoodles holding up
Ingredients
3 medium zucchinis, spiralized into noodles (zoodles)
8 oz rice noodles (optional for more traditional feel)
2 tbsp peanut butter
2 tbsp tamari or gluten-free soy sauce
1 tbsp lime juice
1 tbsp honey or maple syrup
1 tsp chili garlic sauce or sriracha (to taste)
2 garlic cloves, minced
1 tbsp sesame oil
1/4 cup chopped roasted peanuts
2 green onions, sliced
Instructions
If using rice noodles, cook according to package instructions; drain and set aside. If using only zoodles, skip to step 3.
Whisk together peanut butter, tamari, lime juice, honey, chili sauce, and a splash of water to thin as needed.
In a skillet, heat sesame oil over medium heat. Add garlic and sauté 30 seconds until fragrant.
Fold in noodles or zoodles; toss to coat with the sauce. Warm through 2–3 minutes.
Top with peanuts and green onions. Serve immediately with extra lime wedges on the side.
Optional: Toss in shredded carrot for color and extra crunch.
Pro Tips
Run zoodles through a quick cold-water rinse to stop them from becoming mushy.
If you’re sensitive to peanuts, sub with sunflower seed butter.
Balance the spice with extra lime or a touch of sugar if needed.
Easy Variations
Use a sesame-ginger sauce for a different flavor profile.
Add grilled chicken or tofu for a complete protein punch.
Sprinkle with sesame seeds for an extra crunch.
Mistakes To Avoid
Over-sauce the dish, making it soupy; keep it glossy but not watery.
Overcooking zoodles; they go limp quickly.
Using stale peanuts; it impacts flavor and texture.
Serving Ideas
Serve with lime wedges and a fresh herb salad on the side to brighten the plate. A light beer or a citrusy iced tea pairs nicely.
The What Surprised Me Most About This Recipe
How a gluten-free option can deliver the same comfort and flavor as a classic noodle dish without sacrificing texture.
The Secret Ingredient Nobody Expects
A few drops of toasted sesame oil at the end really makes the dish sing.
Why This Recipe Works Better Than Most Versions
The bright acidity, nutty richness, and crisp-tender zucchini create a satisfying contrast in every bite.
Reader Favorite Tip
Let it rest 5 minutes after cooking; flavors meld and the sauce thickens slightly.
The Biggest Mistake People Make
Skipping the lime; the acidity is essential to balancing the richness of peanut butter.
Serving Ideas
Garnish with extra chopped peanuts and scallions for a show-stopping finish.
9. Spinach-Artichoke Bake (Dairy-Optional) With Crunchy Gluten-Free Crust
Because sometimes you want a bake that feels cozy, indulgent, and surprisingly good for you all at once. This spinach-artichoke bake uses dairy-free options to keep it gentle on inflammation while still giving you that creamy, cheesy center you crave. The gluten-free crust provides a satisfying crunch, and the roasted garlic notes tie everything together in a hug of flavor. It’s a crowd-pleaser that still fits your anti-inflammatory goals.
Texture-wise, you’ll get a crisp edge with a creamy interior—perfect for dipping gluten-free toast or fresh vegetables. The aroma will lure anyone near the oven, including you, who forgot it was a weeknight and thought it was a special occasion. FYI, this is the dish you bring to a potluck and watch people gushing over. Seriously.
Why You’ll Love It
Creamy, indulgent flavor without dairy heaviness
Gluten-free crust offers satisfying crunch
Spins and artichokes are anti-inflammatory powerhouses
Can be made dairy-free with plant-based cheese
Beautiful as a main or a side dish
Easy to customize with kitchen staples
Ingredients
1 gluten-free pie crust (store-bought or homemade)
2 cups fresh spinach, chopped
1 can (14 oz) artichoke hearts, drained and chopped
1 cup dairy-free cream cheese or Greek yogurt
1/2 cup shredded mozzarella (or dairy-free cheese)
2 cloves garlic, minced
1 tbsp olive oil
Salt and pepper to taste
Optional: 1/4 cup grated Parmesan
Instructions
Preheat oven to 375°F (190°C). Blind bake crust for 8–10 minutes until lightly golden.
In a skillet, heat olive oil and sauté garlic until fragrant. Add spinach and wilt down.
Stir in artichokes and cream cheese (or yogurt) until smooth. Season with salt and pepper.
Pour filling into the crust, top with mozzarella and Parmesan if using.
Bake 15–20 minutes until cheese is bubbly and crust is crisp at edges.
Let rest 5 minutes before slicing for clean servings.
Pro Tips
Blind baking prevents soggy crust; don’t skip it.
Use a dairy-free cheese blend if avoiding dairy entirely.
Chop artichokes finely for even distribution.
Easy Variations
Add sun-dried tomatoes for a tangy pop.
Incorporate shredded chicken for a heartier bake.
Use kale instead of spinach for a stronger greens bite.
Mistakes To Avoid
Overfilling the crust; it leaks and sogs the base.
Not draining artichokes well; excess moisture ruins texture.
Under-seasoning; this dish needs a good savory punch.
Serving Ideas
Serve with a crisp cucumber-teta salad and a light citrus vinaigrette. It also pairs nicely with a glass of pinot grigio.
The What Surprised Me Most About This Recipe
How a simple dairy-free swap doesn’t compromise creaminess or indulgence.
The Secret Ingredient Nobody Expects
A pinch of nutmeg in the filling for a warm, unexpected note.
Why This Recipe Works Better Than Most Versions
The crust-to-filling ratio is perfect, giving you that comforting bake without feeling heavy or greasy.
Reader Favorite Tip
Toast crust edges for extra crunch before filling for a better texture contrast.
The Biggest Mistake People Make
Slicing too thick; you want neat portions that hold together when plated.
Serving Ideas
Pair with a bright arugula salad and a citrusy vinaigrette to cut richness.
10. Crispy Herb Salmon Cakes With Lemon-Dill Yogurt
There’s something about a well-formed salmon cake that feels like a little victory. These gluten-free cakes stay crispy on the outside thanks to a gentle crust of almond flour and herbs, while the interior remains juicy and flakey. The lemon-dill yogurt dressing keeps things tangy and refreshing—perfect for those days you need a meal that tastes like summer but calms inflammation with omega-3 richness.
It’s a weeknight dream and a weekend favorite in disguise: simple, flavorful, and adaptable to whatever greens you have in the fridge. The aroma of dill and lemon will lure everyone to the table, even your most stubborn pickle of a friend who claims gluten-free meals are boring. Spoiler: they aren’t anymore.
Why You’ll Love It
Gluten-free, pantry-friendly salmon cakes
Crispy exterior with a tender interior
Lemon-dill yogurt adds brightness without heaviness
High omega-3 fish support inflammation relief
Easy to freeze for quick future meals
Great as a main or a hearty sandwich filling
Ingredients
12 oz canned salmon, drained and flaked
1/2 cup almond flour
2 eggs, lightly beaten
2 tbsp chopped fresh dill
1/2 tsp Dijon mustard
1 lemon zest
Salt and pepper to taste
2 tbsp olive oil for frying
For Lemon-Dill Yogurt:
1/2 cup plain Greek yogurt (or dairy-free yogurt)
1 tbsp lemon juice
1 tsp fresh dill, chopped
Salt to taste
Instructions
In a bowl, combine salmon, almond flour, eggs, dill, Dijon, lemon zest, salt, and pepper. Mix until just incorporated; don’t overwork.
Form mixture into 6–8 patties of even size.
Heat olive oil in a skillet over medium heat. Fry salmon patties 3–4 minutes per side, until golden and crisp.
Meanwhile, whisk together yogurt, lemon juice, dill, and a pinch of salt for the sauce.
Remove cakes to a plate, let rest briefly, then serve with lemon-dill yogurt sauce.
Pair with a crisp salad or gluten-free toast for a complete meal.
Pro Tips
Chill patties before frying to help them hold shape; it’s worth the wait.
A touch of hot sauce in the yogurt elevates the dish if you want a kick.
Use a nonstick pan and enough oil to prevent sticking but avoid greasiness.
Easy Variations
Use canned tuna or cod for variations in texture.
Try a cilantro-lime yogurt for a fresh twist.
Make mini patties for sliders or appetizers.
Mistakes To Avoid
Not pressing the patties firmly; they crumble easily.
Too much almond flour makes them crumbly; balance is key.
Overcrowding the pan; gives you steaming instead of crisping.
Serving Ideas
Serve with a cucumber-tomato salad and a light vinaigrette. A side of roasted sweet potatoes makes this feel complete and comforting.
The What Surprised Me Most About This Recipe
That salmon cakes can be both comforting and elegant, with a bright yogurt sauce that never feels heavy.
The Secret Ingredient Nobody Expects
Fresh lemon zest folded into the salmon mix to brighten the fish before it hits the pan.
Why This Recipe Works Better Than Most Versions
The almond flour helps bind while adding a delicate nutty flavor, and the yogurt sauce brings a refreshing contrast.
Reader Favorite Tip
Serve with lemon wedges on the side for extra zing, and don’t forget a sprinkle of fresh dill on top.
The Biggest Mistake People Make
Overworking the salmon mixture; it tightens and becomes dense. Gentle touches yield fluffy, tender patties.
Serving Ideas
Pair with a lemon-scented arugula salad for a crisp, herb-forward plate.
Frequently Asked Questions
Are these recipes all gluten-free? Yes. Each recipe uses gluten-free ingredients and gluten-free pantry staples, with careful handling to avoid cross-contamination.
Can I make these dairy-free? Many recipes offer dairy-free variations, like the cauliflower bake and the curry shrimp, but some use yogurt or cheese for texture. You can swap with dairy-free substitutes without losing the integrity of the dish.
Do these meals taste “gluten-free” or suffer in flavor? Not at all. The recipes lean on anti-inflammatory spices and fresh aromatics to keep flavor vibrant and satisfying.
Can I prepare these ahead of time? Yes. Several recipes store well in the fridge or freezer, especially soups, baked dishes, and bowls. Plan to reheat gently to preserve texture.
What if I don’t have certain ingredients? Substitutions are encouraged. The core flavors—turmeric, ginger, citrus, herbs—shine through, even with substitutions.
Do I need special equipment? A blender or immersion blender is handy for soups; a spiralizer for zoodles helps, but you can use pre-cut veggie noodles as a substitute.
Are these meals budget-friendly? Absolutely. Ingredients are common pantry staples, with occasional premium items like salmon; you can scale according to your budget.
Will these help with inflammation? The recipes focus on anti-inflammatory ingredients like turmeric, ginger, leafy greens, and healthy fats. While individual responses vary, these foods support a balanced anti-inflammatory approach.
How long do leftovers last? Most dishes will keep 3–4 days in the fridge; soups and bowls often taste even better the next day as flavors mellow and meld.
Can I adjust spice levels? Yes. Start modestly and add more gradually, especially with peppers and chili sauces.
Are these kid-friendly? Many are; you can adapt spice levels and textures to suit younger palates, then reintroduce heat in adulthood.
What’s the best way to reheat these? Use gentle reheating on the stove or in a microwave with a splash of broth or water to keep moisture.
Where can I find more gluten-free anti-inflammatory recipes? This article is a starter. You can mix and match any ingredients above with your favorites and search for more variations online or in gluten-free cookbooks focused on anti-inflammatory ingredients.
Final Thoughts
You just loaded up 10 vibrant, gluten-free, anti-inflammatory recipes that taste unapologetically delicious. These aren’t “diet meals” hiding behind a bland banner—they’re crave-worthy, comforting, and built for real life. Start with one, but don’t be surprised if you end up looping through all ten in a single week, discovering new textures, aromas, and favorites. Trust me, your body and your taste buds will thank you as you cook, savor, and share.
If you’re feeling inspired, pick a couple this week and notice how your meals feel lighter, brighter, and more satisfying. Which recipe will become your go-to comfort in the gluten-free, anti-inflammatory rotation? Tell me in the comments—I’m dying to hear your flavor experiments and the little tweaks you discover along the way.
Printable Recipe Card
Want just the essential recipe details without scrolling through the article? Get our printable recipe card with just the ingredients and instructions.
Disclosure: This post may contain affiliate links.
If you make a purchase through these links, I may earn
a small commission at no extra cost to you.
prab chahal
Hi, I’m Prabjot Chahal – the heart (and taste buds) behind this blog!
Food has always been my love language – from experimenting with family recipes to discovering unique flavors from around the world. I believe that cooking isn’t just about following a recipe, it’s about creating moments, sharing stories, and connecting with others over something delicious. Through this blog, I want to build a vibrant food community where we share more than just recipes – we share inspiration, tips, and the joy of making and enjoying good food together. Whether you’re here for quick weekday dinners, festive treats, or creative seasonal ideas, you’re part of this table. So grab a fork (or a whisk!) and let’s cook, bake, and share our love for food – one recipe at a time.


")
")


")