Table of Contents
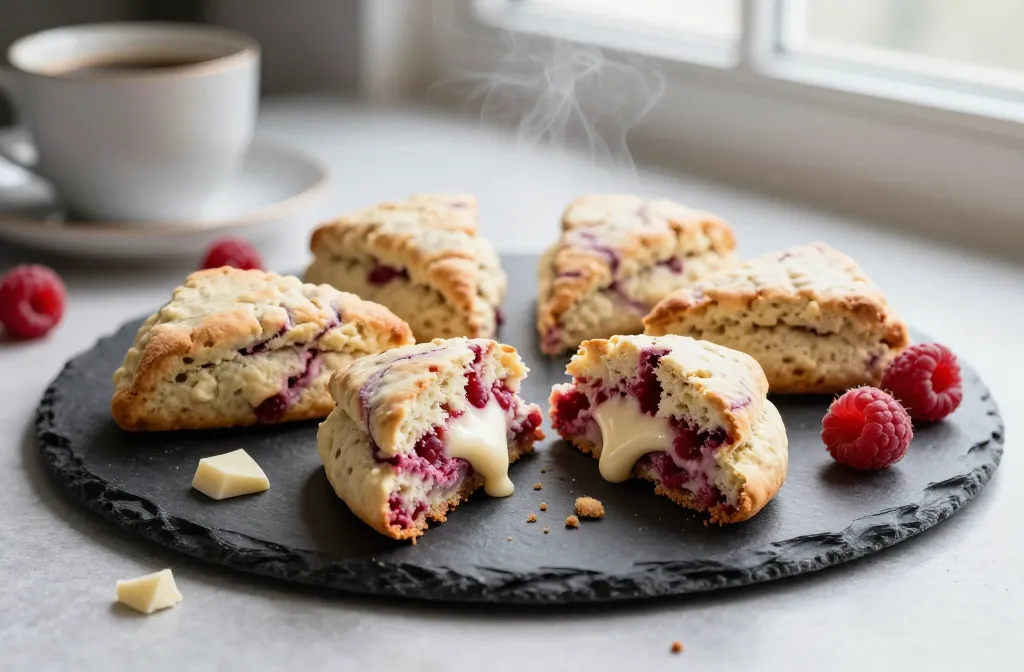
Picture this: It’s Friday night, your friends are coming over in two hours, and you promised dessert. Panic mode? Not anymore. These strawberry cheesecake jars saved me from a near-disaster last month, and honestly, they’ve become my secret weapon ever since.
I’m not a skilled baker—trust me, I’ve burned brownies from a box. But these no-bake strawberry cheesecake jars? They’re foolproof. No oven anxiety, no wondering if it’s “done,” and absolutely no sad, lopsided slices. Just gorgeous, individual servings that look like you spent hours in the kitchen (spoiler: you didn’t).
The best part? That satisfying moment when you dig through the layers—creamy cheesecake, sweet-tangy strawberries, and that perfectly crunchy biscuit base. It’s basically happiness in a jar.
Why Strawberry Cheesecake Jars Are Absolutely Genius
Look, I love regular cheesecake as much as the next person, but let’s be real about the downsides. There’s the whole “will it crack?” anxiety, the water bath situation, and then that awkward moment when you’re trying to cut clean slices and everything just… smooshes.
Mini strawberry cheesecake desserts solve all of that. Here’s why I’m obsessed:
Each person gets their own perfect portion—no debates about who got the bigger slice. The jars are naturally portion-controlled, which means you can enjoy dessert without that “I ate half a cheesecake” guilt. Plus, there’s zero slicing involved. Just grab a jar and a spoon, and you’re good to go.
Related Posts:

")
")


")
These layered cheesecake jars are incredibly versatile too. I’ve made them for birthday parties, brought them to potlucks, prepped them for a week of desserts (they keep beautifully in the fridge), and even packaged them as gifts. My sister gave them to her book club, and apparently, she’s now “the dessert person” in the group.
The visual appeal is unmatched. Those gorgeous, distinct layers photograph like a dream, which honestly matters when you want to show off a little on Instagram. But beyond social media, they just look impressive sitting on a dessert table.
What Makes This Strawberry Cheesecake Jars Recipe Different (And Better)
I’ve tried a lot of strawberry cheesecake in a jar recipes, and many were either too complicated or didn’t quite deliver on taste. This version is the sweet spot—literally and figuratively.
No oven required. I can’t stress this enough. If you’ve ever forgotten to preheat the oven or questioned whether your oven temperature is accurate, this recipe is for you. Everything comes together on the counter and in the fridge.
Ready in about 20 minutes of active work. Yes, there’s a chilling time, but the actual hands-on part is quick. I usually make these while catching up on a show, and before the episode ends, they’re in the fridge doing their thing.
Beginner-friendly in the truest sense. The first time I made these, I’d barely used a hand mixer before. If I can do it, genuinely, anyone can. There’s no tempering, no precise temperatures, no “fold gently 47 times” nonsense.
Customizable for dietary needs. Need them dairy-free? Vegan? Lower in sugar? Gluten-free? This recipe adapts beautifully, and I’ll walk you through all the swaps later.
The presentation factor alone makes these special. They look bakery-quality, the kind of dessert that makes people ask, “Where did you order these from?” Trust me, that never gets old.
Ingredients You’ll Need For Strawberry Cheesecake Jars(With Real-World Swaps)
Here’s what goes into these homemade strawberry cheesecake jars, broken down by layer. I’m including substitutions because I believe recipes should work with what you have, not send you on a scavenger hunt.
For the Biscuit Base:
- 200g digestive biscuits or graham crackers (about 14-16 biscuits)
- 80g melted butter or coconut oil
My notes: Digestive biscuits give a slightly less sweet base, which I prefer, but graham crackers work perfectly too. For a dairy-free version, coconut oil is your friend. I’ve even used melted vegan butter, and no one noticed the difference.
For the Cheesecake Filling:
- 400g cream cheese, at room temperature (this matters!)
- 120g powdered sugar (about ¾ cup)
- 2 teaspoons vanilla extract
- 300ml heavy whipping cream (chilled)
Substitution ideas: Half the cream cheese can be swapped for thick Greek yogurt if you want a tangier, lighter filling. For a lower-fat version, use light cream cheese (though the texture won’t be quite as rich). Vegan cream cheese works surprisingly well—just make sure it’s the brick kind, not spreadable.
For the Strawberry Layer:
- 300g fresh strawberries, hulled and chopped
- 60g sugar (or 3-4 tablespoons honey)
- 1 tablespoon lemon juice
Real talk: Fresh strawberries are ideal, but frozen work when fresh ones aren’t available or affordable. Just thaw them completely and drain excess liquid. I’ve made these in winter with frozen berries, and they were still delicious.
Optional Toppings (But Highly Recommended):
- Whipped cream for piping
- Fresh strawberry slices
- Crushed biscuits for texture
- Chocolate shavings (a little dark chocolate makes everything fancier)
- Fresh mint leaves
Healthier ingredient swaps I’ve tested: Using stevia or monk fruit sweetener instead of sugar works, though adjust to taste since they’re sweeter. Reduced-fat cream cheese is fine, just expect a slightly less creamy texture. For the base, gluten-free biscuits or even crushed nuts work beautifully. I made a version with almond flour and melted coconut oil once—totally different vibe, but really good.
Equipment You’ll Actually Use For Strawberry Cheesecake Jars
Good news: you probably have everything already.
- You’ll need mixing bowls (at least two),
- A hand whisk or electric mixer (electric makes life easier, but whisking by hand works if you’ve got the energy),
- A small saucepan for cooking the strawberries, and a sturdy spoon or spatula for mixing.
- The star of the show: glass jars or dessert cups. I use 8-10 ounce mason jars because they’re inexpensive, look cute, and have lids for storage.
- Small glass tumblers work too. Avoid anything too wide—the layering effect works best in taller, narrower containers.
Optional but nice: a piping bag or zip-top bag for neater filling layers, and a potato masher or fork for crushing biscuits.
Step-by-Step Recipe Instructions For Strawberry Cheesecake Jars (The Easy Way)

Alright, let’s make this happen. I’m walking you through this like I’m texting a friend who’s never made dessert before, because that was basically me.
Step 1: Make the Biscuit Base
- Take your digestive biscuits and crush them into fine crumbs. I put mine in a zip-top bag and go at it with a rolling pin—it’s surprisingly therapeutic. You want the texture of coarse sand, not powder, but no big chunks.
- Mix the crumbs with melted butter until they look like wet sand and hold together when you squeeze it.
- Divide this mixture between your jars—about 2-3 tablespoons per jar—and press it down firmly with the back of a spoon.
- Really pack it in there; this creates that satisfying crunch later.
Common mistake I made the first time: Don’t skip pressing it down. Loose crumbs make for a messy eating experience, and nobody wants that.
Step 2: Create the Strawberry Compote
- Chop your strawberries into small pieces and toss them into a saucepan with sugar and lemon juice.
- Cook over medium heat, stirring occasionally, until the strawberries break down and the mixture thickens—about 8-10 minutes. It should look jammy but still have some fruit chunks.
- Here’s the crucial part: let it cool completely. I mean fully to room temperature, or even stick it in the fridge. Using warm strawberry sauce will melt your cheesecake layer and create a soupy mess.
- I learned this the hard way, so you don’t have to.
Pro tip: Make this layer first, even before the base. That way, it has maximum time to cool while you prep everything else.
Step 3: Whip Up the Cheesecake Filling
- Make sure your cream cheese is soft—leave it out for 30-45 minutes beforehand. Cold cream cheese means lumps, and nobody wants to bite into a chunk of cream cheese.
- Beat the cream cheese with powdered sugar and vanilla until it’s smooth and creamy. In a separate bowl, whip your cold heavy cream until it forms soft peaks. This takes 2-3 minutes with an electric mixer.
- Now here’s the part that matters: gently fold the whipped cream into the cream cheese mixture. Use a spatula and make gentle scooping motions from the bottom up.
- You want to keep all that air you just whipped in—it’s what makes the filling light and mousse-like instead of dense.
My mistake early on: Over-mixing here. If you beat it hard, you’ll deflate the cream and end up with a flat, dense filling. Gentle is the name of the game.
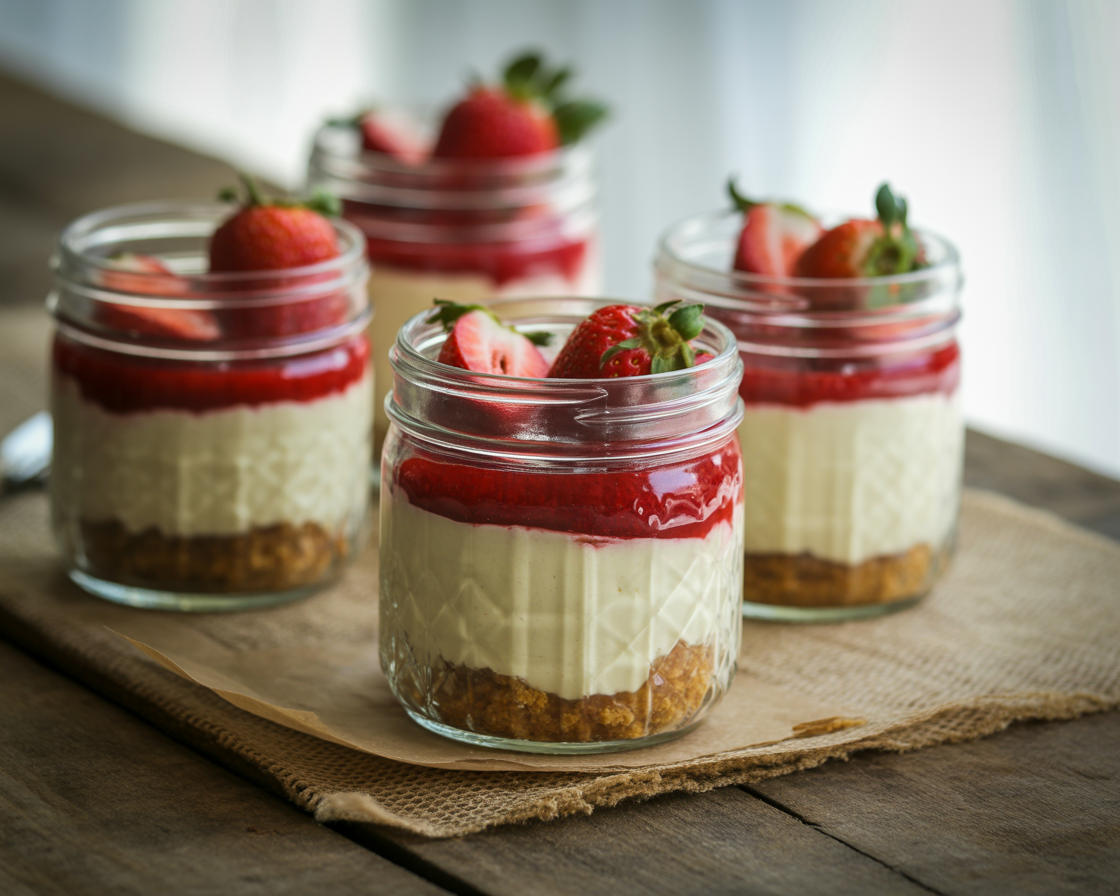
Step 4: Assemble Your Jars (The Fun Part)
- Start with your biscuit base already in the jars. Add a layer of cheesecake filling—I use about 3-4 tablespoons per jar, spreading it gently with the back of a spoon to reach the edges.
- Next, add a layer of your cooled strawberry compote. About 2 tablespoons per jar works well. Then another layer of cheesecake filling, and top with more strawberries.
- For that Instagram-worthy look: Use a piping bag (or a zip-top bag with the corner snipped off) to pipe the cheesecake mixture. It creates cleaner, more defined layers and honestly looks more professional.
- But spooning works perfectly fine too—I did it that way for months.
You can do two layers or three, depending on the height of your jars. I usually do: base, cheesecake, strawberries, cheesecake, strawberries.
Step 5: Chill and Set
- Cover your jars with lids or plastic wrap and refrigerate for at least 2 hours, though 4 hours is better. Overnight is ideal if you’re prepping ahead. The filling needs time to firm up, and the flavors meld together beautifully.
How you know they’re ready: The cheesecake layer should be set enough that it doesn’t jiggle when you tap the jar, but it should still be creamy, not stiff.

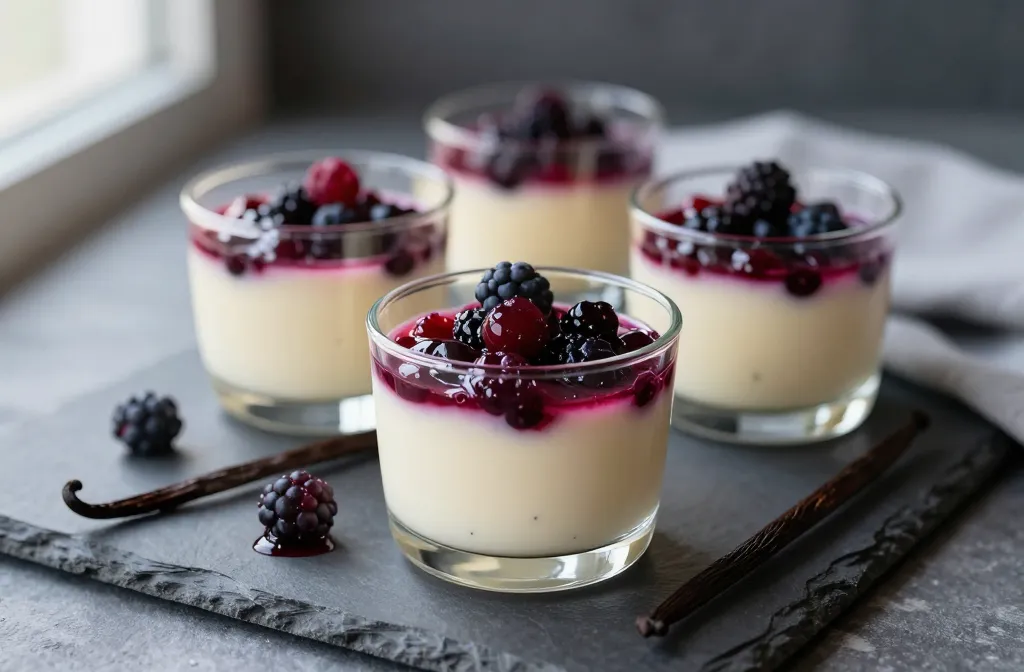
Strawberry Cheesecake Jars: The No-Bake Dessert That Changed My Life
Video
Pro Tips I Wish I’d Known From the Start
- Always cool the strawberry layer completely. I mentioned this already, but it’s worth repeating because it’s the number one way these jars go wrong. Warm fruit + cold cream = sad, melted mess.
- Don’t over-whip the cream. Stop when you hit soft peaks—when you lift the beaters, the peaks should curl over gently. If you keep going to stiff peaks, the texture gets grainy, and if you go even further, you’ll accidentally make butter. Yes, I’ve done that.
- Room temperature cream cheese is non-negotiable. Cold cream cheese will not blend smoothly, no matter how long you beat it. You’ll get lumps. If you forget to take it out ahead of time, cut it into chunks and microwave for 10-15 seconds.
- For clean, beautiful layers: Wipe the inside of the jar with a paper towel between layers if any mixture smudges on the glass. It takes five seconds and makes the presentation so much better.
- Prevent a soggy biscuit base: Make sure your butter-biscuit mixture isn’t too wet—it should just hold together when pressed. And always press it firmly into an even layer. A loose base gets soggy faster when the moisture from other layers seeps down.
Strawberry Cheesecake Jars: Flavor Variations to Keep Things Exciting
Once you nail the basic strawberry cheesecake jars recipe, the world opens up. Here are variations I’ve actually made and loved:
Chocolate Strawberry Cheesecake Jars: Add 3 tablespoons of cocoa powder to the cheesecake mixture, or use a chocolate biscuit base (Oreos without the filling work great). The chocolate-strawberry combo is always a winner.
Oreo Strawberry Cheesecake Jars: Replace digestive biscuits with crushed Oreos (cream and all) mixed with melted butter. Kids lose their minds over this version.
Lemon Strawberry Cheesecake Jars: Add 2 tablespoons of lemon juice and 1 tablespoon of lemon zest to the cheesecake filling. The citrus brightens everything up—perfect for summer.
White Chocolate Strawberry Jars: Melt 100g white chocolate and fold it into the cheesecake mixture once it’s cooled slightly. This makes it richer and more indulgent.
Nutella Strawberry Cheesecake Jars: Swirl 3-4 tablespoons of Nutella into the cheesecake filling for a hazelnut twist. Dangerous, but so worth it.
Mixed Berry Jars: Combine strawberries with blueberries, raspberries, or blackberries in the compote. This works great when berries are in season and affordable.
Healthy Versions Of Strawberry Cheesecake Jars (Yes, Really)
I’m not a health food blogger, but I appreciate having options when I want dessert without the guilt.
- High-Protein Strawberry Cheesecake Jars: Replace half the cream cheese with thick Greek yogurt or skyr. The protein content shoots up, and the tanginess is actually delicious. I’ve made these for post-workout treats.
- Low-Calorie Version: Use light cream cheese, replace sugar with a zero-calorie sweetener, and skip the butter in the base (just press in dry, finely crushed biscuits). Each jar comes in under 200 calories this way.
- Sugar-Free for Diabetics: Use a granulated sweetener like erythritol or allulose in both the filling and strawberry layer. My aunt is diabetic, and she couldn’t tell these were sugar-free.
- Vegan Strawberry Cheesecake Jars: Use vegan cream cheese (Kite Hill or Violife works well), coconut cream instead of whipping cream, and coconut oil instead of butter. The texture is slightly different but still creamy and delicious.
- Keto-Friendly Version: Use almond flour mixed with butter for the base, full-fat cream cheese, heavy cream, and a keto sweetener like erythritol. Skip the sugar in the strawberries or use just a touch of sweetener—fresh berries have natural sweetness.
How to Serve and Style These Strawberry Cheesecake Jars
Half the fun of easy cheesecake jar desserts is how you present them. Here are my favorite ways:
- For a party dessert table, arrange jars on a tiered stand with height variation. Add fresh strawberry halves around the base and scatter some mint leaves for color. Provide small spoons tied with ribbon for a cohesive look.
- On Valentine’s Day, tie a red or pink ribbon around each jar and add a small tag. These make incredibly thoughtful homemade gifts that feel special.
- For individual gift jars, layer them prettily, seal with lids, and attach a handwritten recipe card. I’ve given these to neighbors, teachers, and coworkers, and the response is always amazing.
- The crushed biscuit topping adds texture and a finished look. Just sprinkle some reserved biscuit crumbs over the final layer before serving.
- A piped whipped cream swirl on top makes them look bakery-quality. Use a star tip for that professional touch, and add a fresh strawberry slice on top.
- For café-style presentation, serve them on small plates with a long spoon, and maybe add a mint sprig or edible flower if you’re feeling fancy.
Storage and Make-Ahead Tips
These no-bake strawberry cheesecake jars are perfect for preparing in advance, which is a lifesaver for busy people.
- Refrigerator storage: They keep well covered in the fridge for up to 4 days. The flavors actually deepen after a day, so making them ahead is smart. Just keep the lids on or cover tightly with plastic wrap.
- Freezing: Yes, you can freeze them, though the texture changes slightly. Freeze without toppings for up to 1 month. Thaw in the fridge overnight before serving. The biscuit base can get a bit softer, but the flavor remains good.
- Best containers: Mason jars with lids are ideal because you can stack them and they’re airtight. If using cups without lids, plastic wrap works fine.
- Keeping layers fresh: Don’t add toppings like whipped cream or fresh fruit until just before serving. These additions make the layers look fresh and prevent sogginess.
- Make-ahead timeline: I usually make these the night before I need them. The overnight chill gives perfect texture, and I’m not rushed on the day of the event.
Strawberry Cheesecake Jars: Common Mistakes and How to Avoid Them
Let me save you from the errors I made while figuring this out.
- Runny filling: This happens when the whipped cream isn’t whipped enough, or when you don’t chill the jars long enough. Make sure your cream forms soft peaks before folding it in, and be patient with the chilling time.
- Watery strawberry topping: If your strawberries release too much liquid, cook them a bit longer to evaporate excess moisture. Also, draining any pooled liquid after cooking helps.
- Hard biscuit layer: Too much butter makes the base greasy; too little makes it crumbly and hard. The mixture should hold together when squeezed but not feel wet. About 40% butter to biscuit ratio is the sweet spot.
- Over-sweet filling: Taste as you go. You can always add more sugar, but you can’t take it away. Start with less powdered sugar than the recipe calls for, then adjust.
- Splitting cream: This happens when you over-whip it or if the cream isn’t cold enough. Always use chilled cream straight from the fridge, and stop at soft peaks.
Strawberry Cheesecake Jars Nutrition Information (Approximate)
For those who track, here’s the breakdown per jar (based on standard recipe with no substitutions):
- Calories: 380-420 per jar
- Protein: 5-6g
- Fat: 28-32g
- Carbohydrates: 35-40g
- Sugar: 24-28g
To reduce calories without sacrificing too much flavor: Use light cream cheese (saves about 80 calories per jar), reduce sugar by one-third (saves 30-40 calories), use a thinner biscuit base (saves 50-60 calories), and skip heavy toppings. These changes can bring you down to about 250 calories per jar while keeping them satisfying.
Perfect Occasions for These Strawberry Cheesecake Jars
I’ve made mini strawberry cheesecake desserts for more occasions than I can count. They’re genuinely versatile.
- Valentine’s Day is obvious—strawberries and cream cheese scream romance. Plus, the individual servings make it feel more special than sharing a slice.
- Birthdays work great because you can customize jars for different dietary needs. When my friend had a party with vegan and gluten-free guests, I made three variations, and everyone was happy.
- Bridal and baby showers love these. They’re elegant, easy to serve, and guests can grab them without needing plates and forks. The aesthetic fits perfectly with shower themes, too.
- Eid and festive parties benefit from make-ahead desserts that look impressive. I’ve brought these to Eid gatherings, and they always disappear fast.
- Potlucks are where these shine. No worrying about cutting and serving—just set out the jars with spoons, and people help themselves.
- Kids’ celebrations are easier with individual portions. No fighting over who got more, and parents appreciate portion control.
- Weekend family desserts make ordinary days feel special. Sometimes you just want something sweet after dinner that isn’t ice cream or cookies. These hit differently.
Frequently Asked Questions About Strawberry Cheesecake Jars
Can I make strawberry cheesecake jars without cream cheese?
Yes, though the flavor and texture will differ. Thick Greek yogurt combined with mascarpone cheese works as a substitute. For a completely cream-cheese-free version, use mascarpone alone with whipped cream—it’s lighter and less tangy but still delicious. I’ve also seen recipes using silken tofu for vegan versions, though I haven’t tried that personally.
How long should I chill them?
Minimum 2 hours, but 4 hours is better for a proper setting. Overnight is ideal if you have time. The cheesecake layer needs to firm up, and the wait lets all the flavors blend together. I know waiting is hard—I’m impatient too—but trust me, it’s worth it.
Can I use frozen strawberries?
Absolutely. Thaw them completely, drain the excess liquid, then proceed with the recipe. Frozen strawberries might release more liquid when cooking, so you may need to cook the mixture a bit longer to thicken it properly. I’ve done this in the winter months when fresh strawberries are expensive or not sweet enough.
Can I make this a day in advance?
Yes, and I’d actually recommend it. These homemade strawberry cheesecake jars taste even better the next day as the flavors meld. Just wait to add any fresh whipped cream or delicate toppings until just before serving to keep them looking fresh.
Why is my filling runny?
Usually, it was because the whipped cream wasn’t whipped enough before folding in, or because you didn’t let the jars chill long enough. Make sure your cream reaches soft peaks, and be patient with the refrigeration time. Also, room-temperature ingredients can make the mixture too soft initially—it firms up as it chills.
Can I use store-bought strawberry sauce?
You can, though homemade tastes fresher and lets you control the sweetness. If you’re in a pinch, strawberry jam loosened with a tablespoon of lemon juice works as a shortcut. I’ve done this when I’m really rushed, and while it’s not quite the same, it’s still good.
Let’s Stay Connected
I’d love to see how your strawberry cheesecake in a jar turns out! Seriously, there’s nothing better than seeing someone make a recipe and put their own spin on it.
Try this recipe for your next gathering, or just make a batch for yourself (no judgment—I’ve eaten three in one sitting). If you make them, I’d genuinely love to hear about it. Did you try a variation? Change something up? Serve them for a special occasion?
If you found this helpful, save it for later—you know, for when you need a dessert solution, and your brain is blank. And if you want easier, real-person recipes that don’t require culinary school skills, stick around.
Happy layering, and enjoy every creamy, fruity, crunchy bite!
Do Check Out My Favorite Red Velvet Mug Cake: Your 5-Minute Valentine (Because You Deserve It)
Printable Recipe Card
Want just the essential recipe details without scrolling through the article? Get our printable recipe card with just the ingredients and instructions.