Cranky mornings, creaky joints, and the endless quest for meals that actually fuel you—sound familiar? You’re not alone. I’ve been there, staring at a pantry full of gluten-free options that promise miracles but deliver blandness and regret. These 10 recipes are different: they’re vibrant, easy, and crafted to support aging bodies without compromising flavor. They’re weeknight heroes, weekend meal-prep champs, and your new best friends at potlucks. FYI, you don’t have to be gluten-free to love them; they’re just gluten-smart for longevity, focus, and energy. Trust me, your taste buds and your future self will thank you.
In this list, you’ll find a mix of comforting classics with a gluten-free twist, punchy flavors, and textures that keep you coming back for bites. Each recipe is designed to be approachable, not intimidating, and all of them lean into real-food ingredients that nourish aging bodies—fiber, protein, healthy fats, and a rainbow of vegetables. Curious what makes these stand out? You’ll see textures that snap, sauces that linger, and aromas that conjure cozy memories. Let’s dive in and discover the first glow-up meal that starts your day with confidence.
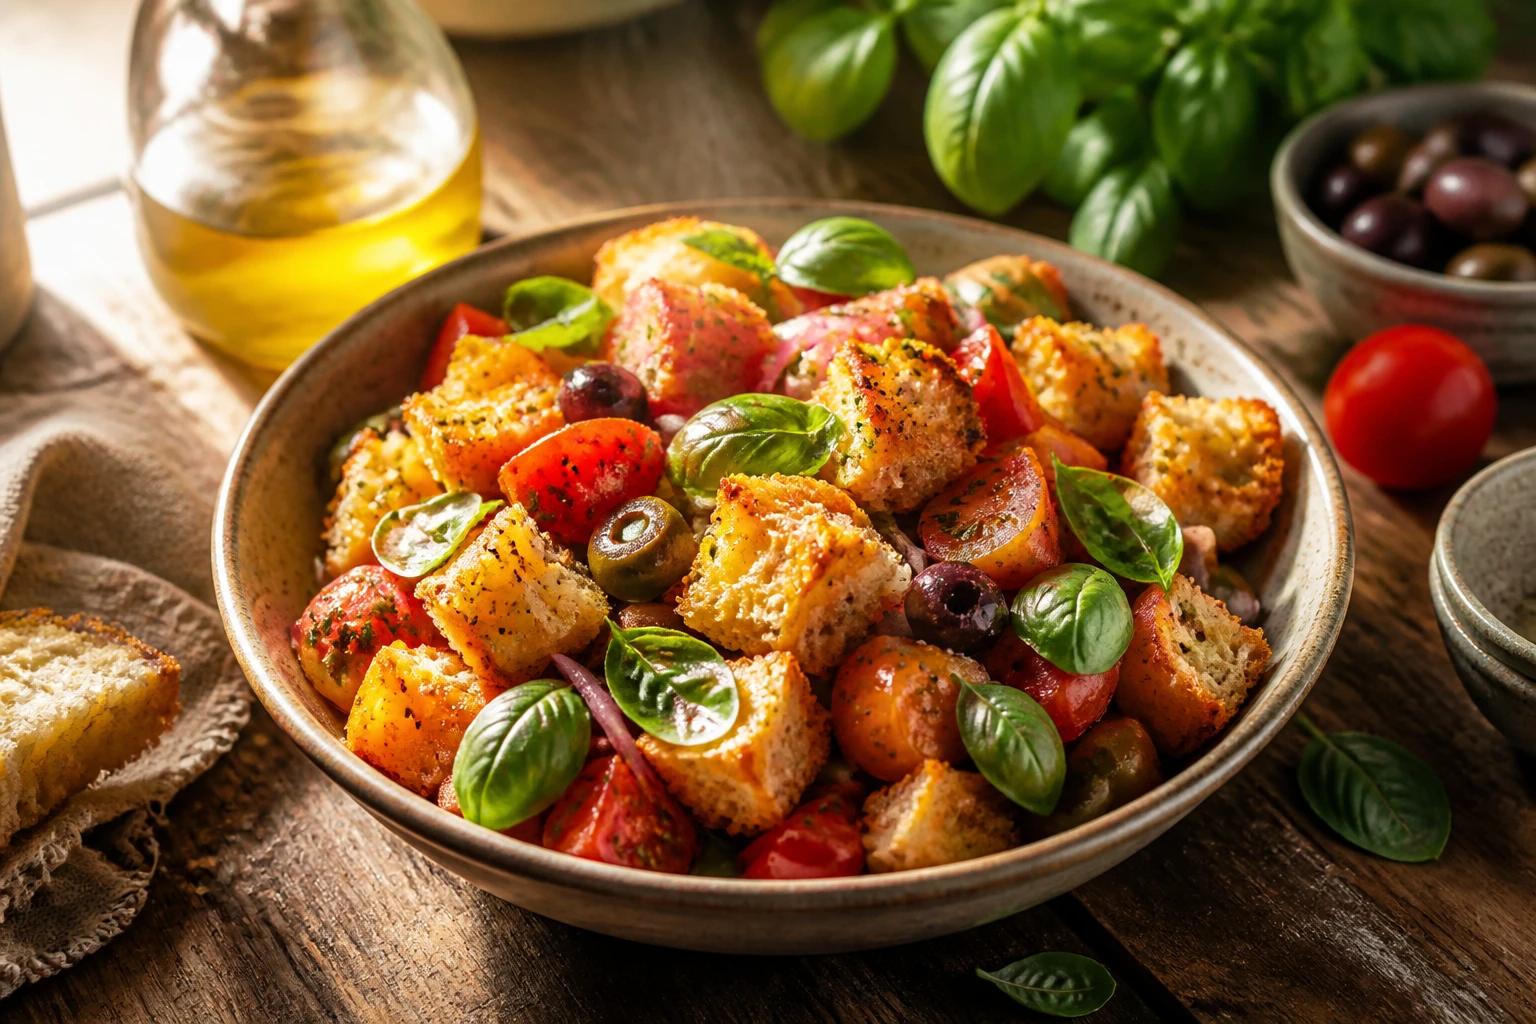
On a Wednesday that felt like it would never end, I grabbed stale gluten-free bread, ripe tomatoes, and a bottle of olive oil that smelled like sunshine. One bite of this panzanella and the day instantly brightened—crisp, herbed, and vibrant. The secret is toasting the bread until it’s bronze and crunchy, then soaking it just enough to mingle flavors without turning into mush. It’s a party for your senses: garlic’s bite, basil’s perfume, and tomatoes that glow with sunlight. Seriously, you’ll want this for brunch, lunchboxes, and midnight snack emergencies.
Why You’ll Love It
Bright, pantry-friendly flavors that lift dull days
Pair with a chilled white wine or a sparkling water with lemon for a refreshing contrast.
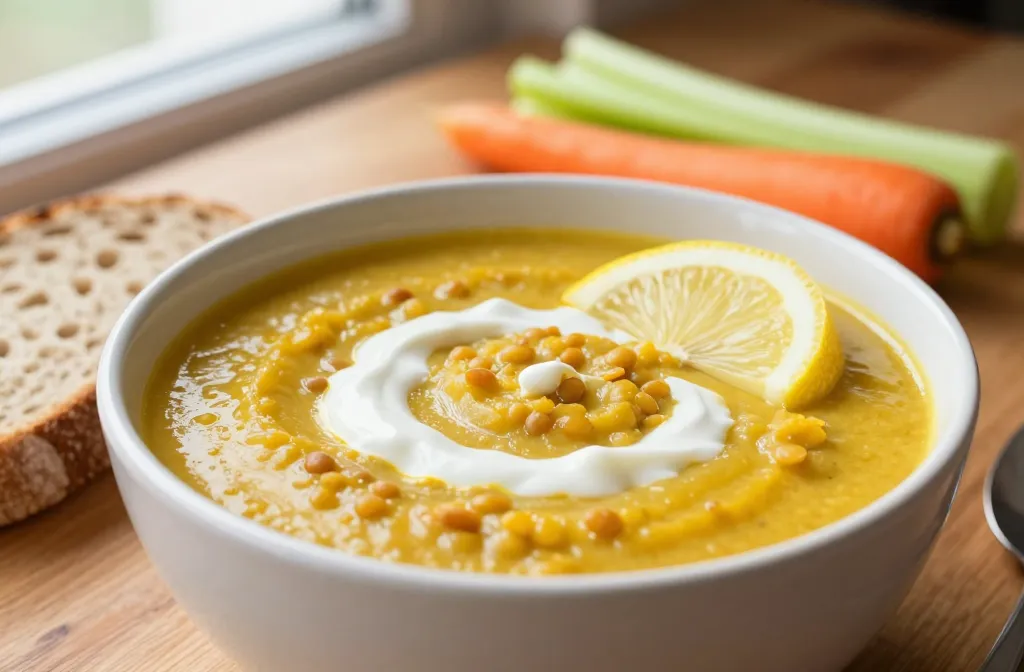
2. Creamy Coconut-Garlic Lentil Soup That Peaks Comfort
Picture this: a rainy Sunday, a mug of something warm, and a bowl that tastes like a hug. Lentils shine here, but the real magic is coconut milk weaving through garlic, ginger, and a kiss of lime. It’s gluten-free by default, dairy-friendly if you choose dairy-free coconut, and naturally rich in fiber and plant-based protein. This soup is made for days when your energy dips but your cravings stay bold.
Why You’ll Love It
Creamy texture without dairy creaminess, thanks to coconut milk
One-pot wonder that minimizes cleanup
Budget-friendly and freezer-friendly
Protein-packed to support muscle maintenance
Ingredients
1 tablespoon olive oil
1 onion, chopped
3 cloves garlic, minced
1 tablespoon fresh ginger, grated
1 cup dried red lentils, rinsed
4 cups vegetable broth
1 can (14 oz) coconut milk
1 teaspoon ground cumin
1/2 teaspoon turmeric
Juice of 1 lime
Salt and pepper to taste
Fresh cilantro for garnish
Instructions
Heat oil in a pot; sauté onion until translucent, about 5 minutes.
Stir in garlic and ginger; cook for 1 minute until fragrant.
Add lentils, broth, coconut milk, and spices; bring to a gentle boil.
Simmer uncovered 20–25 minutes, until lentils are soft and soup thickens.
Puree half the soup for a velvety body, return to pot, and stir through.
Finish with lime juice, salt, and pepper; adjust consistency with more broth if needed.
Garnish with cilantro and an extra drizzle of coconut milk if desired.
Pro Tips
Rinse lentils to remove dust and reduce foaming.
For extra heartiness, add diced carrots or celery with the onion.
Use light coconut milk to keep it lighter if preferred.
Easy Variations
Spice it up with red pepper flakes for a kick.
Swap lentils for rinsed chickpeas in a creamy chickpea version.
Top with roasted pumpkin seeds for crunch.
Mistakes To Avoid
Over-thickening the soup—keep an eye on liquid levels.
Burning garlic—always add ginger next to prevent scorching.
Undercooking lentils—give them time to soften completely.
Serving Ideas
Serve with gluten-free garlic bread or a simple side salad.
Pair with a crisp white wine or a warm mug of herbal tea.
What Surprised Me Most About This Recipe
The way coconut and lime converge to brighten the earthiness of lentils—it’s like a sunshine twist in a cozy bowl.
The Secret Ingredient Nobody Expects
A tiny pinch of cinnamon in the spice mix adds surprising warmth without tipping sweet.
Why This Recipe Works Better Than Most Versions
Using coconut milk with a splash of lime keeps the soup dairy-free and lively, not flat and bland.
Reader Favorite Tip
Blend only half for a silky texture, then leave the rest chunky for texture variety.
The Biggest Mistake People Make
Skipping the acid at the end—you need that brightness to lift the flavors.
Serving Ideas
Pair with a side of roasted gluten-free cornbread for a satisfying meal.
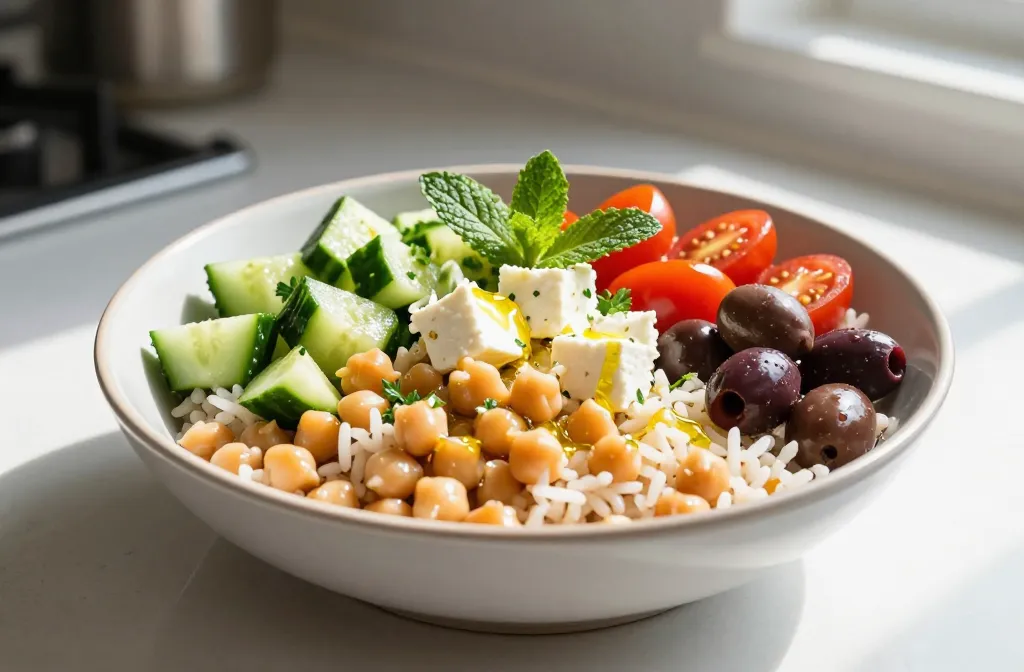
3. Saffron Lemon Chickpea Quinoa Bowl That Feels Like a Vacation
We all have days when talking to quinoa feels like a stretch. This bowl rescues you with sun-kissed saffron, zippy lemon, and hearty chickpeas that stand up to bold flavors. It’s gluten-free, protein-packed, and incredibly forgiving—cook quinoa in advance, then toss with warm chickpeas, sautéed veggies, and a bright dressing. It’s the perfect weekday lunch or a quick dinner when you’re entertaining and want a crowd-pleaser that’s secretly glamorous.
Why You’ll Love It
Bright citrus and saffron aroma
High-protein, gluten-free grain bowl
Great for meal-prep and lunchtime leftovers
Colorful, Instagram-worthy plating without extra effort
Ingredients
1 cup quinoa, rinsed
2 cups vegetable broth
1 can chickpeas, drained
1 red bell pepper, sliced
1 small zucchini, diced
1/4 teaspoon saffron threads, soaked in 2 tablespoons hot water
2 tablespoons olive oil
Juice of 1 lemon
Salt and pepper to taste
Fresh parsley for garnish
Instructions
Cook quinoa in broth according to package directions until fluffy.
Sauté bell pepper and zucchini in olive oil until just tender.
Combine cooked quinoa, chickpeas, and sautéed veggies in a bowl.
Stir in saffron with its soaking liquid and lemon juice; season well.
Toss to combine, adjust salt, and serve warm or at room temperature.
Garnish with parsley and a final drizzle of olive oil.
Pro Tips
Storing quinoa separately helps keep textures crisp in bowls.
Roasting chickpeas adds a delightful crunch if you have time.
Double the saffron for a deeper aroma if you love it.
Easy Variations
Add feta or vegan feta for a tangy tang.
Mix in spinach or kale at the end for a greens boost.
Sub barley for a chewier bite (gluten-free option needed).
Mistakes To Avoid
Overcooking quinoa; it becomes crumbly. Pull it off as soon as the specks look fluffy.
Ignoring saffron; it’s what makes the dish sing, don’t skip.
Rushing the dressing—let flavors mingle at least 5 minutes.
Serving Ideas
Serve with a side of hummus with sea salt pita chips for crunch.
What Surprised Me Most About This Recipe
How a simple saffron bath can elevate a humble quinoa bowl into something you’d expect from a chic cafe.
The Secret Ingredient Nobody Expects
Grated lemon zest folded into the dressing lifts everything with a sunny lift.
Why This Recipe Works Better Than Most Versions
Layering textures—creamy quinoa, soft veggies, and a saffron perfume—keeps bowls exciting bite after bite.
Reader Favorite Tip
Prep extra lemon juice and saffron water to drizzle over leftovers for a quick refreshed bowl.
The Biggest Mistake People Make
Winging the saffron; too little and the dish falls flat, too much and it’s overpowering.
Serving Ideas
Top with toasted almonds for crunch or a scoop of salsa for brightness.
4. Quinoa-Pesto Stuffed Portobello Caps That Actually Impress
Imagine a grill session that actually pays off indoors. Stuffed portobello caps with a zesty gluten-free pesto quinoa filling feel like a high-five to your weeknight routine. The mushrooms stay meaty and juicy, while the stuffing brings brightness from lemon and greens from kale. It’s a showstopper that’s easy enough to whip up after a busy day but fancy enough to serve guests without blinking.
Why You’ll Love It
Meaty mushrooms without stuffing them heavy
Bright, herbaceous pesto ties everything together
Gluten-free, vegetarian-friendly, and satisfying
Very presentable on a plate; great for entertaining
Ingredients
4 large portobello mushrooms, stems removed
1 cup cooked quinoa
1/2 cup gluten-free pesto
2 cups fresh spinach, chopped
1/4 cup grated Parmesan or dairy-free parmesan
1 tablespoon olive oil
Salt and pepper to taste
Instructions
Preheat oven to 400°F (205°C). Brush mushroom caps with olive oil and season with salt.
Bake cap-side down on a sheet for 8 minutes to release moisture.
In a bowl, mix quinoa, pesto, spinach, and parmesan until well combined.
Flip mushroom caps right-side up and fill with the quinoa mixture.
Return to oven and bake 10–12 minutes until filling is hot and mushrooms are tender.
Broil for 1–2 minutes to lightly brown the tops if desired.
Pro Tips
Press the filling lightly to ensure it stays put during baking.
Use a punchy pesto for maximum flavor punch.
Make extra filling for a quick lunch later in the week.
Easy Variations
Swap pesto for sun-dried tomato formal dressing.
Stuff with a mushroom-spinach ricotta mix for a gooier bite.
Top with crushed nuts for crunch.
Mistakes To Avoid
Overfilling caps, which leads to overflowing bake.
Not draining moisture from mushrooms first; it makes fillings soggy.
Using raw quinoa; ensure it’s properly cooked before mixing.
Serving Ideas
Pair with a simple arugula salad and lemon vinaigrette.
What Surprised Me Most About This Recipe
That a veggie-forward dish can feel indulgent when you land on the right pesto-to-quinoa ratio.
The Secret Ingredient Nobody Expects
A splash of lemon juice in the pesto—brightens every bite.
Why This Recipe Works Better Than Most Versions
The mushroom base keeps the dish hearty without needing gluten or cheese-forward richness.
Reader Favorite Tip
Let them rest 5 minutes after baking; the flavors intensify and slice neatly.
The Biggest Mistake People Make
Skipping the pre-bake moisture release; dry mushrooms ruin the mouthfeel.
Serving Ideas
Serve with a light cucumber-yogurt drizzle for contrast.
5. Lemon-Garlic Shrimp Zoodles With Rustic Crisps
My kitchen turned into a tiny coastal bistro the first time I whipped this up. The zoodles stay snappy, the shrimp caramelizes at the edges, and the garlic-lemon perfume? Irresistible. Gluten-free, quick, and clean—this is the kind of dish you whip for a date night at home or a celebratory weeknight when you deserve a win. And yes, you’ll want seconds, thirds, and maybe a fourth taste just to be sure.
Why You’ll Love It
Super quick with restaurant-worthy flavor
Low-carb, gluten-free, high-protein
Texture play between crisp zucchini and juicy shrimp
One-pan method minimizes cleanup
Ingredients
1 pound shrimp, peeled and deveined
4 medium zucchinis, spiralized
2 tablespoons olive oil
3 cloves garlic, minced
1 lemon, zested and juiced
1/4 cup white wine or broth
Salt, pepper, red pepper flakes to taste
Fresh parsley for garnish
Instructions
Pat shrimp dry and season with salt, pepper, and a pinch of red pepper.
Heat olive oil in a large skillet over medium-high heat; sear shrimp until pink and opaque, 2–3 minutes per side. Remove and set aside.
Add garlic; sauté 30 seconds until fragrant, then deglaze with wine or broth.
Stir in lemon zest and juice; simmer briefly to reduce a touch.
Return shrimp to the pan, add zoodles, and toss gently until just warmed.
Season to taste and finish with parsley.
Pro Tips
Don’t overcook shrimp; it turns rubbery quickly.
If you don’t have a spiralizer, use pre-cut zucchini noodles.
Let the sauce reduce for extra flavor concentration.
Easy Variations
Swap shrimp for scallops or chicken for a different protein.
Use pesto instead of garlic-lemon for a bright spin.
Top with a handful of cherry tomatoes for color and sweetness.
Mistakes To Avoid
Soggy zoodles from overcooking; heat briefly to keep bite.
Using too much citrus that overshadows the seafood flavor.
Skipping pre-searing—shrimp lose flavor if you dump straight into sauce.
Serving Ideas
Offer with a crusty gluten-free baguette to mop up sauce.
What Surprised Me Most About This Recipe
The zoodles steal the show—when prepared right, they balance the shrimp’s richness perfectly.
The Secret Ingredient Nobody Expects
A tiny pinch of smoked paprika in the pan with garlic adds a whisper of depth.
Why This Recipe Works Better Than Most Versions
Fast, fresh, and vibrant—no heavy cream, no gluten, just clean flavor that hits all the right notes.
Reader Favorite Tip
Finish with a squeeze of lemon and a drizzle of olive oil for extra gloss and brightness.
The Biggest Mistake People Make
Overcrowding the pan; you’ll steam instead of sear and lose that crisp edge on the shrimp.
Serving Ideas
Pair with a light cucumber dill salad for refreshing contrast.
6. Honey-Malsala Salmon With Roasted Veggie Rice
Gluten-free and gloriously flavorful, this salmon recipe turns a simple weeknight into a small celebration. The salmon slathers in a honey-mustard glaze with a zing of ginger and garlic, while the roasted veggie rice brings a warm, caramelized sweetness. It’s fast, punchy, and just fancy enough to feel like you treated yourself. Plus, it makes the kitchen smell like a cozy coastal cafe, which is basically therapy in aroma form.
Why You’ll Love It
Sumptuous glaze that caramelizes beautifully
One-pan salmon with a vibrant veggie rice base
Gluten-free, omega-3 rich, and satisfying
Perfect for meal-prep with leftovers that reheat well
Ingredients
4 salmon fillets
2 tablespoons honey
1 tablespoon Dijon mustard
2 teaspoons olive oil
1 cup cooked brown rice
2 cups mixed roasted vegetables (carrots, broccoli, bell peppers)
1 tablespoon soy-free tamari or gluten-free soy sauce
Salt and pepper to taste
Lemon wedges for serving
Instructions
Preheat oven to 425°F (220°C). Toss vegetables with a little olive oil, salt, and pepper; spread on a sheet and roast 15–20 minutes.
Meanwhile, whisk honey, mustard, tamari, and 1 teaspoon olive oil to make glaze.
Place salmon on a parchment-lined sheet; brush with glaze and bake 10–12 minutes, until opaque and flakey.
Warm rice and mix with roasted vegetables; season with salt and pepper.
Serve salmon atop veggie rice with a lemon wedge.
Pro Tips
Double the glaze and brush salmon again during the last 2 minutes for extra gloss.
Roast vegetables until edges are caramelized for maximum flavor.
Use wild-caught salmon for richer flavor if budget allows.
Easy Variations
Replace salmon with cod or chicken thighs for a different protein profile.
Swap honey for maple syrup for a different sweetness note.
Add a handful of toasted almonds to the veggie mix for crunch.
Mistakes To Avoid
Overcooking salmon; it dries out quickly.
Overloading the tray with veggies that steam instead of roast.
Not tasting glaze—balance sweetness and saltiness before brushing on fish.
Serving Ideas
Serve with a crisp cucumber salad to contrast warm, savory flavors.
What Surprised Me Most About This Recipe
The glaze caramelizes into a glossy crust that tastes restaurant-grade with minimal effort.
The Secret Ingredient Nobody Expects
A dash of apple cider vinegar in the glaze brightens and rounds the sweetness beautifully.
Why This Recipe Works Better Than Most Versions
One-pan precision and a balancing act of sweet-savory glaze keeps it elegant without gluten-heavy partners.
Reader Favorite Tip
Let the salmon rest 2 minutes after removal from oven to lock in juices.
The Biggest Mistake People Make
Applying glaze too early, which makes it runny and less glossy post-bake.
Serving Ideas
Add a dollop of dairy-free yogurt on the side for a tangy contrast.
7. Spicy Black Bean and Sweet Potato Bliss Bowls
Comfort in a bowl, with a kick. Black beans, roasted sweet potatoes, and a smoky paprika-lime dressing create a meal that hits all the right notes: heartiness, brightness, and a texture dance from creamy beans to crispy edges. This dish is ideal for batch cooking, easy to portion, and incredibly forgiving—perfect after a long day or when you need a quick, soulful bite.
Why You’ll Love It
Plant-based protein that sticks with you
Colorful, crave-worthy layering of textures
Nutritious and gluten-free by default
Budget-friendly with pantry staples
Ingredients
1 tablespoon olive oil
1 large sweet potato, cubed
1 can black beans, drained
1 cup cooked brown rice or quinoa
1 teaspoon smoked paprika
1/2 teaspoon chili powder
Juice of 1 lime
Salt and pepper to taste
Avocado slices and cilantro for serving
Instructions
Toss sweet potato cubes with olive oil and paprika; roast at 425°F (220°C) for 20–25 minutes until edges are crisp.
In a pan, warm black beans with a splash of lime juice and a pinch of salt.
Assemble bowls: base of rice or quinoa, add sweet potatoes, beans, and toppings.
Finish with avocado, cilantro, and additional lime juice if desired.
Season to taste and serve warm or at room temperature.
Pro Tips
Roast sweet potatoes on a single layer for better crispiness.
Mash a few beans into the rice for creaminess if needed.
Prep extra lime wedges for bright finishing touches.
Easy Variations
Swap black beans for chickpeas with cumin for a different feel.
Add corn for a sweet pop and color.
Drizzle a yogurt-lime sauce for a creamy contrast.
Mistakes To Avoid
Stir-frying beans too long; they turn mushy and dull.
Over-saucing, which masks the natural sweetness of sweet potatoes.
Not salting the beans at a minimum; they need seasoning.
Serving Ideas
Pair with a light cucumber-tennise salad to steal the show.
What Surprised Me Most About This Recipe
That plant-based meals can deliver richness without dairy or meat—just smart seasoning and textures.
The Secret Ingredient Nobody Expects
A little espresso ground in the paprika mix adds an earthy depth (trust me on this one).
Why This Recipe Works Better Than Most Versions
Balanced spiciness and the creamy avocado prevent the dish from feeling dry or boring.
Reader Favorite Tip
Make a big batch and freeze in individual portions; reheats beautifully.
The Biggest Mistake People Make
Skipping avocado; the dish needs that creamy cushion to tie flavors together.
Serving Ideas
Serve with a wedge of lime and a handful of chopped fresh cilantro.
8. Herbaceous Turkey Lettuce Cups With Ginger-Scallion Slaw
On busy weeknights I crave something fresh and satisfying that doesn’t require a trip to the deli. These lettuce cups hit the mark: lean turkey, a zingy, bright slaw, and a crisp bite from the lettuce wrap. The gluten-free aspect is a non-issue here; the real star is the bold, clean flavors that wake you up without weighing you down. It’s the kind of meal that feels light but delivers serious satisfaction, especially when you want to feel like you fed your body well.
Why You’ll Love It
Low-carb and gluten-free
Bright, fresh, and crunchy
Super quick with minimal cleanup
Perfectly portable for lunches or dinners
Ingredients
1 lb ground turkey
1 tablespoon sesame oil
2 tablespoons gluten-free soy sauce
1 teaspoon grated ginger
2 cloves garlic, minced
2 cups shredded cabbage and carrot mix
1/4 cup chopped scallions
Romaine or butter lettuce leaves
Crushed peanuts or sesame seeds for topping (optional)
Instructions
Cook turkey in sesame oil until browned and cooked through.
Stir in garlic, ginger, and soy sauce; cook 1–2 minutes more.
Fold in cabbage-carrot mix and scallions; cook until slightly wilted.
Spoon filling into lettuce leaves; top with peanuts or sesame seeds if using.
Fold and eat with your hands for a satisfying texture contrast.
Pro Tips
Keep lettuce leaves crisp by patting dry and not washing too far ahead.
Add a splash of rice wine vinegar for extra zing in the slaw.
Double the slaw if you want more crunch and freshness.
Easy Variations
Use ground chicken or tempeh for a different protein profile.
Add mango or pineapple for a tropical twist.
Swap cabbage for shredded kale for heartier texture.
Mistakes To Avoid
Over-sautéing the filling; keep some bite for the crunch in lettuce.
Too salty; adjust soy sauce at the end.
Letting the filling sit too long in hot pan; moisture builds up and wilts the leaves.
Serving Ideas
Plate on a bright, colorful platter to highlight the greens and oranges.
What Surprised Me Most About This Recipe
The lettuce cups offer a flexible, satisfying structure that makes weeknight meals feel special without effort.
The Secret Ingredient Nobody Expects
A splash of lime juice over the slaw right before serving brightens every bite.
Why This Recipe Works Better Than Most Versions
The contrast of warm turkey with crisp lettuce creates a refreshing texture you don’t get in typical gluten-free meals.
Reader Favorite Tip
Wrap fillings in extra-wide lettuce leaves for easy handling and extra crunch.
The Biggest Mistake People Make
Over-stuffing the cups; keep fillings balanced so the leaf doesn’t tear.
Serving Ideas
Pair with a chilled cucumber-mint tea for a refreshing finish.
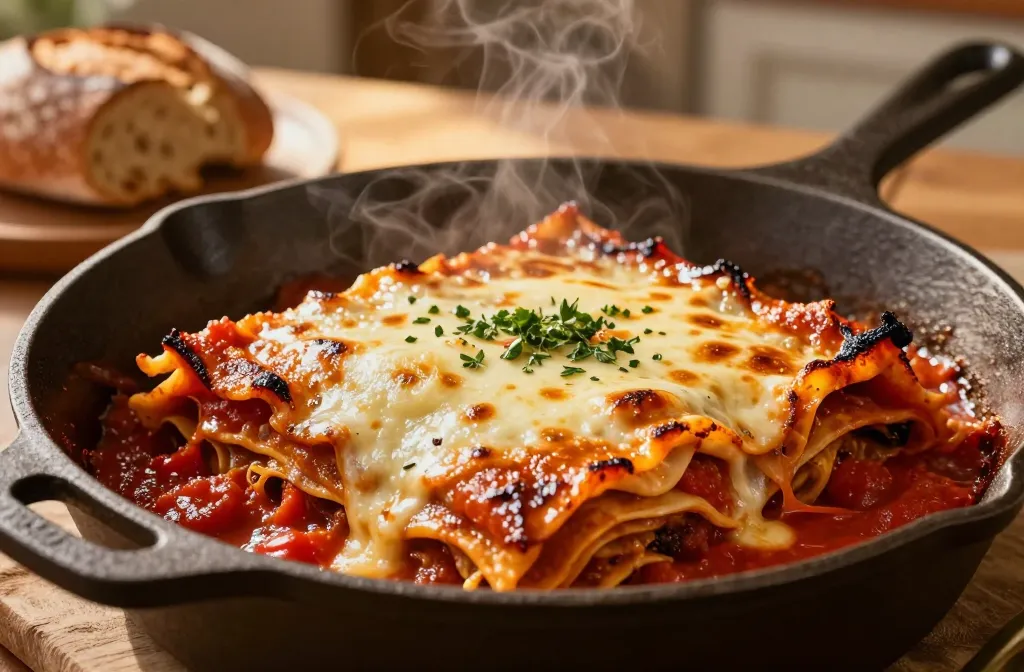
Risotto is comfort in a spoon, right? This version uses gluten-free stock and a velvety crown of mushrooms with thyme. It’s indulgent without feeling heavy, and the best part is how you can coax a perfect al dente bite with a few patient stirs. I love making this on a rainy night when you want something lush yet manageable. It’s a reminder that gluten-free doesn’t mean compromising on the luxurious spoonful that makes you sigh with happiness.
Why You’ll Love It
Silky, creamy texture without dairy cream
Fragrant with thyme and mushrooms
Vegetarian-friendly and gluten-free by design
Elevates weeknight meals to a restaurant vibe
Ingredients
1 cup Arborio rice
4 cups gluten-free vegetable broth, kept warm
1 cup mushrooms, sliced
2 tablespoons olive oil
1 shallot, minced
1 tablespoon fresh thyme leaves
1/4 cup white wine (optional)
Salt and pepper to taste
Optional: dairy-free butter for finishing
Instructions
Warm broth in a pot; keep it simmering softly.
In another pot, sauté shallot in olive oil until translucent.
Stir in mushrooms and thyme; cook until mushrooms release fragrance and soften.
Pour in wine (if using) and let it absorb; begin adding warm broth a ladle at a time, stirring until absorbed before adding the next.
Continue until rice is creamy and al dente, about 18–20 minutes. Finish with a splash of dairy-free butter if desired.
Pro Tips
Stir consistently to release starch and create creaminess.
Keep broth hot to avoid cooling the risotto mid-cook.
Cook mushrooms separately if you want a more defined texture.
Easy Variations
Stir in peas and parmesan for a classic twist.
Finish with truffle oil for an elevated aroma.
Use porcini for a deeper mushroom flavor.
Mistakes To Avoid
Adding too much liquid at once; you want gradual absorption.
Overcooking; you’re aiming for a creamy bite, not mush.
Skipping seasoning at the end; a touch more salt can save the dish.
Serving Ideas
Garnish with fresh thyme and a sprinkle of black pepper for an aromatic finish.
What Surprised Me Most About This Recipe
That a dairy-free version can feel luxuriously indulgent with the right balance of starch, broth, and aromatics.
The Secret Ingredient Nobody Expects
A tiny drizzle of truffle oil right before serving adds an elite note without overpowering.
Why This Recipe Works Better Than Most Versions
Relying on the natural starch of Arborio rice and a careful simmer yields a true risotto texture with gluten-free friendly stock.
Reader Favorite Tip
Stir in a handful of chopped parsley at the end for a fresh, green lift.
The Biggest Mistake People Make
Not tasting as you go; risotto needs gradual seasoning as it thickens.
Serving Ideas
Serve with a side of roasted asparagus or a crisp arugula salad.
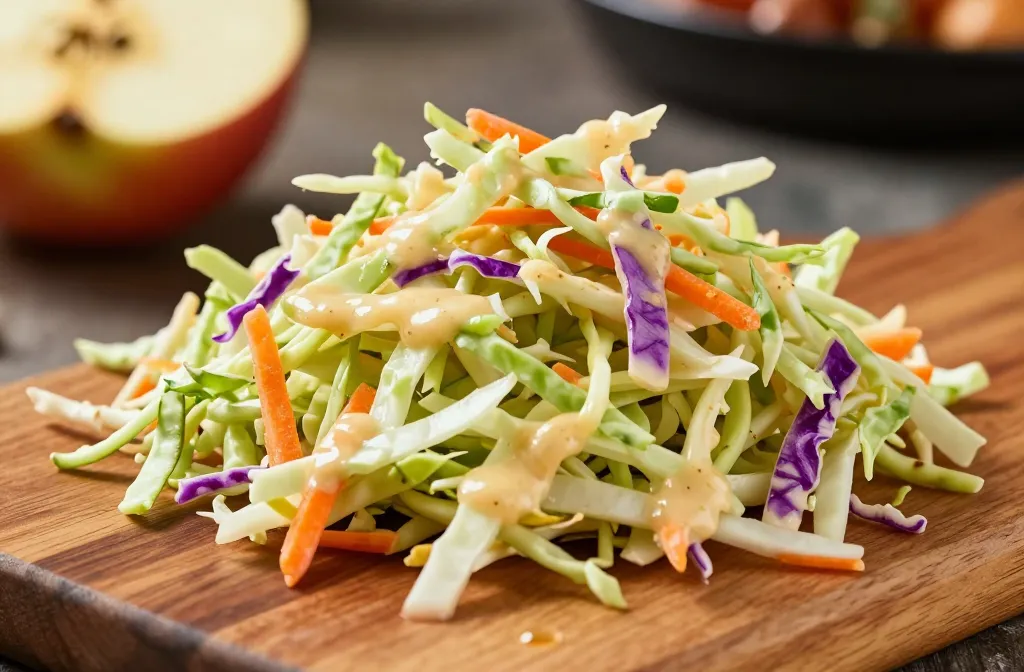
10. Cinnamon Apple Chickpea Crumble With Gluten-Free Oats
If you still believe gluten-free means sacrificing comfort desserts, think again. This crumble delivers warm, cinnamon-scented apples over a tender chickpea crumble, with a crisp oat topping that adds texture and plenty of cozy vibes. It’s naturally gluten-free, sweet enough to satisfy cravings, and surprisingly nutritious with fiber and plant-based protein. It’s the kind of dessert you’ll want to make again and again, preferably with a scoop of dairy-free vanilla ice cream on top.
Why You’ll Love It
Comforting crumble with a surprising texture balance
Gluten-free and incredibly cozy
Great for making ahead and serving warm
Sweet without being cloying, thanks to apples and oats
Ingredients
4 cups apples, chopped
1 tablespoon lemon juice
1/4 cup sugar or maple syrup
1 cup chickpeas, mashed lightly
1/2 cup gluten-free oats
1/4 cup almond flour
1 teaspoon cinnamon
2 tablespoons melted coconut oil
Pinch of salt
Instructions
Preheat oven to 375°F (190°C). Toss apples with lemon juice and sugar/maple syrup; place in a baking dish.
In a bowl, mix oats, almond flour, cinnamon, and salt. Stir in mashed chickpeas and coconut oil until crumbly.
Crumble topping evenly over apples.
Bake 25–30 minutes until apples are tender and topping is golden.
Let cool slightly before serving with ice cream or yogurt if desired.
Pro Tips
Mashed chickpeas add protein and a creamy texture without dairy.
Use a mix of tart and sweet apples for depth of flavor.
Keep an eye on top to avoid burning the edges.
Easy Variations
Streusel with chopped nuts for extra crunch.
Swap apples for pears or stone fruit when in season.
Add a splash of vanilla in the apples for extra warmth.
Mistakes To Avoid
Overcrowding the dish; ensure air can circulate for crisp topping.
Using very wet apples; pat dry to avoid soggy topping.
Overly dense crumble; lighten with oats and almond flour ratio.
Serving Ideas
Top with a dollop of vanilla yogurt or coconut whipped cream.
What Surprised Me Most About This Recipe
Mashed chickpeas as a crumble base? It sounds odd until you taste how it adds protein without making the dish heavy.
The Secret Ingredient Nobody Expects
A pinch of sea salt in the apple mixture heightens the sweetness in a magical way.
Why This Recipe Works Better Than Most Versions
The combo of gluten-free oats with almond flour creates a crumb that’s crunchy and decadent at once.
Reader Favorite Tip
Serve with a warm caramel sauce or a light vanilla bean cream for extra indulgence.
The Biggest Mistake People Make
Over-syruping apples; balance sweetness to keep the crumble from tipping into cloying.
Serving Ideas
Pair with cinnamon espresso for an adult twist.
Frequently Asked Questions
Q: Are these meals truly gluten-free? A: Yes, each recipe is designed to avoid gluten-containing ingredients, with chefs’ tips to ensure cross-contamination is minimized if you’re extremely sensitive.
Q: Can I freeze these dishes? A: Several of them freeze well, especially soups, bowls, and crumbles. Label portions and use within 2–3 months for best texture.
Q: Are these suitable for keto? A: Some are more carb-forward (rice, quinoa, oats). If you’re tracking macros strictly, swap grains for cauliflower rice or additional greens and adjust portions.
Q: Do I need dairy-free options here? A: Many can be dairy-free with substitutions like coconut milk, dairy-free butter, or vegan cheese. I’ve noted these when applicable.
Q: How can I batch-cook gluten-free meals without losing flavor? A: Cook proteins separately, roast sturdy veggies, and keep sauces in separate jars. Rebuild bowls after reheating to preserve texture and brightness.
Q: What if I’m allergic to nuts? A: I’ve included several nut-free variations and substitutions (like extra seeds or dairy-free yogurt) in places where nuts show up as toppings or thickeners.
Q: How do I store leftovers safely? A: Cool quickly, transfer to airtight containers, and refrigerate up to 3–4 days. Reheat gently to preserve texture.
Q: Can I adjust spice levels for kids? A: Absolutely. Start with half the spice and work up, offering hot sauce on the side if needed.
Q: Are these kid-friendly? A: Most are adaptable for kids—soft textures, mild flavors, and fun toppings help them enjoy gluten-free meals without fuss.
Q: Which recipe is the easiest to start with? A: The Creamy Coconut-Garlic Lentil Soup is a cozy starter that doesn’t overwhelm, yet delivers depth and comfort.
Final Thoughts
If you’ve been chasing meals that honor your aging body while still sparking joy at the table, you’ve just found a treasure map. These 10 gluten-free dishes prove you don’t have to sacrifice flavor for health. Grab your apron, pick a couple to test this week, and watch how your week transforms—fewer last-minute takeouts, more nourishing bites, and a table that feels a little louder with laughter. You’ve got this, and your future self will be grateful you started today.
The Biggest Surprise Here
Gluten-free cooking isn’t about scarcity—it’s about clever swaps that bring big flavor and big texture to every plate.
The Secret Ingredient Nobody Expects
Sometimes it’s the citrus zest, sometimes a tiny pinch of salt in your glaze. The magic lies in tiny, deliberate boosts that wake up ingredients you already love.
The Power of Texture, Always
From crunchy panzanella croutons to creamy lentil soups and tender roast, texture is the unsung hero that makes these meals intriguing, crave-worthy, and genuinely satisfying.
Reader Favorite Tip
Keep a couple of gluten-free pantry staples on hand—quinoa, chickpeas, gluten-free oats, and a good stock—and you’ll be ready to improvise delicious, healthy aging meals on the fly.
The Invitation
Want a guided week plan? I can help you map out a gluten-free, aging-friendly menu that keeps your days energized and your taste buds thrilled. Let’s cook together soon.
Printable Recipe Card
Want just the essential recipe details without scrolling through the article? Get our printable recipe card with just the ingredients and instructions.
Disclosure: This post may contain affiliate links.
If you make a purchase through these links, I may earn
a small commission at no extra cost to you.
prab chahal
Hi, I’m Prabjot Chahal – the heart (and taste buds) behind this blog!
Food has always been my love language – from experimenting with family recipes to discovering unique flavors from around the world. I believe that cooking isn’t just about following a recipe, it’s about creating moments, sharing stories, and connecting with others over something delicious. Through this blog, I want to build a vibrant food community where we share more than just recipes – we share inspiration, tips, and the joy of making and enjoying good food together. Whether you’re here for quick weekday dinners, festive treats, or creative seasonal ideas, you’re part of this table. So grab a fork (or a whisk!) and let’s cook, bake, and share our love for food – one recipe at a time.


")
")


")