You bought an air fryer for fries and somehow discovered it’s a tiny wizard for everything else. Ready for your next trick? Garlic bread. No oven, no fuss, and no waiting around while your kitchen heats up like a sauna. We’ll make it fast, golden, buttery, and exactly as garlicky as your heart (and social calendar) can handle.
Why Air Fryer Garlic Bread Rules
Garlic bread in the air fryer hits crispy edges and a tender center in minutes. It tastes like you babysat it in a fancy oven—without actually babysitting anything.
You also get incredible control. Want toastier edges? Add a minute. Want extra butter? Don’t ask, just do it. Short cook time + huge flavor payoff = ideal weeknight flex.
FYI: You can use store-bought bread, leftover baguette, or even hot dog buns. No judgment here.
The Simple Ingredient To Air Fryer Garlic Bread

You only need a handful of staples. The magic lives in the butter-garlic ratio and a bit of heat.
- Bread: Baguette, Italian loaf, ciabatta, or thick sandwich slices. Day-old works great.
- Butter: Softened, salted or unsalted. If unsalted, add a pinch of salt.
- Garlic: Fresh cloves, grated or minced. Garlic powder works in a pinch.
- Parsley: Fresh for color and brightness; dried if that’s what you’ve got.
- Olive oil: Optional, for extra crisp and flavor.
- Parmesan: Optional, but highly recommended for the salty umami finish.
- Red pepper flakes: Optional, for a little sparkle of heat.
Ratios That Never Fail
For 4 thick slices or half a baguette:
- 4 tablespoons butter (softened)
- 2–3 garlic cloves (grated), or 1 teaspoon garlic powder
- 1 tablespoon chopped parsley
- 1–2 teaspoons olive oil (optional)
- 1–2 tablespoons grated Parmesan (optional)
- Pinch of salt and a few grinds of black pepper
IMO: Two cloves taste polite. Three cloves say hello from across the room.
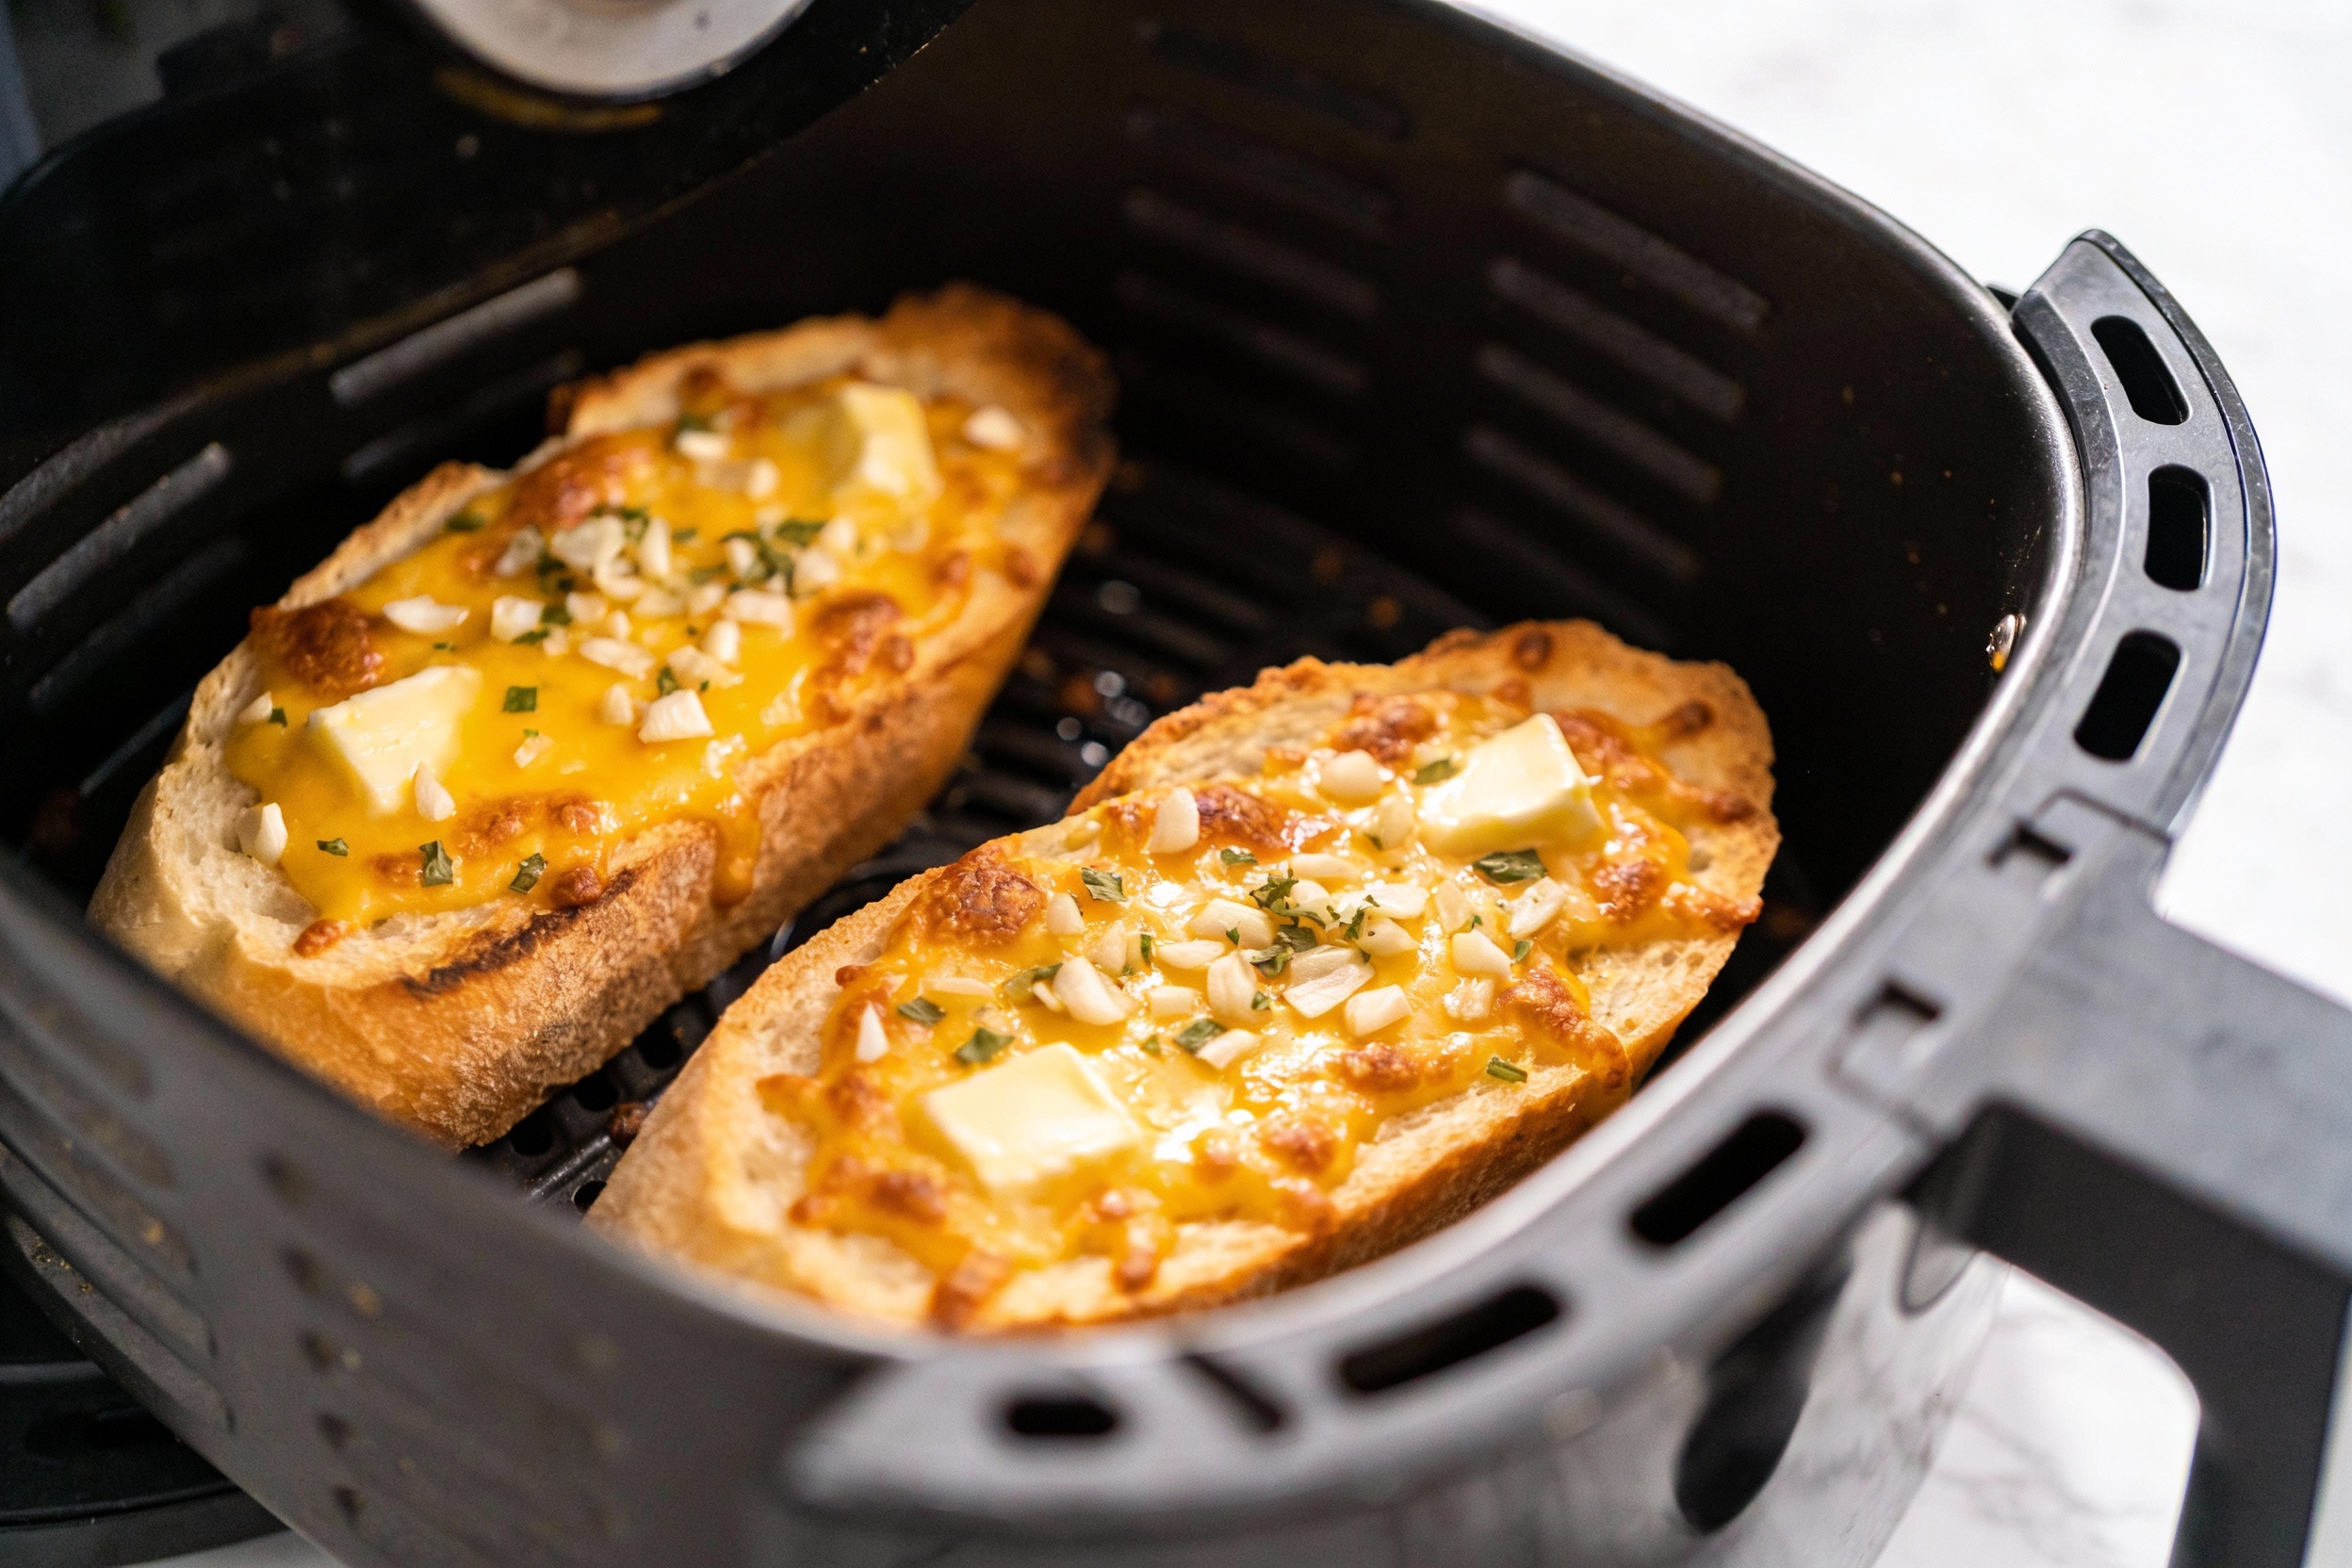
Air Fryer Garlic Bread Step-by-Step: From Bread to Gold in 8 Minutes
You don’t need culinary school. Just follow this flow.
- Preheat the air fryer to 360°F (182°C). Two to three minutes is enough. Yes, preheating matters for even browning.
- Mix the spread. In a bowl, mash the butter with garlic, parsley, salt, pepper, and olive oil. Stir in Parmesan if using.
- Slice the bread. Aim for 1-inch slices. Too thin and it dries out; too thick and the center stays doughy.
- Spread generously. Go edge-to-edge. Don’t fear the corners. That’s where flavor lives.
- Air fry 4–6 minutes. Start checking at 4 minutes. You want the edges golden and the center bubbly.
- Optional: Broil effect. For a deeper toast, bump to 380°F for the final 1–2 minutes.
- Finish with flair. Sprinkle more parsley or Parm while hot. Let rest 1 minute so the butter settles (and you don’t scorch your tongue).
Timing Guide by Bread Type
- Thin baguette slices: 3–4 minutes
- Thick baguette or Italian loaf: 5–7 minutes
- Sandwich bread: 3–5 minutes
- Ciabatta: 5–6 minutes (watch closely; it browns fast)
Air Fryer Garlic Bread Make It Your Way: Variations You’ll Actually Use

You can stay classic, or you can jazz it up like you run a tiny bistro.
- Cheesy Garlic Bread: Add shredded mozzarella on top before air frying. Finish with Parmesan.
- Garlic Herb Mix: Add dried oregano or Italian seasoning to the butter.
- Spicy Garlic Bread: Mix in red pepper flakes or a drizzle of Calabrian chili oil.
- Lemon Garlic Bread: Add 1/2 teaspoon lemon zest to the butter for brightness.
- Vegan Option: Use vegan butter and nutritional yeast instead of Parm. Still delish.
- Stuffed Garlic Bread: Slice bread almost through, spread butter inside each slit, then air fry. Drama, but worth it.
Garlic: Fresh vs. Powder
– Fresh garlic: Punchy, aromatic, a little spicy. Grate it for max flavor spread.
– Garlic powder: Mellow and even. Use 1 teaspoon powder per 4 tablespoons butter.
FYI: Combine both for a layered garlic flavor that tastes like you knew what you were doing all along.
No-Soggy-Bread: Expert Tips
I made the mistakes so you don’t have to.
- Don’t overcrowd the basket. Air needs space to circulate. Work in batches.
- Butter should be soft, not melted. Melted butter can soak the bread and make it greasy.
- Go edge-to-edge. Dry edges burn. Full coverage prevents scorching.
- Use parchment liners sparingly. They block airflow. If you use them, poke holes and keep pieces small.
- Taste your butter mix. Salt and garlic levels need adjusting based on your bread and butter brand.
The Crispy-Chewy Balance
Want extra crispy? Add 1 teaspoon olive oil to the butter and finish 1–2 minutes at 380°F.
Want chewier centers? Use slightly thicker slices and pull at 4–5 minutes.
Related Posts:


")
")

")
Air Fryer Garlic Bread: Serving Ideas That Make You Look Like You Planned This

Garlic bread rarely needs an excuse, but it loves company.
- Dips: Marinara, whipped ricotta with lemon, pesto, or garlic confit mashed into butter (yes, double garlic).
- Soup night: Tomato, minestrone, or creamy mushroom. Bread becomes the star sidekick.
- Pasta partner: Bolognese, Alfredo, or aglio e olio if you want garlic on garlic (we support you).
- Snack attack: Cut into strips, dunk into warm pizza sauce, call it a day.
Make-Ahead and Freezer-Friendly
– Make-ahead spread: Mix the butter and refrigerate up to 5 days or freeze up to 2 months.
– Freezer garlic bread: Spread butter on slices, freeze flat on a sheet, then bag. Air fry from frozen at 360°F for 6–8 minutes.
IMO, keeping a stash in the freezer makes you 30% happier on weeknights.
Air Fryer Garlic Bread Common Pitfalls (And Quick Fixes)
– Bread scorched on top, pale underneath? Lower temp to 340–350°F and cook a minute longer for even browning.
– Butter burned? You used too high heat or not enough spread. Add a touch more butter and drop the temp.
– Too greasy? Reduce butter by 1 tablespoon and add a teaspoon olive oil for balance.
– No garlic punch? Add 1/4 teaspoon garlic powder to the fresh garlic mix. It weirdly helps.
FAQ About Air Fryer Garlic Bread
Can I use margarine instead of butter?
Yes, but expect a different flavor and melt. Butter gives richer taste and better browning. If you use margarine, pick one with at least 60% fat for decent texture.
Do I need to flip the bread?
Usually no. Air fryers circulate heat well. If the underside looks pale at 4 minutes, give it a 30–60 second flip to even things out.
What if my air fryer has no temperature control?
Use the “air fry” or “high” setting and start checking at 3 minutes. You might need to shorten the cook time since some fixed-temp models run hot.
Can I make it without dairy?
Totally. Use a dairy-free butter and skip the Parmesan or swap in nutritional yeast. You still get that savory, buttery vibe.
Why is my garlic turning bitter?
Garlic burns fast. If it tastes harsh, lower your temp a bit and make sure your butter fully coats the garlic. You can also use half fresh garlic and half powder to smooth the flavor.
How do I keep leftovers crisp?
Reheat in the air fryer at 320°F for 2–3 minutes. Microwaves make it sad and spongy—don’t do that to your hard work.
Conclusion on Air Fryer Garlic Bread
Air fryer garlic bread delivers big bistro energy with weeknight effort. You mix a quick butter, swipe it on bread, and let the air fryer do its thing for a handful of minutes. The result? Golden edges, buttery centers, and a kitchen that smells like you own a trattoria. Keep a batch in the freezer, tweak the garlic level to your vibe, and consider this your new go-to side, snack, or—honestly—entire meal.
Related Recipe: Air Fryer Grilled Cheese When You Don’t Want a Stove