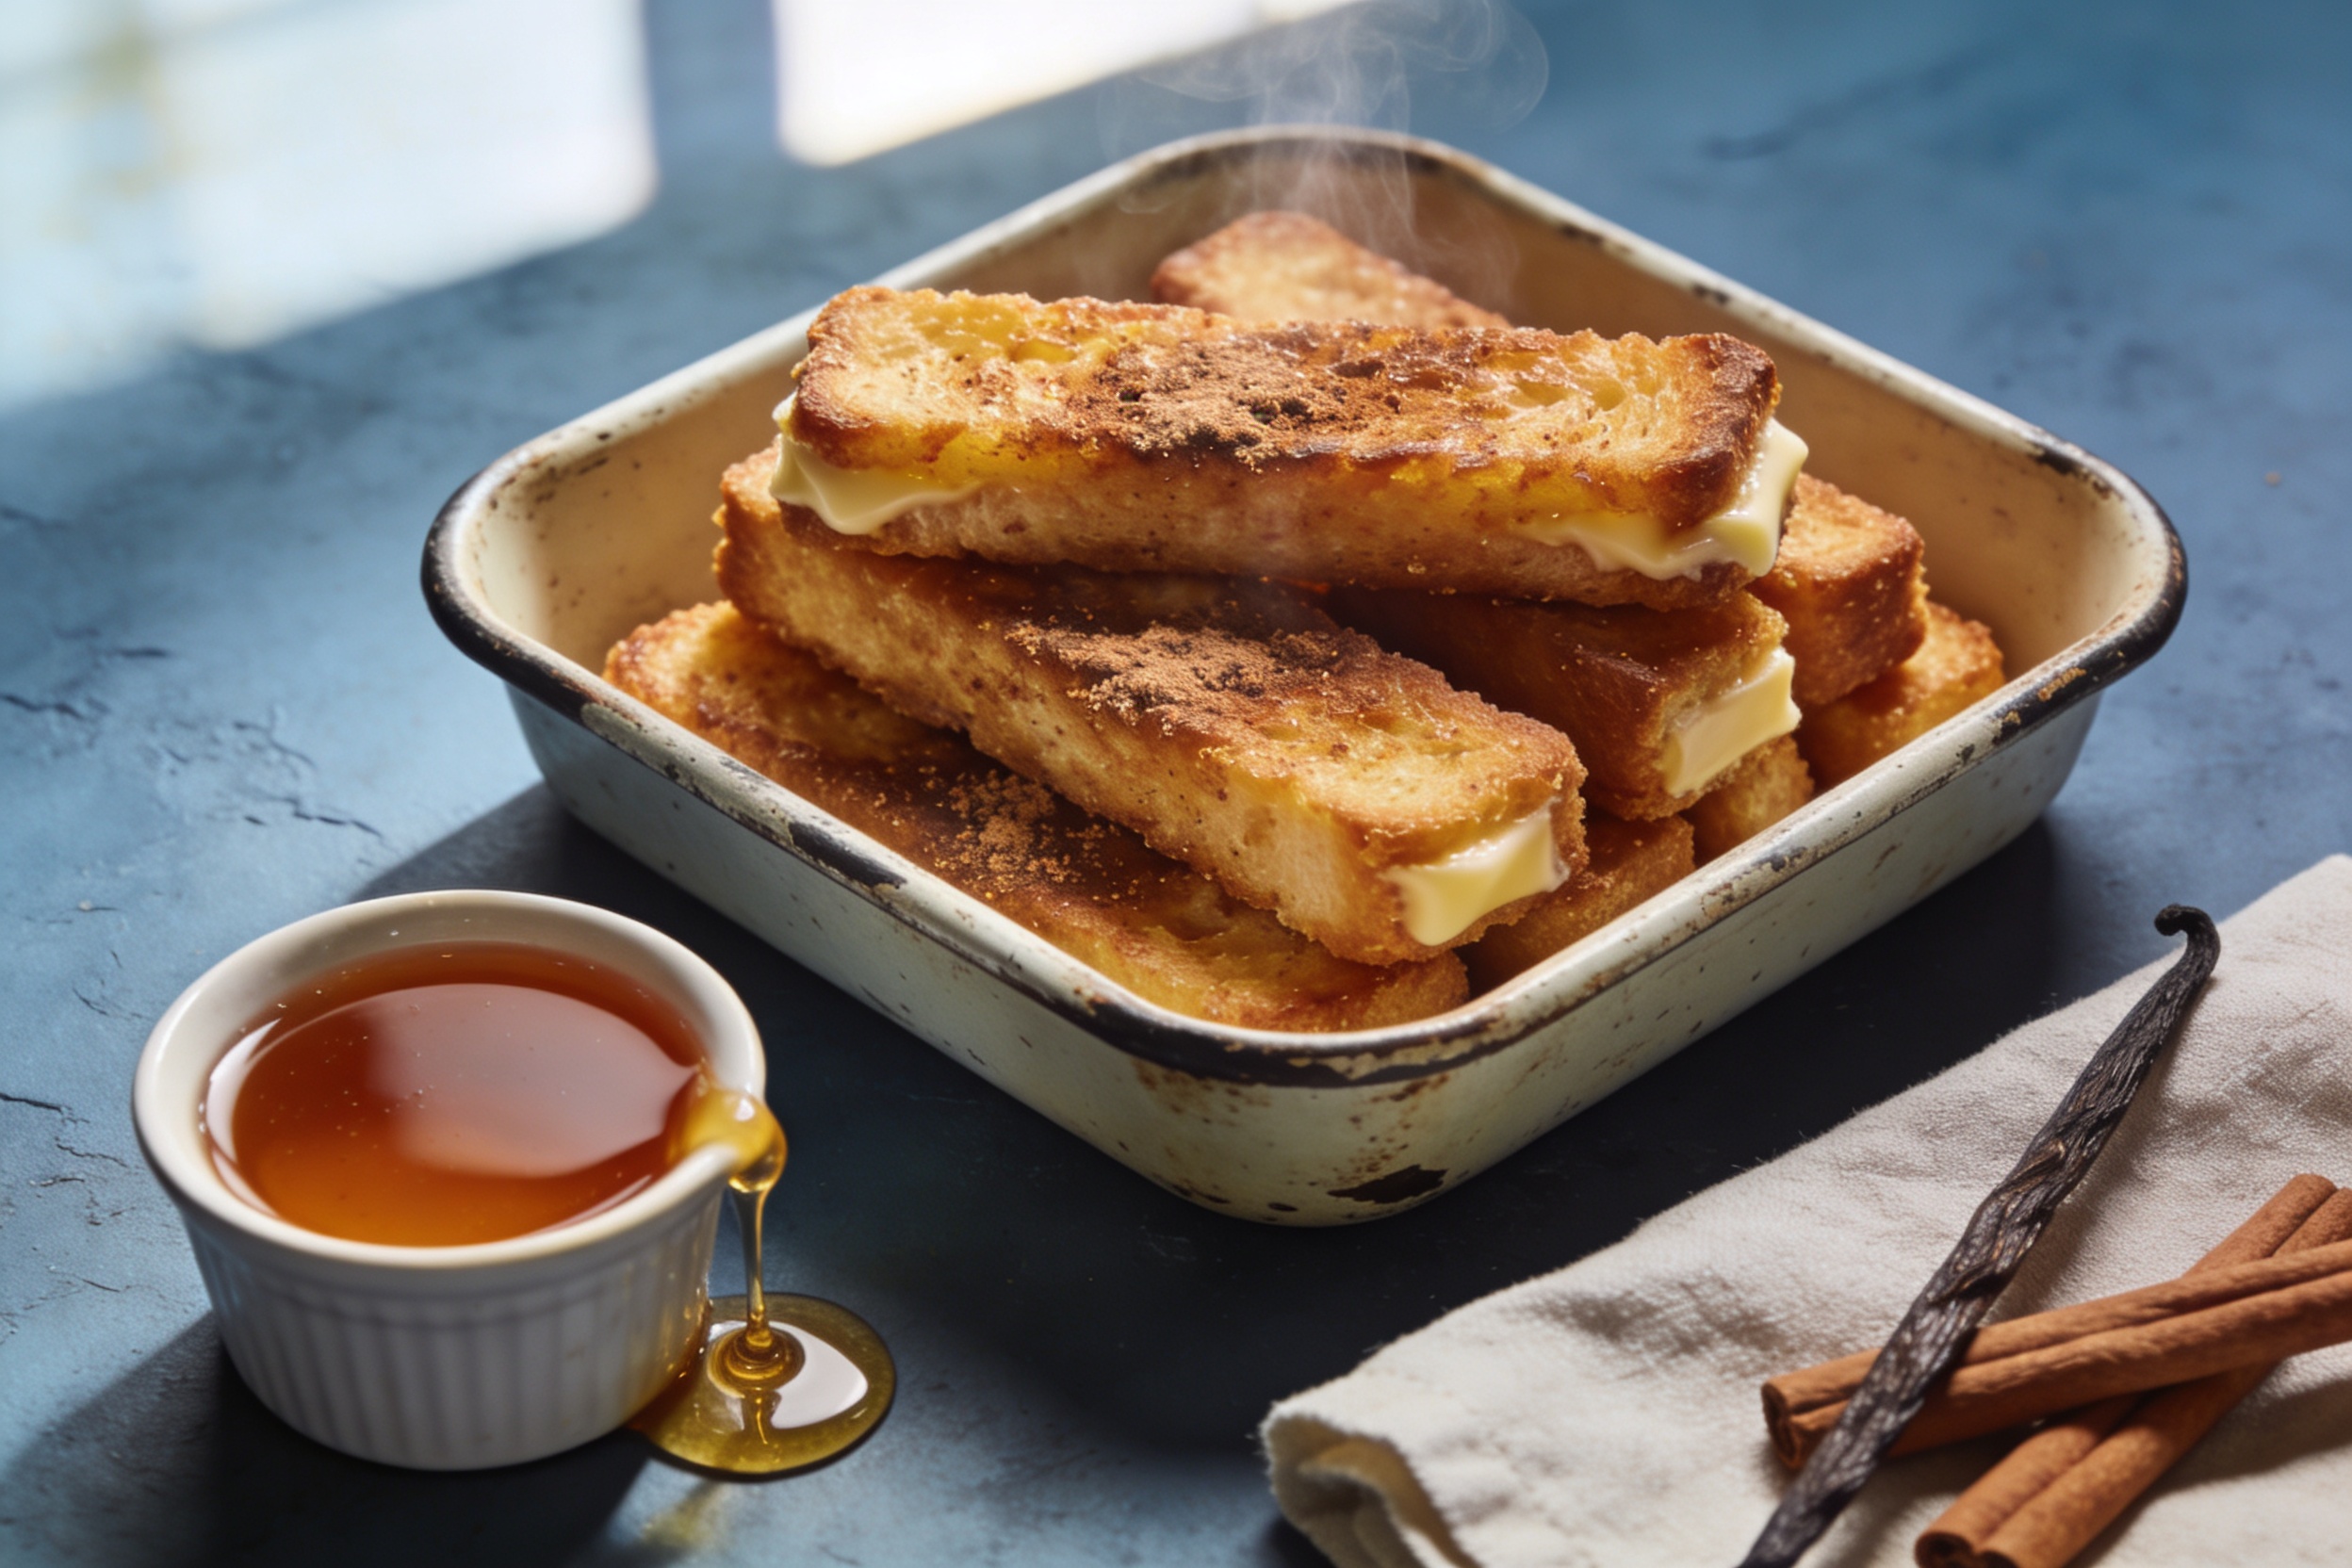
French toast sticks do one thing extremely well: they deliver crispy, custardy joy you can dunk with one hand while texting with the other. They’re nostalgic, they’re fast, and they make your kitchen smell like a weekend. And the homemade version? Way better than the frozen box—crispier edges, richer flavor, and you get to boss around the cinnamon.
Why French Toast Sticks Slap (And Beat the Boxed Kind)
Let’s be honest: frozen sticks taste fine when you’re too tired to care. But when you make them yourself, you get buttery crisp edges, pillowy centers, and real vanilla-cinnamon vibes. Plus, you control sweetness, bread type, and size. Want thick chunky batons? Go for it. Want little dippers for tiny hands? Adorable and practical. Also, you can freeze your own batch. So you still get convenience later, just with flavor that doesn’t scream “microwave.”
The Bread Matters More Than You Think
Bread makes or breaks these sticks. You want structure and a little dryness so the custard soaks in without turning them soggy.
Brioche or challah: Rich and soft—your most indulgent option. Slice thick.
Texas toast: Easy to find, sturdy, and soaks custard beautifully.
Day-old sandwich bread: Works fine, just don’t soak too long.
Pro tip: Use bread that’s at least a day old or lightly toast fresh slices to dry them out. This gives you maximum custard absorption with minimum mush.
How to Cut the Sticks
Slice bread into 1-inch-thick slabs, then cut each slice into 3–4 even sticks. Thicker sticks stay tender inside while the outside crisps like a dream.
The Custard: Where the Magic Happens
Your batter should taste like dessert but not like cake batter gone wild. Here’s a reliable mix that coats well and cooks evenly. Base Custard (for about 8 slices/24 sticks):
4 large eggs
3/4 cup whole milk (or half-and-half for richer sticks)
2 tablespoons sugar (use brown sugar for deeper flavor)
1 teaspoon vanilla extract
1 teaspoon ground cinnamon
Pinch of salt
Whisk until smooth—no streaky eggs. Pour into a shallow dish so dunking takes seconds, not minutes.
Optional Flavor Upgrades
Orange zest for brightness
Nutmeg (a tiny grate—don’t go overboard)
Maple syrup in the custard for caramelized edges
Almond extract—just a drop, it’s potent
FYI: A pinch more salt makes everything pop. Crazy but true.
Pan-Fried, Air-Fried, or Baked? Choose Your Fighter
You’ve got options, and honestly, they all win. Here’s the deal:
Pan-Frying (Best Texture, Classic Route)
Heat a nonstick skillet or griddle over medium.
Add 1 tablespoon butter plus 1 teaspoon neutral oil (the oil keeps butter from burning).
Dip sticks quickly—just a few seconds per side—then let excess drip off.
Cook 2–3 minutes per side until golden-brown, turning to hit all edges.
Result: Buttery, crisp crust with custardy interior. IMO, this method wins on flavor.
Result: Crunchy outside, slightly drier inside. Great for batch cooking with less mess.
Baked (Low Mess, Family-Sized Batch)
Preheat to 400°F (205°C). Line a sheet pan with parchment and brush with melted butter.
Bake 10–12 minutes, flip, then bake 6–8 minutes more.
Optional: Broil 1 minute for extra color.
Result: Easiest for crowds. Not as buttery as pan-fried, but still legit.
The Cinnamon-Sugar Finish (Optional but Worth It)
Want that diner-style sparkle? Toss warm sticks in a quick mix.
1/4 cup sugar
1 teaspoon cinnamon
Shake them in a bag with this blend while the sticks are still warm and slightly tacky. You get that crunchy, sparkly finish that makes syrup optional. Optional, not banned. We’re fun, not cruel.
Syrups and Toppings That Actually Slap
Maple syrup—obviously
Berry compote or jam thinned with lemon juice
Peanut butter or almond butter for protein and drama
Greek yogurt + honey if you want to pretend this is “health food”
Whipped cream because you’re not a quitter
Make-Ahead, Freeze, Reheat: Meal Prep Like a Breakfast Ninja
Yes, you can freeze them. In fact, you should. Cook them fully, cool on a rack, and freeze in a single layer. Then stash in a freezer bag with parchment between layers. To reheat:
Oven: 375°F for 8–10 minutes
Air fryer: 350°F for 5–7 minutes
Toaster oven: Until hot and crisp
Skip the microwave unless you’re chasing sogginess as a lifestyle.
Common Mistakes (And How to Dodge Them)
Soaking too long: Quick dips only. You want saturated, not soggy.
Pan too hot: You’ll burn the outside before the middle warms through. Medium heat wins.
Skimping on salt: A pinch wakes up the sweetness. Science and taste buds agree.
Crowding the pan: Give them space so they brown, not steam.
Using flimsy bread: Thin slices collapse. Go thick or go home.
Want Them Extra-Crispy?
Dust dipped sticks lightly with cornstarch before frying.
Or mix 1 tablespoon melted butter into the custard for a richer crust.
FAQ
Can I make these dairy-free?
Absolutely. Use almond, oat, or coconut milk. Choose a neutral oil or dairy-free butter for the pan. Vanilla and cinnamon still bring big flavor, so you won’t miss the dairy.
Do I need to add sugar to the custard?
Nope. You can skip it if you plan to add syrup or cinnamon-sugar later. Sugar helps caramelize the crust, though, so a little goes a long way. IMO, 1–2 tablespoons hits the sweet spot.
What’s the best bread for meal prep?
Texas toast or slightly stale brioche holds up best after freezing and reheating. They stay tender inside without turning to mush. Avoid super-thin sandwich bread if you want sturdy sticks.
How do I keep the custard from tasting eggy?
Whisk thoroughly, don’t overload the milk-to-egg ratio, and cook gently over medium heat. Add vanilla and a pinch of salt to balance the flavor. Overcooking causes that sulfur-y vibe—don’t do that to yourself.
Can I make them gluten-free?
Yes. Use your favorite gluten-free bread with some structure (thicker slices help). Let it dry out a bit first so it absorbs custard without falling apart. Everything else stays the same.
How do I avoid soggy middles?
Use day-old bread, dip quickly, and cook on medium so heat reaches the center. Let sticks rest on a rack for a minute after cooking—steam escapes, crust stays crisp. Easy win.
Conclusion
Homemade French toast sticks take minimal effort and deliver maximum breakfast happiness. Pick sturdy bread, mix a flavor-packed custard, and cook them in a way that fits your mood—pan, air fryer, or oven. Freeze extras so Future You can flex on a weekday. And don’t forget the dunking sauce—because breakfast should feel a little celebratory, IMO.
Disclosure: This post may contain affiliate links.
If you make a purchase through these links, I may earn
a small commission at no extra cost to you.
prab chahal
Hi, I’m Prabjot Chahal – the heart (and taste buds) behind this blog!
Food has always been my love language – from experimenting with family recipes to discovering unique flavors from around the world. I believe that cooking isn’t just about following a recipe, it’s about creating moments, sharing stories, and connecting with others over something delicious. Through this blog, I want to build a vibrant food community where we share more than just recipes – we share inspiration, tips, and the joy of making and enjoying good food together. Whether you’re here for quick weekday dinners, festive treats, or creative seasonal ideas, you’re part of this table. So grab a fork (or a whisk!) and let’s cook, bake, and share our love for food – one recipe at a time.


")
")


")


")