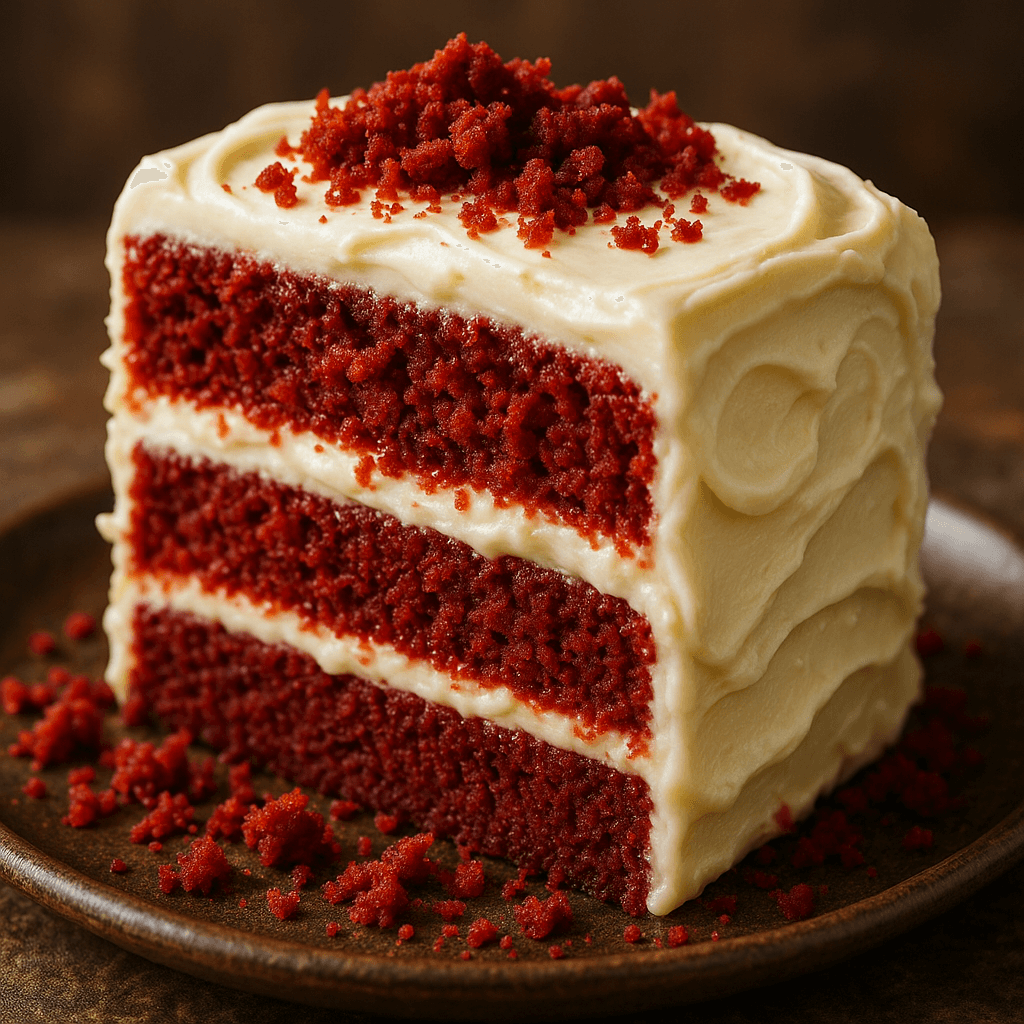
Bake the ultimate red velvet cake with this moist, fluffy, and velvety recipe. Perfect for birthdays, holidays, and special occasions – a timeless dessert everyone loves!
Some cakes taste good, and some cakes look good, but red velvet cake does both. This cake makes every event feel a little more special. The color is bright red, the crumb is moist, and the texture is soft, all of which make it special. People want to eat red velvet cake over and over again, whether it’s for a birthday, Valentine’s Day, Christmas, or just a cozy weekend.
But why is this cake so famous? Is it really just a cake made of chocolate? Or is there something else going on that you can’t see?
What is Red Velvet Cake
Red velvet cake is a soft, moist cake that is a bright red color and has a slight tangy flavor. It has a light cocoa flavor and a creamy frosting, which is usually cream cheese, instead of just chocolate cake. The name “velvet” comes from the smooth, soft crumb that makes every bite feel like a treat.
History of Red Velvet Cake
The story behind red velvet cake is just as interesting as the cake itself. In the early 1900s, it became a big deal in the US. Some people think it came from kitchens in the South, while others think it came from the famous Waldorf-Astoria Hotel in New York, where it was a famous dessert.
Unsweetened cocoa powderjust a little, for subtle chocolate flavor
Baking sodafor leavening
Salt
Buttermilkgives tanginess and moisture
White vinegarreacts with baking soda and enhances color
Red food coloringclassic deep red color
Vanilla extractoptional but adds flavor
🍰 For the Cream Cheese Frosting
Cream cheesesoftened
Unsalted buttersoftened
Powdered sugaricing sugar
Vanilla extract
Equipment
2 round cake tins (8-inch) for baking the cake layers
Parchment paper to line the tins so the cake doesn’t stick
Mixing bowls at least 2 large ones
Electric hand mixer or stand mixer for creaming butter/sugar and making frosting (a whisk works, but takes longer)
Measuring cups and spoons for accurate ingredient amounts
Sifter or fine mesh sieve to sift dry ingredients like flour and cocoa
Spatula for folding and scraping batter from the bowl
Cooling rack to cool the cake evenly after baking
Toothpick or cake tester to check doneness
Offset spatula or butter knife for spreading frosting smoothly
Method
Step 1: Prep
Preheat your oven to 170 °C (350 °F).
Grease and line two round cake tins (8-inch) with parchment paper.
Bring buttermilk, eggs, and butter to room temperature for best mixing.
Step 2: Make the Cake Batter
Mix dry ingredients
In a bowl, sift together:
2 ½ cups flour
2 tbsp cocoa powder
1 tsp baking soda
½ tsp salt
Cream butter and sugar
In another large bowl, beat:
½ cup butter (or ½ cup oil)
1 ½ cups sugar
Mix until light and fluffy.
Add eggs + wet ingredients
Beat in 2 eggs (one at a time)
Add: 1 tsp vanilla
Add: 1 cup buttermilk
Add: 1 tsp vinegar
red food coloring (until you get a rich red color)
Combine wet + dry
Slowly add the dry ingredients to the wet mixture, mixing on low speed just until smooth (do not overmix).
Step 3: Bake
Divide the batter between the 2 prepared pans.
Bake for 25–30 minutes or until a toothpick inserted comes out clean.
Cool in the pans for 10 minutes, then transfer to a rack to cool completely.
Cream Cheese Frosting Beat together:
225 g (8 oz) cream cheese
½ cup butter
2–3 cups powdered sugar
1 tsp vanilla
Beat until smooth and creamy.
Step 4: Assemble
Place one cake layer on a plate. Spread frosting on top.
Place second layer on top, then frost the top and sides.
Chill for 30 minutes to help it set before slicing.
Video
Notes
1. Use room temperature ingredients
Bring eggs, butter, and buttermilk to room temp before mixing.
This helps them blend smoothly and creates a softer crumb.
2. Don’t overmix the batter
Mix just until combined once you add the dry ingredients.
Overmixing develops gluten → can make the cake dense and dry.
3. Measure accurately (especially flour)
Too much flour = dry cake.
Spoon the flour into the cup and level off — don’t scoop directly from the bag.
4. Go easy on the cocoa
Red velvet is not a chocolate cake — it should have just a hint of cocoa.
Too much will dull the red color and overpower the flavor.
5. Use gel or liquid food coloring
Gel gives stronger color without thinning the batter.
If using liquid, add a bit extra flour if your batter becomes too thin.
6. Check doneness early
Start checking at 25 mins.
Insert a toothpick — it should come out clean or with just a few moist crumbs.
7. Cool completely before frosting
Warm cake will melt your frosting and make layers slide.
Cool layers fully on a rack first.
8. Chill for neat slices
After frosting, chill the cake for at least 30 mins for clean cuts and a firm structure.
What is the Purpose of Adding Vinegar and Buttermilk to Red Velvet Cake?
Buttermilk and vinegar may not sound like they go together, but they are what makes red velvet cake so fluffy. When you mix the acid from both ingredients with baking soda, you get a light and airy crumb. They also balance out the sweetness by adding that little bit of tang that red velvet cake is known for.
Types of Frosting for Red Velvet Cake
The icing on red velvet cake is what makes it distinctive. Cream cheese frosting is the most popular, but ermine and buttercream are also popular.
What is Cream Cheese Frosting?
Cream cheese frosting is the most common choice. There is a hint of sweetness, creaminess, and tanginess about it. The delicate crumb of red velvet goes wonderfully with it and makes the cocoa taste greater. It's always been a favorite because it includes cream cheese, butter, powdered sugar, and vanilla in it.
What is Ermine Frosting?
To prepare ermine frosting, which is also called boiled milk frosting, you mix flour and milk together to make a paste. You add the sugar and butter after that. It’s a simple choice that isn’t as sweet as cream cheese frosting and is light and smooth.
What is Buttercream Frosting?
You make buttercream by beating butter and powdered sugar together until they are fluffy. It’s sweeter and richer than the other choices, and people often use it to decorate because it keeps its shape well.
How to Decorate Red Velvet Cake
Decorating red velvet cake can be as simple or as creative as you want.
What are Some Traditional Decorations for Red Velvet Cake?
Crumb Topping – Use leftover cake crumbs to dust over the frosting.
Piped Designs – Swirls, rosettes, or borders with buttercream.
Simple Elegance – Smooth cream cheese frosting with a sprinkle of red crumbs on top.
Festive Add-ons – Add chocolate curls, berries, or edible flowers for special occasions.
Tips for Baking the Perfect Red Velvet Cake
Use room temperature ingredients for smooth mixing.
Don’t overmix the batter—this can make the cake dense.
Always use good-quality cocoa powder for flavor.
Allow cakes to cool completely before frosting to avoid melting.
For even layers, weigh out the batter before baking.
Common Mistakes When Making Red Velvet Cake
Too much food coloring can make the cake taste bad.
If you don’t use buttermilk or vinegar, the cake will be dense.
Too much baking—red velvet should be moist, not dry.
Not cooling down properly makes the frosting messy.
Red Velvet Cake Variations
Red velvet isn’t limited to just one form—it has inspired a range of delicious desserts.
What are Some Different Flavors of Red Velvet Cake?
Red Velvet Cupcakes – Red Velvet Cupcakes: Little cakes with cream cheese frosting on top.
Red Velvet Cheesecake – A rich dessert made of layers of cheesecake and red velvet sponge
Red Velvet Brownies – fudgy, chocolatey, and dark in color.
Red Velvet Cookies – Soft cookies with white chocolate chips in them.
Pink or Green Velvet Cakes – a fun way to use food coloring for different events.
Frequently Asked Questions
1. Why does red velvet cake use both buttermilk and vinegar?
Baking soda reacts with buttermilk and vinegar because they are both acidic. The reaction between those chemicals makes little air bubbles and makes the crumb soft and tender. They also help balance the sweetness, which is what makes red velvet taste so good. A lot of red velvet recipes, including yours, use both for taste and texture.
2. Can I skip the red food coloring or use a natural alternative?
Yes, but it looks different. The reddish color used to come from the interaction of cocoa and acids. A lot of recipes call for food coloring now, though. If you don’t want to use fake red dye, you can try these things:
Beet juice or beet powder can be used as a natural colorant, but it might change the taste and add moisture, so you should change the other liquids.
To make the tone darker, add less red and more cocoa.
The cake won’t look as bright red as “velvet chocolate,” but it can still taste great.
3. What kind of cocoa powder is best for red velvet cake?
Cocoa powder that is unsweetened and natural (not alkalized), not Dutch-processed. Natural cocoa has a lot of acid in it, which makes it react with buttermilk and baking soda. Using Dutch-processed (alkalized) cocoa could make some of that chemical lift and tang go away. The color might also look more purple.
4. How do I prevent the cake from being dry or overbaked?
Bake until a toothpick inserted in the center comes out with a few moist crumbs (not completely dry).
Don’t overbake — ovens vary, so start checking a few minutes before the stated time.
Use properly measured ingredients (especially flour — spoon & level rather than scooping).
Use room temperature ingredients for even mixing.
Cool the cake completely before frosting (hot cake will melt frosting), but don’t let it stay too long exposed to air — wrap or cover once sufficiently cooled.
5. Can I make this cake in a single larger pan, or as a sheet cake?
Yes, you can change layer recipes so that they work in a larger pan or a sheet cake form. Keep these things in mind:
Change the baking time based on the type of pan you are using (a single pan will need more time, while a shallow sheet pan will need less).
If your oven has hot spots, turn the pan halfway through to make sure it bakes evenly.
Use a toothpick to check if it’s done.
If you go from layered to sheet, the cake might bake faster, so check it earlier.
6. What frosting options go well with red velvet cake (besides cream cheese)?
You can use these frostings instead of cream cheese frosting:
Ermine frosting is made from boiled milk and flour, while buttercream is thicker and sweeter.
To make the frosting smooth, use Swiss or Italian meringue buttercream.
To make mascarpone frosting, mix together sugar, whipped cream, and mascarpone.
A nice drip effect can be made with white chocolate ganache or glaze.
Pick a frosting that you like and that fits the event. Each one has a different texture and level of sweetness.
7. How should I store leftover red velvet cake, and for how long?
To keep it fresh:
Refrigerate in an airtight container (especially because cream cheese or dairy-based frosting can spoil) — works for 3–4 days.
Keep cake layers covered or wrapped to prevent drying out.
If you want to freeze: wrap individual cake layers in plastic wrap, then foil. Freeze up to 2–3 months. Thaw in refrigerator, then bring to room temperature before serving.
If frosting is delicate, assemble cake after thawing to preserve texture.
Final Thoughts
Eating a red velvet cake is more than just a treat; it’s a symbol of happiness, celebration, and history. The icing is smooth, the crumb is soft, and the acidity is mild. No matter what kind of red velvet cake you make—cupcakes, brownies, cheesecake, or the original—it will always be a hit.
The next time you want a cake that looks and tastes great, be ready to make your own red velvet cake. Every bite will taste great.
Want just the essential recipe details without scrolling through the article? Get our printable recipe card with just the ingredients and instructions.
Disclosure: This post may contain affiliate links.
If you make a purchase through these links, I may earn
a small commission at no extra cost to you.
prab chahal
Hi, I’m Prabjot Chahal – the heart (and taste buds) behind this blog!
Food has always been my love language – from experimenting with family recipes to discovering unique flavors from around the world. I believe that cooking isn’t just about following a recipe, it’s about creating moments, sharing stories, and connecting with others over something delicious. Through this blog, I want to build a vibrant food community where we share more than just recipes – we share inspiration, tips, and the joy of making and enjoying good food together. Whether you’re here for quick weekday dinners, festive treats, or creative seasonal ideas, you’re part of this table. So grab a fork (or a whisk!) and let’s cook, bake, and share our love for food – one recipe at a time.


")
")
")